Notice: Function _load_textdomain_just_in_time was called incorrectly. Translation loading for the wordpress-seo domain was triggered too early. This is usually an indicator for some code in the plugin or theme running too early. Translations should be loaded at the init action or later. Please see Debugging in WordPress for more information. (This message was added in version 6.7.0.) in /home/aoo6zmy4glfd/public_html/wp-includes/functions.php on line 6114

Notice: Function _load_textdomain_just_in_time was called incorrectly. Translation loading for the breadcrumb-navxt domain was triggered too early. This is usually an indicator for some code in the plugin or theme running too early. Translations should be loaded at the init action or later. Please see Debugging in WordPress for more information. (This message was added in version 6.7.0.) in /home/aoo6zmy4glfd/public_html/wp-includes/functions.php on line 6114
Database Archives | Netsoftmate

Good Contents Are Everywhere, But Here, We Deliver The Best of The Best.Please Hold on!
Database Management Services, Oracle Exadata, Oracle Exadata X8M, Remote Database Management

If you are looking for highest levels of database performance for your Oracle database then, Oracle Exadata is an outstanding solution. It delivers finest performance for mixed data, data warehousing (DW), analytics, and OLTP (online transaction processing) workloads. Enriched with a variety of deployment options, it lets you run your Oracle Database and other data workloads anywhere you need, whether its on-premises or in the Oracle Cloud. Oracle Exadata storage provides a cutting-edge technology which is simple to use, manage and provides mission-critical accessibility and reliability. Here are 5 reasons stating why should you run the Oracle Database on Oracle Exadata.


5 Reasons Why you Should Run Your Oracle Database on Oracle Exadata | Netsoftmate


1. Bespoke for Oracle Database


Following a standard approach to build your database infrastructure will hamper your business growth. With time, databases grow, which means, your business needs more servers, more storage solutions and more labor to manage it. As a result, the management cost will go up and there is a huge exposure to risk of errors, ultimately hampering your business growth. That’s why each business, big or small, needs a new approach that’s engineered to cater the critical database workloads.
The only technique to handle these critical database workloads is through Oracle Exadata. It is specially equipped to provide high storage bandwidth to seamlessly manage the Oracle Database and other data workloads. Oracle Exadata, as a part of Oracle Engineered System offers a highly integrated platform that delivers more power with less hardware. It eliminates the IT complexity while supplying greater performance, scalability, security and data protection.


5 Reasons Why you Should Run Your Oracle Database on Oracle Exadata | Netsoftmate


2. Increase Employee Productivity


Timely delivery of persuasive data that supports business operations and lessens the time required to deliver new business applications will surely result in better revenue. Oracle Exadata’s congregated and optimized infrastructure platform for database workloads helps the IT staff to spend less time on everyday operations and work more towards other IT development efforts. Accidental outages have less effect on employees and business operations that have lesser database related failures.
The consolidated Oracle Exadata platform provides an economical base for Oracle database operations. It increases employee productivity and helps grow revenues with less cost and complexity. With an enhanced performance up to 100X faster, accessing the data becomes easy and you can engage with customers quickly. With the same power, you can consolidate your databases onto a single platform, and deliver more than four times the density


5 Reasons Why you Should Run Your Oracle Database on Oracle Exadata | Netsoftmate


3. Achieve Operational Benefits


Businesses that rely on multiple vendors may face problems in managing a complex database infrastructure. Retaining and managing each database and server overstrains IT staff, and establishing new applications can take longer than usual. You may also need IT specialists to take care of each different component. As the number of applications and their associated databases increases, your admin costs go up, and so will your data center footprint.
Oracle Exadata delivers greater database and application performance with less hardware—and fewer licenses. Oracle Exadata, from Oracle Engineered Systems means easier upgrades, tuning, patching, observing and support, so you can manage your costs. They process transactions faster, complete queries in less time, and have decreased load and backup recovery times.


5 Reasons Why you Should Run Your Oracle Database on Oracle Exadata | Netsoftmate


4. Maximize Accessibility


Positive data security and database uptime are critical components that directly impact the business operations and revenue progress. Database collapse makes it tough to establish dependable security, plan and policies for sensitive data. There are too many points of control to monitor and maintain. A larger base is vulnerable to attack and there’s hardly enough budget for the specialist skills vital to manage it.
That’s the reason; businesses use Oracle Exadata to run their most important Oracle database and other data workloads. With software and hardware operational together, Oracle Exadata eliminates system downtime, using its in-built flexibility and redundancy. With Oracle Maximum Availability Architecture, you can get the ultimate in invincible uptime. The benefits include, less business impact from outages, less IT impact in managing downtime and reliable application and developer productivity.


5 Reasons Why you Should Run Your Oracle Database on Oracle Exadata | Netsoftmate


5. Invest in the Cloud


Businesses always plan for a simple and comprehensive cloud strategy and application. Ideally, businesses strategize to invest in an architecture offering an apt pathway to a cloud consumption model for the future. A full-proof plan that is flexible to mix and match on-premises deployment with a well-matched public cloud option, whether that’s for development, improvement and testing or ensuring business endurance.
Oracle Exadata offers the best of both worlds for the database and the business. Businesses can either purchase and manage on-premises Oracle Exadata or choose an Oracle Database Cloud Exadata Service. Oracle Cloud service is equivalent to an on-premises Oracle Exadata, just with a different consumption model. That’s why all the components of Oracle Engineered System are a powerful set of options. They are designed with the same architecture, with all the same benefits. All you need to do is choose which consumption model works best for you.


About Netsoftmate Technologies Inc.

Netsoftmate is an Oracle Gold Partner and a boutique IT services company specializing in installation, implementation and 24/7 support for Oracle Engineered Systems like Oracle Exadata, Oracle Database Appliance, Oracle ZDLRA, Oracle ZFS Storage and Oracle Private Cloud Appliance. Apart from OES, we have specialized teams of  experts providing round the clock remote database administration support for any type of database and cyber security compliance and auditing services.


Feel free to get in touch with us by signing up on the link below –


Priority Suport for Oracle Engineered Systems | Netsoftmate
0

Database Management Services, Oracle Database Management Solution, Oracle Databases

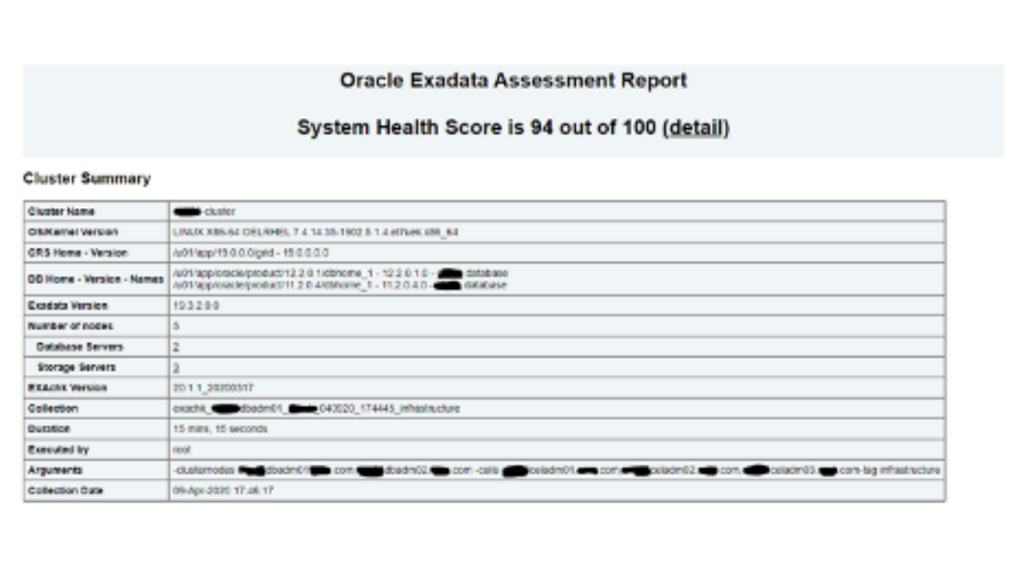
Recently Oracle introduced “Autonomous Health Framework”. Oracle Autonomous Health Framework contains Oracle ORAchk, Oracle EXAchk, and Oracle Trace File Analyzer.

You have access to Oracle Autonomous Health Framework as a value add-on to your existing support contract. There is no additional fee or license required to run Oracle Autonomous Health Framework.


In this article we will learn how to Install, setup and execute AHF for Oracle Exadata Database machine in detail.


Step 1: Download AHF for Linux operating system as shown below. Here we are using the wget command to download file directly to the server. If you don’t have proxy you can download the file MOS to your desktop and copy it the server using WinSCP.


[root@dm01db01 ~]# cd /u01/app/oracle/software/


[root@dm01db01 software]# mkdir Exachk


[root@dm01db01 software]# cd Exachk/


[root@dm01db01 Exachk]# export use_proxy=on

[root@dm01db01 Exachk]# export http_proxy=”webproxy.netsoftmate.come:80/”


  • Download the AHF zip file


[root@dm01db01 Exachk]# wget  –http-user=abdul.mohammed@netsoftmate.com –http-password=************ –no-check-certificate –output-document=AHF-LINUX_v20.1.1.zip “https://updates.oracle.com/Orion/Services/download/AHF-LINUX_v20.1.1.zip?aru=23443431&patch_file=AHF-LINUX_v20.1.1.zip”


  • Download the latest cvu. This will be used by the exachk to run the cluster verification


[root@dm01db01 Exachk]# wget  –http-user=abdul.mohammed@netsoftmate.com –http-password=************ –no-check-certificate –output-document=cvupack_Linux_x86_64.zip “https://download.oracle.com/otndocs/products/clustering/cvu/cvupack_Linux_x86_64.zip”


[root@dm01db01 Exachk]# ls -ltr

total 356748

-rw-r–r– 1 root root 365267646 Mar 17 16:02 AHF-LINUX_v20.1.1.zip

-rw-r–r– 1 root root 293648959 Jul 13  2018 cvupack_Linux_x86_64.zip


eBook - Oracle Exadata X8M Patching Recipes | Netsoftmate

Step 2:
Unzip the AHF zip file


[root@dm01db01 Exachk]# unzip AHF-LINUX_v20.1.1.zip

Archive:  AHF-LINUX_v20.1.1.zip

  inflating: README.txt

  inflating: ahf_setup


[root@dm01db01 Exachk]# ./ahf_setup -v

AHF Build ID : 20110020200317092524

AHF Build Platform : Linux

AHF Build Architecture : x86_64


Step 3: Execute the AHF setup


[root@dm01db01 Exachk]# ./ahf_setup


AHF Installer for Platform Linux Architecture x86_64


AHF Installation Log : /tmp/ahf_install_344489_2020_04_06-12_20_51.log


Starting Autonomous Health Framework (AHF) Installation


AHF Version: 20.1.1.0.0 Build Date: 202003170925


TFA is already installed at : /u01/app/11.2.0.4/grid/tfa/dm01db01/tfa_home


Installed TFA Version : 122111 Build ID : 20170612164756


Default AHF Location : /opt/oracle.ahf


Do you want to install AHF at [/opt/oracle.ahf] ? [Y]|N : Y


AHF Location : /opt/oracle.ahf


AHF Data Directory stores diagnostic collections and metadata.

AHF Data Directory requires at least 5GB (Recommended 10GB) of free space.


Choose Data Directory from below options :


  1. /u01/app/oracle [Free Space : 50454 MB]
  2. Enter a different Location


Choose Option [1 – 2] : 1


AHF Data Directory : /u01/app/oracle/oracle.ahf/data


exachk scheduler is already running at : /root/Exachk


Installed exachk version : EXACHK  VERSION: 19.2.0_20190717


Stopping exachk scheduler


Copying exachk configuration from /root/Exachk


Shutting down TFA : /u01/app/11.2.0.4/grid/tfa/dm01db01/tfa_home


Copying TFA Data Files from /u01/app/11.2.0.4/grid/tfa/dm01db01/tfa_home


Uninstalling TFA : /u01/app/11.2.0.4/grid/tfa/dm01db01/tfa_home


Do you want to add AHF Notification Email IDs ? [Y]|N : Y


Enter Email IDs separated by space : abdul.mohammed@netsoftmate.com


AHF will also be installed/upgraded on these Cluster Nodes :


  1. dm01db02
  2. dm01db03
  3. dm01db04


The AHF Location and AHF Data Directory must exist on the above nodes

AHF Location : /opt/oracle.ahf

AHF Data Directory : /u01/app/oracle/oracle.ahf/data


Do you want to install/upgrade AHF on Cluster Nodes ? [Y]|N : Y


Extracting AHF to /opt/oracle.ahf


Configuring TFA Services


Copying TFA Data Files to AHF


Discovering Nodes and Oracle Resources


TFA will configure Storage Cells using SSH Setup:


.———————————–.

|   | EXADATA CELL | CURRENT STATUS |

+—+————–+—————-+

| 1 | dm01cel01   | ONLINE         |

| 2 | dm01cel02   | ONLINE         |

| 3 | dm01cel03   | ONLINE         |

| 4 | dm01cel04   | ONLINE         |

| 5 | dm01cel05   | ONLINE         |

| 6 | dm01cel06   | ONLINE         |

| 7 | dm01cel07   | ONLINE         |

‘—+————–+—————-‘


Not generating certificates as GI discovered


Starting TFA Services


.——————————————————————————-.

| Host      | Status of TFA | PID    | Port | Version    | Build ID             |

+———–+—————+——–+——+————+———————-+

| dm01db01 | RUNNING       | 365382 | 5000 | 20.1.1.0.0 | 20110020200317092524 |

‘———–+—————+——–+——+————+———————-‘


Running TFA Inventory…


Adding default users to TFA Access list…


.——————————————————————.

|                   Summary of AHF Configuration                   |

+—————–+————————————————+

| Parameter       | Value                                          |

+—————–+————————————————+

| AHF Location    | /opt/oracle.ahf                                |

| TFA Location    | /opt/oracle.ahf/tfa                            |

| Exachk Location | /opt/oracle.ahf/exachk                         |

| Data Directory  | /u01/app/oracle/oracle.ahf/data                |

| Repository      | /u01/app/oracle/oracle.ahf/data/repository     |

| Diag Directory  | /u01/app/oracle/oracle.ahf/data/dm01db01/diag |

‘—————–+————————————————‘


Retrieving legacy exachk wallet details …

Storing exachk wallet details into AHF config/wallet …


Starting exachk daemon from AHF …


AHF install completed on dm01db01


Installing AHF on Remote Nodes :


AHF will be installed on dm01db02, Please wait.


Installing AHF on dm01db02 :


[dm01db02] Copying AHF Installer


[dm01db02] Running AHF Installer


AHF will be installed on dm01db03, Please wait.


Installing AHF on dm01db03 :


[dm01db03] Copying AHF Installer


[dm01db03] Running AHF Installer


AHF will be installed on dm01db04, Please wait.


Installing AHF on dm01db04 :


[dm01db04] Copying AHF Installer


[dm01db04] Running AHF Installer


AHF binaries are available in /opt/oracle.ahf/bin


AHF is successfully installed


Moving /tmp/ahf_install_251936_2020_04_06-13_07_32.log to /u01/app/oracle/oracle.ahf/data/dm01db01/diag/ahf/


Step 4: Verify AHF setup


[root@dm01db01 Exachk]# cd /opt/oracle.ahf/


[root@dm01db01 oracle.ahf]# ls -ltr

total 36

drwxr-xr-x 7 root root 4096 Nov 19 02:38 python

drwxr-xr-x 5 root root 4096 Mar 17 11:25 ahf

drwxr-xr-x 6 root root 4096 Mar 17 11:25 common

drwxr-x–x 5 root root 4096 Mar 17 11:25 jre

drwxr-xr-x 8 root root 4096 Apr  6 12:28 exachk

drwxr-x–x 2 root root 4096 Apr  6 12:28 analyzer

-rw-r–r– 1 root root 1057 Apr  6 12:28 install.properties

drwxr-x–x 9 root root 4096 Apr  6 12:28 tfa

drwxr-x–x 2 root root 4096 Apr  6 12:28 bin


[root@dm01db01 oracle.ahf]# cd exachk/


[root@dm01db01 exachk]# ls -ltr

total 81772

-rw-r–r– 1 root root   186651 Mar 17 11:20 exachk.pyc

-rw-r–r– 1 root root 65423079 Mar 17 11:23 collections.dat

-rw-r–r– 1 root root  9674765 Mar 17 11:23 rules.dat

-rw-r–r– 1 root root  8341706 Mar 17 11:24 Apex5_CollectionManager_App.sql

-rw-r–r– 1 root root    43473 Mar 17 11:24 sample_user_defined_checks.xml

-r–r–r– 1 root root     3217 Mar 17 11:24 user_defined_checks.xsd

drwxr-xr-x 2 root root     4096 Mar 17 11:24 messages

drwxr-xr-x 2 root root     4096 Mar 17 11:25 web

drwxr-xr-x 3 root root     4096 Mar 17 11:25 lib

drwxr-xr-x 2 root root     4096 Mar 17 11:25 build

drwxr-xr-x 2 root root     4096 Apr  6 12:28 bash

-rwxr-xr-x 1 root root    25788 Apr  6 12:28 exachk


Step 5: unzip the cvu zip file under AHF home as show below


[root@dm01db01 Exachk]# unzip cvupack_Linux_x86_64.zip -d /opt/oracle.ahf/common/cvu


[root@dm01db01 Exachk]# ls -ltr /opt/oracle.ahf/common/cvu

total 92

drwxrwxr-x 7 root root 4096 Jun 13  2018 jdk

drwxrwxr-x 3 root root 4096 Jun 13  2018 srvm

drwxrwxr-x 3 root root 4096 Jun 13  2018 has

drwxrwxr-x 3 root root 4096 Jun 13  2018 crs

drwxrwxr-x 3 root root 4096 Jun 13  2018 suptools

drwxrwxr-x 3 root root 4096 Jun 13  2018 oss

drwxrwxr-x 7 root root 4096 Jun 13  2018 cv

drwxrwxr-x 3 root root 4096 Jun 13  2018 xdk

drwxrwxr-x 2 root root 4096 Jun 13  2018 utl

drwxrwxr-x 4 root root 4096 Jun 13  2018 rdbms

drwxrwxr-x 6 root root 4096 Jun 13  2018 install

drwxrwxr-x 4 root root 4096 Jun 13  2018 deinstall

drwxrwxr-x 4 root root 4096 Jun 13  2018 clone

drwxrwxr-x 8 root root 4096 Jun 13  2018 oui

drwxrwxr-x 3 root root 4096 Jun 13  2018 diagnostics

drwxrwxr-x 3 root root 4096 Jun 13  2018 oracore

drwxrwxr-x 3 root root 4096 Jun 13  2018 nls

drwxrwxr-x 3 root root 4096 Jun 13  2018 jdbc

drwxrwxr-x 3 root root 4096 Jun 13  2018 dbjava

drwxrwxr-x 6 root root 4096 Jun 13  2018 network

drwxrwxr-x 2 root root 4096 Jun 13  2018 jlib

drwxrwxr-x 2 root root 4096 Jun 13  2018 lib

drwxrwxr-x 2 root root 4096 Jun 13  2018 bin


Note: If you don’t download and extract the cvupack you will get the following warning message.


“Either Cluster Verification Utility pack (cvupack) does not exist at /opt/oracle.ahf/common/cvu or it is an old or invalid cvupack”


Step 6: Execute Exachk for Exadata


[root@dm01db01 ~]# cd /opt/oracle.ahf/exachk/

[root@dm01db01 exachk]# ./exachk


Checking ssh user equivalency settings on all nodes in cluster for root


Node dm01db02 is configured for ssh user equivalency for root user


Node dm01db03 is configured for ssh user equivalency for root user


Node dm01db04 is configured for ssh user equivalency for root user


Searching for running databases . . . . .


.  .  .  .

List of running databases registered in OCR


  1. testdb
  2. orcldb
  3. All of above
  4. None of above


Select databases from list for checking best practices. For multiple databases, select 3 for All or comma separated number like 1,2 etc [1-4][3].


Searching out ORACLE_HOME for selected databases.


.  .  .  .  .  .  .

.


Checking Status of Oracle Software Stack – Clusterware, ASM, RDBMS


.  .  .  . . . .  .  .  . . . .

.  .  .  . . . .  .  .  .  .  .  .  .  .  .  .  .  .  . . . .  .  .  .  .  .  .  .  .  .  .  .  .  . . . .  .  .  .  .  .  .  .  .  .  .  .  .  . . . .  .  .  .  .  .  .  .  .  .  .  .

——————————————————————————————————-

                                                 Oracle Stack Status

——————————————————————————————————-

  Host Name       CRS Installed  RDBMS Installed    CRS UP    ASM UP  RDBMS UP    DB Instance Name

——————————————————————————————————-

  dm01db01                  Yes          Yes          Yes      Yes      Yes          orcldb1 testdb1

  dm01db02                  Yes          Yes          Yes      Yes      Yes          testdb2 orcldb2

  dm01db03                  Yes          Yes          Yes      Yes      Yes          orcldb3 testdb3

  dm01db04                  Yes          Yes          Yes      Yes      Yes          testdb4 orcldb4

——————————————————————————————————-


Copying plug-ins


. .


Node dm01cel01-priv2 is configured for ssh user equivalency for root user


Node dm01cel02-priv2 is configured for ssh user equivalency for root user


Node dm01cel03-priv2 is configured for ssh user equivalency for root user


Node dm01cel04-priv2 is configured for ssh user equivalency for root user


Node dm01cel05-priv2 is configured for ssh user equivalency for root user


Node dm01cel06-priv2 is configured for ssh user equivalency for root user


Node dm01cel07-priv2 is configured for ssh user equivalency for root user


.  .  .  .  .  .  .  .  .  .  .  .  .  .  .  .  .  .  .  .  .  .  .  .  .  .

dm01sw-ibb01 is configured for ssh user equivalency for root user

.

dm01sw-iba01 is configured for ssh user equivalency for root user


dm01sw-iba01 is configured for ssh user equivalency for root user


*** Checking Best Practice Recommendations ( Pass / Warning / Fail ) ***


.  .


Collections and audit checks log file is

/u01/app/oracle/oracle.ahf/data/dm01db01/exachk/exachk_dm01db01_orcldb_040620_12376/log/exachk.log


Starting to run exachk in background on dm01db02


Starting to run exachk in background on dm01db03


Starting to run exachk in background on dm01db04


============================================================

              Node name – dm01db01

============================================================


 Collecting – ASM Disk Group for Infrastructure Software and Configuration

 Collecting – ASM Diskgroup Attributes

 Collecting – ASM diskgroup usable free space

 Collecting – ASM initialization parameters

 Collecting – Database Parameters for testdb database

 Collecting – Database Parameters for orcldb database

 Collecting – Database Undocumented Parameters for orcldb database

 Collecting – RDBMS Feature Usage for orcldb database

 Collecting – CPU Information

 Collecting – Clusterware and RDBMS software version

 Collecting – Compute node PCI bus slot speed for infiniband HCAs

 Collecting – Kernel parameters

 Collecting – Maximum number of semaphore sets on system

 Collecting – Maximum number of semaphores on system

 Collecting – OS Packages

 Collecting – Patches for Grid Infrastructure

 Collecting – Patches for RDBMS Home

 Collecting – RDBMS patch inventory

 Collecting – Switch Version Information

 Collecting – number of semaphore operations per semop system call

 Collecting – CRS user limits configuration

 Collecting – CRS user time zone check

 Collecting – Check alerthistory for non-test open stateless alerts [Database Server]

 Collecting – Check alerthistory for stateful alerts not cleared [Database Server]

 Collecting – Clusterware patch inventory

 Collecting – Discover switch type(spine or leaf)

 Collecting – Enterprise Manager agent targets

 Collecting – Exadata Critical Issue DB09

 Collecting – Exadata Critical Issue EX30

 Collecting – Exadata Critical Issue EX36

 Collecting – Exadata Critical Issue EX56

 Collecting – Exadata Critical Issue EX57

 Collecting – Exadata Critical Issue EX58

 Collecting – Exadata critical issue EX48

 Collecting – Exadata critical issue EX55

 Collecting – Exadata software version on database server

 Collecting – Exadata system model number

 Collecting – Exadata version on database server

 Collecting – HCA firmware version on database server

 Collecting – HCA transfer rate on database server

 Collecting – Infrastructure Software and Configuration for compute

 Collecting – MaxStartups setting in sshd_config

 Collecting – OFED Software version on database server

 Collecting – Obtain hardware information

 Collecting – Operating system and Kernel version on database server

 Collecting – Oracle monitoring agent and/or OS settings on ADR diagnostic directories

 Collecting – Raid controller bus link speed

 Collecting – Review Non-Exadata components in use on the InfiniBand fabric

 Collecting – System Event Log

 Collecting – Validate key sysctl.conf parameters on database servers

 Collecting – Verify Data Network is Separate from Management Network

 Collecting – Verify Database Server Disk Controller Configuration

 Collecting – Verify Database Server Physical Drive Configuration

 Collecting – Verify Database Server Virtual Drive Configuration

 Collecting – Verify Disk Cache Policy on database server

 Collecting – Verify Hardware and Firmware on Database and Storage Servers (CheckHWnFWProfile) [Database Server]

 Collecting – Verify ILOM Power Up Configuration for HOST_AUTO_POWER_ON

 Collecting – Verify ILOM Power Up Configuration for HOST_LAST_POWER_STATE

 Collecting – Verify IP routing configuration on database servers

 Collecting – Verify InfiniBand Address Resolution Protocol (ARP) Configuration on Database Servers

 Collecting – Verify Master (Rack) Serial Number is Set [Database Server]

 Collecting – Verify Quorum disks configuration

 Collecting – Verify RAID Controller Battery Temperature [Database Server]

 Collecting – Verify RAID disk controller CacheVault capacitor condition [Database Server]

 Collecting – Verify RAID disk controller CacheVault capacitor condition [Database Server]

 Collecting – Verify TCP Segmentation Offload (TSO) is set to off

 Collecting – Verify available ksplice fixes are installed [Database Server]

 Collecting – Verify basic Logical Volume(LVM) system devices configuration

 Collecting – Verify database server InfiniBand network MTU size

 Collecting – Verify database server disk controllers use writeback cache

 Collecting – Verify database server file systems have Check interval = 0

 Collecting – Verify database server file systems have Maximum mount count = -1

 Collecting – Verify imageinfo on database server

 Collecting – Verify imageinfo on database server to compare systemwide

 Collecting – Verify installed rpm(s) kernel type match the active kernel version

 Collecting – Verify key InfiniBand fabric error counters are not present

 Collecting – Verify no database server kernel out of memory errors

 Collecting – Verify proper ACFS drivers are installed for Spectre v2 mitigation

 Collecting – Verify service exachkcfg autostart status on database server

 Collecting – Verify the localhost alias is pingable [Database Server]

 Collecting – Verify the InfiniBand Fabric Topology (verify-topology)

 Collecting – Verify the Master Subnet Manager is running on an InfiniBand switch

 Collecting – Verify the Name Service Cache Daemon (NSCD) configuration

 Collecting – Verify the Subnet Manager is properly disabled [Database Server]

 Collecting – Verify the currently active image status [Database Server]

 Collecting – Verify the ib_sdp module is not loaded into the kernel

 Collecting – Verify the storage servers in use configuration matches across the cluster

 Collecting – Verify the vm.min_free_kbytes configuration

 Collecting – Verify there are no files present that impact normal firmware update procedures [Database Server]

 Collecting – collect time server data [Database Server]

 Collecting – root time zone check

 Collecting – verify asr exadata configuration check via ASREXACHECK on database server

Starting to run root privileged commands in background on storage server dm01cel01 (192.168.1.6)


Starting to run root privileged commands in background on storage server dm01cel02 (192.168.1.8)


Starting to run root privileged commands in background on storage server dm01cel03 (192.168.1.10)


Starting to run root privileged commands in background on storage server dm01cel04 (192.168.1.16)


Starting to run root privileged commands in background on storage server dm01cel05 (192.168.1.18)


Starting to run root privileged commands in background on storage server dm01cel06 (192.168.1.20)


Starting to run root privileged commands in background on storage server dm01cel07 (192.168.1.22)


Starting to run root privileged commands in background on infiniband switch (dm01sw-ibb01)


Starting to run root privileged commands in background on infiniband switch (dm01sw-iba01)


Collections from storage server:

————————————————————


Collections from Infiniband Switch:

————————————————————

 Collecting – Exadata Critical Issue IB5

 Collecting – Exadata Critical Issue IB6

 Collecting – Exadata Critical Issue IB8

 Collecting – Hostname in /etc/hosts

 Collecting – Infiniband Switch NTP configuration

 Collecting – Infiniband subnet manager status

 Collecting – Infiniband switch HCA status

 Collecting – Infiniband switch HOSTNAME configuration

 Collecting – Infiniband switch firmware version

 Collecting – Infiniband switch health

 Collecting – Infiniband switch localtime configuration

 Collecting – Infiniband switch module configuration

 Collecting – Infiniband switch subnet manager configuration

 Collecting – Infiniband switch type(Spine or leaf)

 Collecting – Infrastructure Software and Configuration for switch

 Collecting – Verify average ping times to DNS nameserver [IB Switch]

 Collecting – Verify no IB switch ports disabled due to excessive symbol errors

 Collecting – Verify the localhost alias is pingable [IB Switch]

 Collecting – Verify there are no unhealthy InfiniBand switch sensors

 Collecting – sm_priority configuration on Infiniband switch


Data collections completed. Checking best practices on dm01db01.

————————————————————


 FAIL =>     Exadata software version on database server does not meet certified platinum configuration

 FAIL =>     Oracle database does not meet certified platinum configuration for /u01/app/oracle/product/11.2.0.4/dbhome

 WARNING =>  Database parameter AUDIT_SYS_OPERATIONS should be set to the recommended value on testdb1 instance

 WARNING =>  Database parameter AUDIT_SYS_OPERATIONS should be set to the recommended value on orcldb1 instance

 INFO =>     Oracle GoldenGate failure prevention best practices

 INFO =>     One or more non-default AWR baselines should be created for orcldb

 WARNING =>  Non-default database Services are not configured for orcldb

 WARNING =>  Database parameter processes should be set to recommended value on testdb1 instance

 WARNING =>  Database parameter processes should be set to recommended value on orcldb1 instance

 FAIL =>     _reconnect_to_cell_attempts parameter in cellinit.ora is not set to recommended value

 FAIL =>     Oracle monitoring agent and Operating systems settings on Automatic diagnostic  repository directories are not correct or not all targets have been scanned or not all diagnostic directories found

 FAIL =>     Storage Server user “CELLDIAG” should exist

 FAIL =>     Downdelay attribute is not set to recommended value on bonded client interface

 FAIL =>     One or more of SYSTEM, SYSAUX, USERS, TEMP tablespaces are not of type bigfile for orcldb

 FAIL =>     The initialization parameter cluster_database_instances should be at the default value for testdb

 FAIL =>     The initialization parameter cluster_database_instances should be at the default value for orcldb

 WARNING =>  SYS or SYSTEM objects were found to be INVALID for orcldb

 WARNING =>  There are non-Exadata components in use on the InfiniBand fabric

 INFO =>     Database parameter AUDIT_TRAIL should be set to the recommended value for testdb

 INFO =>     Database parameter AUDIT_TRAIL should be set to the recommended value for orcldb

 FAIL =>     Memlock settings do not meet the Oracle best practice recommendations for /u01/app/oracle/product/11.2.0.4/dbhome

 WARNING =>  All disk groups should have compatible.advm attribute set to recommended values

 WARNING =>  All disk groups should have compatible.rdbms attribute set to recommended values

 WARNING =>  Database has one or more dictionary managed tablespace for orcldb

 CRITICAL => System is exposed to Exadata Critical Issue EX58

 CRITICAL => System is exposed to Exadata Critical Issue EX58

 FAIL =>     Some data or temp files are not autoextensible for orcldb

 WARNING =>  Key InfiniBand fabric error counters should not be present

 CRITICAL => One or more log archive destination and alternate log archive destination settings are not as recommended for orcldb

 FAIL =>     Database parameter DB_LOST_WRITE_PROTECT is not set to recommended value on testdb1 instance

 FAIL =>     Database parameter DB_LOST_WRITE_PROTECT is not set to recommended value on orcldb1 instance

 FAIL =>     Database parameter GLOBAL_NAMES is not set to recommended value on testdb1 instance

 FAIL =>     Database parameter GLOBAL_NAMES is not set to recommended value on orcldb1 instance

 FAIL =>     Database parameter PARALLEL_ADAPTIVE_MULTI_USER is not set to recommended value on testdb1 instance

 FAIL =>     Database parameter PARALLEL_ADAPTIVE_MULTI_USER is not set to recommended value on orcldb1 instance

 FAIL =>     Database parameter PARALLEL_THREADS_PER_CPU is not set to recommended value on testdb1 instance

 FAIL =>     Database parameter PARALLEL_THREADS_PER_CPU is not set to recommended value on orcldb1 instance

 FAIL =>     Database parameter OS_AUTHENT_PREFIX is not set to recommended value on testdb1 instance

 FAIL =>     Database parameter OS_AUTHENT_PREFIX is not set to recommended value on orcldb1 instance

 FAIL =>     Database parameter sql92_security is not set to recommended value on testdb1 instance

 FAIL =>     Database parameter sql92_security is not set to recommended value on orcldb1 instance

 FAIL =>     Database parameter COMPATIBLE should be set to recommended value for testdb

 FAIL =>     Database parameter COMPATIBLE should be set to recommended value for orcldb

 CRITICAL => Database parameters log_archive_dest_n with Location attribute are not all set to recommended value for orcldb

 CRITICAL => Database parameter Db_create_online_log_dest_n is not set to recommended value for testdb

 FAIL =>     Flashback on PRIMARY is not configured for orcldb

 FAIL =>     Flashback on STANDBY is not configured for testdb

 INFO =>     Operational Best Practices

 INFO =>     Database Consolidation Best Practices

 INFO =>     Computer failure prevention best practices

 INFO =>     Data corruption prevention best practices

 INFO =>     Logical corruption prevention best practices

 INFO =>     Database/Cluster/Site failure prevention best practices

 INFO =>     Client failover operational best practices

 INFO =>     Verify the percent of available celldisk space used by the griddisks

 WARNING =>  Application objects were found to be invalid for orcldb

 CRITICAL => Database control files are not configured as recommended for testdb

 CRITICAL => Database control files are not configured as recommended for orcldb

 WARNING =>  ASM parameter ASM_POWER_LIMIT is not set to the default value.

 INFO =>     While initialization parameter LOG_ARCHIVE_CONFIG is set it should be verified for your environment on Standby Database for testdb

 WARNING =>  Redo log files should be appropriately sized for testdb

 WARNING =>  Redo log files should be appropriately sized for orcldb

 FAIL =>     Table AUD$[FGA_LOG$] should use Automatic Segment Space Management for orcldb

 INFO =>     Database failure prevention best practices

 WARNING =>  Database has one or more dictionary managed tablespace for orcldb

 FAIL =>     Primary database is not protected with Data Guard (standby database) for real-time data protection and availability for orcldb

 FAIL =>     Database parameter LOG_BUFFER is not set to recommended value on orcldb1 instance

 INFO =>     Storage failures prevention best practices

 INFO =>     Software maintenance best practices

 CRITICAL => The data files should be recoverable for testdb

 CRITICAL => The data files should be recoverable for orcldb

 FAIL =>     FRA space management problem file types are present without an RMAN backup completion within the last 7 days for testdb

 INFO =>     Oracle recovery manager(rman) best practices

 WARNING =>  control_file_record_keep_time should be within recommended range [1-9] for testdb

 INFO =>     Exadata Critical Issues (Doc ID 1270094.1):- DB1-DB4,DB6,DB9-DB44, EX1-EX60 and IB1-IB3,IB5-IB8

Collecting patch inventory on CRS_HOME /u01/app/11.2.0.4/grid

Collecting patch inventory on ORACLE_HOME /u01/app/oracle/product/11.2.0.4/dbhome


Copying results from dm01db02 and generating report. This might take a while. Be patient.


.

============================================================

              Node name – dm01db02

============================================================


 Collecting – CPU Information

 Collecting – Clusterware and RDBMS software version

 Collecting – Compute node PCI bus slot speed for infiniband HCAs

 Collecting – Kernel parameters

 Collecting – Maximum number of semaphore sets on system

 Collecting – Maximum number of semaphores on system

 Collecting – OS Packages

 Collecting – Patches for Grid Infrastructure

 Collecting – Patches for RDBMS Home

 Collecting – RDBMS patch inventory

 Collecting – number of semaphore operations per semop system call

 Collecting – CRS user limits configuration

 Collecting – CRS user time zone check

 Collecting – Check alerthistory for non-test open stateless alerts [Database Server]

 Collecting – Check alerthistory for stateful alerts not cleared [Database Server]

 Collecting – Clusterware patch inventory

 Collecting – Exadata Critical Issue DB09

 Collecting – Exadata Critical Issue EX30

 Collecting – Exadata Critical Issue EX36

 Collecting – Exadata Critical Issue EX56

 Collecting – Exadata Critical Issue EX57

 Collecting – Exadata Critical Issue EX58

 Collecting – Exadata critical issue EX48

 Collecting – Exadata critical issue EX55

 Collecting – Exadata software version on database server

 Collecting – Exadata system model number

 Collecting – Exadata version on database server

 Collecting – HCA firmware version on database server

 Collecting – HCA transfer rate on database server

 Collecting – Infrastructure Software and Configuration for compute

 Collecting – MaxStartups setting in sshd_config

 Collecting – OFED Software version on database server

 Collecting – Obtain hardware information

 Collecting – Operating system and Kernel version on database server

 Collecting – Oracle monitoring agent and/or OS settings on ADR diagnostic directories

 Collecting – Raid controller bus link speed

 Collecting – System Event Log

 Collecting – Validate key sysctl.conf parameters on database servers

 Collecting – Verify Data Network is Separate from Management Network

 Collecting – Verify Database Server Disk Controller Configuration

 Collecting – Verify Database Server Physical Drive Configuration

 Collecting – Verify Database Server Virtual Drive Configuration

 Collecting – Verify Disk Cache Policy on database server

 Collecting – Verify Hardware and Firmware on Database and Storage Servers (CheckHWnFWProfile) [Database Server]

 Collecting – Verify ILOM Power Up Configuration for HOST_AUTO_POWER_ON

 Collecting – Verify ILOM Power Up Configuration for HOST_LAST_POWER_STATE

 Collecting – Verify IP routing configuration on database servers

 Collecting – Verify InfiniBand Address Resolution Protocol (ARP) Configuration on Database Servers

 Collecting – Verify Master (Rack) Serial Number is Set [Database Server]

 Collecting – Verify Quorum disks configuration

 Collecting – Verify RAID Controller Battery Temperature [Database Server]

 Collecting – Verify RAID disk controller CacheVault capacitor condition [Database Server]

 Collecting – Verify RAID disk controller CacheVault capacitor condition [Database Server]

 Collecting – Verify TCP Segmentation Offload (TSO) is set to off

 Collecting – Verify available ksplice fixes are installed [Database Server]

 Collecting – Verify basic Logical Volume(LVM) system devices configuration

 Collecting – Verify database server InfiniBand network MTU size

 Collecting – Verify database server disk controllers use writeback cache

 Collecting – Verify database server file systems have Check interval = 0

 Collecting – Verify database server file systems have Maximum mount count = -1

 Collecting – Verify imageinfo on database server

 Collecting – Verify imageinfo on database server to compare systemwide

 Collecting – Verify installed rpm(s) kernel type match the active kernel version

 Collecting – Verify no database server kernel out of memory errors

 Collecting – Verify proper ACFS drivers are installed for Spectre v2 mitigation

 Collecting – Verify service exachkcfg autostart status on database server

 Collecting – Verify the localhost alias is pingable [Database Server]

 Collecting – Verify the InfiniBand Fabric Topology (verify-topology)

 Collecting – Verify the Name Service Cache Daemon (NSCD) configuration

 Collecting – Verify the Subnet Manager is properly disabled [Database Server]

 Collecting – Verify the currently active image status [Database Server]

 Collecting – Verify the ib_sdp module is not loaded into the kernel

 Collecting – Verify the storage servers in use configuration matches across the cluster

 Collecting – Verify the vm.min_free_kbytes configuration

 Collecting – Verify there are no files present that impact normal firmware update procedures [Database Server]

 Collecting – collect time server data [Database Server]

 Collecting – root time zone check

 Collecting – verify asr exadata configuration check via ASREXACHECK on database server

list index out of range


Data collections completed. Checking best practices on dm01db02.

————————————————————


 FAIL =>     Exadata software version on database server does not meet certified platinum configuration

 FAIL =>     Oracle database does not meet certified platinum configuration for /u01/app/oracle/product/11.2.0.4/dbhome

 WARNING =>  Database parameter AUDIT_SYS_OPERATIONS should be set to the recommended value on testdb2 instance

 WARNING =>  Database parameter AUDIT_SYS_OPERATIONS should be set to the recommended value on orcldb2 instance

 INFO =>     Oracle GoldenGate failure prevention best practices

 WARNING =>  Non-default database Services are not configured for orcldb

 WARNING =>  Database parameter processes should be set to recommended value on testdb2 instance

 WARNING =>  Database parameter processes should be set to recommended value on orcldb2 instance

 FAIL =>     _reconnect_to_cell_attempts parameter in cellinit.ora is not set to recommended value

 FAIL =>     Oracle monitoring agent and Operating systems settings on Automatic diagnostic  repository directories are not correct or not all targets have been scanned or not all diagnostic directories found

 FAIL =>     Downdelay attribute is not set to recommended value on bonded client interface

 FAIL =>     One or more of SYSTEM, SYSAUX, USERS, TEMP tablespaces are not of type bigfile for orcldb

 FAIL =>     The initialization parameter cluster_database_instances should be at the default value for testdb

 FAIL =>     The initialization parameter cluster_database_instances should be at the default value for orcldb

 INFO =>     Database parameter AUDIT_TRAIL should be set to the recommended value for testdb

 INFO =>     Database parameter AUDIT_TRAIL should be set to the recommended value for orcldb

 FAIL =>     Memlock settings do not meet the Oracle best practice recommendations for /u01/app/oracle/product/11.2.0.4/dbhome

 CRITICAL => System is exposed to Exadata Critical Issue EX58

 CRITICAL => One or more log archive destination and alternate log archive destination settings are not as recommended

 CRITICAL => One or more disk groups which contain critical files do not use high redundancy

 FAIL =>     Database parameter DB_LOST_WRITE_PROTECT is not set to recommended value on testdb2 instance

 FAIL =>     Database parameter DB_LOST_WRITE_PROTECT is not set to recommended value on orcldb2 instance

 FAIL =>     Database parameter GLOBAL_NAMES is not set to recommended value on testdb2 instance

 FAIL =>     Database parameter GLOBAL_NAMES is not set to recommended value on orcldb2 instance

 FAIL =>     Database parameter PARALLEL_ADAPTIVE_MULTI_USER is not set to recommended value on testdb2 instance

 FAIL =>     Database parameter PARALLEL_ADAPTIVE_MULTI_USER is not set to recommended value on orcldb2 instance

 FAIL =>     Database parameter PARALLEL_THREADS_PER_CPU is not set to recommended value on testdb2 instance

 FAIL =>     Database parameter PARALLEL_THREADS_PER_CPU is not set to recommended value on orcldb2 instance

 FAIL =>     Database parameter OS_AUTHENT_PREFIX is not set to recommended value on testdb2 instance

 FAIL =>     Database parameter OS_AUTHENT_PREFIX is not set to recommended value on orcldb2 instance

 FAIL =>     Database parameter sql92_security is not set to recommended value on testdb2 instance

 FAIL =>     Database parameter sql92_security is not set to recommended value on orcldb2 instance

 FAIL =>     Database parameter COMPATIBLE should be set to recommended value for testdb

 FAIL =>     Database parameter COMPATIBLE should be set to recommended value for orcldb

 CRITICAL => Database parameters log_archive_dest_n with Location attribute are not all set to recommended value for orcldb

 CRITICAL => Database parameter Db_create_online_log_dest_n is not set to recommended value for testdb

 CRITICAL => Database control files are not configured as recommended

 WARNING =>  ASM parameter ASM_POWER_LIMIT is not set to the default value.

 INFO =>     While initialization parameter LOG_ARCHIVE_CONFIG is set it should be verified for your environment on Standby Database for testdb

 WARNING =>  Redo log files should be appropriately sized for testdb

 WARNING =>  Redo log files should be appropriately sized for orcldb

 FAIL =>     Database parameter LOG_BUFFER is not set to recommended value on orcldb2 instance

Collecting patch inventory on CRS_HOME /u01/app/11.2.0.4/grid

Collecting patch inventory on ORACLE_HOME /u01/app/oracle/product/11.2.0.4/dbhome


Copying results from dm01db03 and generating report. This might take a while. Be patient.


.

============================================================

              Node name – dm01db03

============================================================


 Collecting – CPU Information

 Collecting – Clusterware and RDBMS software version

 Collecting – Compute node PCI bus slot speed for infiniband HCAs

 Collecting – Kernel parameters

 Collecting – Maximum number of semaphore sets on system

 Collecting – Maximum number of semaphores on system

 Collecting – OS Packages

 Collecting – Patches for Grid Infrastructure

 Collecting – Patches for RDBMS Home

 Collecting – RDBMS patch inventory

 Collecting – number of semaphore operations per semop system call

 Collecting – CRS user limits configuration

 Collecting – CRS user time zone check

 Collecting – Check alerthistory for non-test open stateless alerts [Database Server]

 Collecting – Check alerthistory for stateful alerts not cleared [Database Server]

 Collecting – Clusterware patch inventory

 Collecting – Exadata Critical Issue DB09

 Collecting – Exadata Critical Issue EX30

 Collecting – Exadata Critical Issue EX36

 Collecting – Exadata Critical Issue EX56

 Collecting – Exadata Critical Issue EX57

 Collecting – Exadata Critical Issue EX58

 Collecting – Exadata critical issue EX48

 Collecting – Exadata critical issue EX55

 Collecting – Exadata software version on database server

 Collecting – Exadata system model number

 Collecting – Exadata version on database server

 Collecting – HCA firmware version on database server

 Collecting – HCA transfer rate on database server

 Collecting – Infrastructure Software and Configuration for compute

 Collecting – MaxStartups setting in sshd_config

 Collecting – OFED Software version on database server

 Collecting – Obtain hardware information

 Collecting – Operating system and Kernel version on database server

 Collecting – Oracle monitoring agent and/or OS settings on ADR diagnostic directories

 Collecting – Raid controller bus link speed

 Collecting – System Event Log

 Collecting – Validate key sysctl.conf parameters on database servers

 Collecting – Verify Data Network is Separate from Management Network

 Collecting – Verify Database Server Disk Controller Configuration

 Collecting – Verify Database Server Physical Drive Configuration

 Collecting – Verify Database Server Virtual Drive Configuration

 Collecting – Verify Disk Cache Policy on database server

 Collecting – Verify Hardware and Firmware on Database and Storage Servers (CheckHWnFWProfile) [Database Server]

 Collecting – Verify ILOM Power Up Configuration for HOST_AUTO_POWER_ON

 Collecting – Verify ILOM Power Up Configuration for HOST_LAST_POWER_STATE

 Collecting – Verify IP routing configuration on database servers

 Collecting – Verify InfiniBand Address Resolution Protocol (ARP) Configuration on Database Servers

 Collecting – Verify Master (Rack) Serial Number is Set [Database Server]

 Collecting – Verify Quorum disks configuration

 Collecting – Verify RAID Controller Battery Temperature [Database Server]

 Collecting – Verify RAID disk controller CacheVault capacitor condition [Database Server]

 Collecting – Verify RAID disk controller CacheVault capacitor condition [Database Server]

 Collecting – Verify TCP Segmentation Offload (TSO) is set to off

 Collecting – Verify available ksplice fixes are installed [Database Server]

 Collecting – Verify basic Logical Volume(LVM) system devices configuration

 Collecting – Verify database server InfiniBand network MTU size

 Collecting – Verify database server disk controllers use writeback cache

 Collecting – Verify database server file systems have Check interval = 0

 Collecting – Verify database server file systems have Maximum mount count = -1

 Collecting – Verify imageinfo on database server

 Collecting – Verify imageinfo on database server to compare systemwide

 Collecting – Verify installed rpm(s) kernel type match the active kernel version

 Collecting – Verify no database server kernel out of memory errors

 Collecting – Verify proper ACFS drivers are installed for Spectre v2 mitigation

 Collecting – Verify service exachkcfg autostart status on database server

 Collecting – Verify the localhost alias is pingable [Database Server]

 Collecting – Verify the InfiniBand Fabric Topology (verify-topology)

 Collecting – Verify the Name Service Cache Daemon (NSCD) configuration

 Collecting – Verify the Subnet Manager is properly disabled [Database Server]

 Collecting – Verify the currently active image status [Database Server]

 Collecting – Verify the ib_sdp module is not loaded into the kernel

 Collecting – Verify the storage servers in use configuration matches across the cluster

 Collecting – Verify the vm.min_free_kbytes configuration

 Collecting – Verify there are no files present that impact normal firmware update procedures [Database Server]

 Collecting – collect time server data [Database Server]

 Collecting – root time zone check

 Collecting – verify asr exadata configuration check via ASREXACHECK on database server

list index out of range


Data collections completed. Checking best practices on dm01db03.

————————————————————


 FAIL =>     Exadata software version on database server does not meet certified platinum configuration

 FAIL =>     Oracle database does not meet certified platinum configuration for /u01/app/oracle/product/11.2.0.4/dbhome

 WARNING =>  Database parameter AUDIT_SYS_OPERATIONS should be set to the recommended value on testdb3 instance

 WARNING =>  Database parameter AUDIT_SYS_OPERATIONS should be set to the recommended value on orcldb3 instance

 INFO =>     Oracle GoldenGate failure prevention best practices

 WARNING =>  Non-default database Services are not configured for orcldb

 WARNING =>  Database parameter processes should be set to recommended value on testdb3 instance

 WARNING =>  Database parameter processes should be set to recommended value on orcldb3 instance

 FAIL =>     _reconnect_to_cell_attempts parameter in cellinit.ora is not set to recommended value

 FAIL =>     Oracle monitoring agent and Operating systems settings on Automatic diagnostic  repository directories are not correct or not all targets have been scanned or not all diagnostic directories found

 FAIL =>     Downdelay attribute is not set to recommended value on bonded client interface

 WARNING =>  The IP routing configuration is not correct

 FAIL =>     One or more of SYSTEM, SYSAUX, USERS, TEMP tablespaces are not of type bigfile for orcldb

 FAIL =>     The initialization parameter cluster_database_instances should be at the default value for testdb

 FAIL =>     The initialization parameter cluster_database_instances should be at the default value for orcldb

 INFO =>     Database parameter AUDIT_TRAIL should be set to the recommended value for testdb

 INFO =>     Database parameter AUDIT_TRAIL should be set to the recommended value for orcldb

 FAIL =>     Memlock settings do not meet the Oracle best practice recommendations for /u01/app/oracle/product/11.2.0.4/dbhome

 CRITICAL => System is exposed to Exadata Critical Issue EX58

 FAIL =>     Management network is not separate from data network

 CRITICAL => One or more log archive destination and alternate log archive destination settings are not as recommended

 CRITICAL => One or more disk groups which contain critical files do not use high redundancy

 FAIL =>     Database parameter DB_LOST_WRITE_PROTECT is not set to recommended value on testdb3 instance

 FAIL =>     Database parameter DB_LOST_WRITE_PROTECT is not set to recommended value on orcldb3 instance

 FAIL =>     Database parameter GLOBAL_NAMES is not set to recommended value on testdb3 instance

 FAIL =>     Database parameter GLOBAL_NAMES is not set to recommended value on orcldb3 instance

 FAIL =>     Database parameter PARALLEL_ADAPTIVE_MULTI_USER is not set to recommended value on testdb3 instance

 FAIL =>     Database parameter PARALLEL_ADAPTIVE_MULTI_USER is not set to recommended value on orcldb3 instance

 FAIL =>     Database parameter PARALLEL_THREADS_PER_CPU is not set to recommended value on testdb3 instance

 FAIL =>     Database parameter PARALLEL_THREADS_PER_CPU is not set to recommended value on orcldb3 instance

 FAIL =>     Database parameter OS_AUTHENT_PREFIX is not set to recommended value on testdb3 instance

 FAIL =>     Database parameter OS_AUTHENT_PREFIX is not set to recommended value on orcldb3 instance

 FAIL =>     Database parameter sql92_security is not set to recommended value on testdb3 instance

 FAIL =>     Database parameter sql92_security is not set to recommended value on orcldb3 instance

 FAIL =>     Database parameter COMPATIBLE should be set to recommended value for testdb

 FAIL =>     Database parameter COMPATIBLE should be set to recommended value for orcldb

 CRITICAL => Database parameters log_archive_dest_n with Location attribute are not all set to recommended value for orcldb

 CRITICAL => Database parameter Db_create_online_log_dest_n is not set to recommended value for testdb

 CRITICAL => Database control files are not configured as recommended

 WARNING =>  ASM parameter ASM_POWER_LIMIT is not set to the default value.

 INFO =>     While initialization parameter LOG_ARCHIVE_CONFIG is set it should be verified for your environment on Standby Database for testdb

 WARNING =>  Redo log files should be appropriately sized for testdb

 WARNING =>  Redo log files should be appropriately sized for orcldb

 FAIL =>     Database parameter LOG_BUFFER is not set to recommended value on orcldb3 instance

Collecting patch inventory on CRS_HOME /u01/app/11.2.0.4/grid

Collecting patch inventory on ORACLE_HOME /u01/app/oracle/product/11.2.0.4/dbhome


Copying results from dm01db04 and generating report. This might take a while. Be patient.


.

============================================================

              Node name – dm01db04

============================================================


 Collecting – CPU Information

 Collecting – Clusterware and RDBMS software version

 Collecting – Compute node PCI bus slot speed for infiniband HCAs

 Collecting – Kernel parameters

 Collecting – Maximum number of semaphore sets on system

 Collecting – Maximum number of semaphores on system

 Collecting – OS Packages

 Collecting – Patches for Grid Infrastructure

 Collecting – Patches for RDBMS Home

 Collecting – RDBMS patch inventory

 Collecting – number of semaphore operations per semop system call

 Collecting – CRS user limits configuration

 Collecting – CRS user time zone check

 Collecting – Check alerthistory for non-test open stateless alerts [Database Server]

 Collecting – Check alerthistory for stateful alerts not cleared [Database Server]

 Collecting – Clusterware patch inventory

 Collecting – Exadata Critical Issue DB09

 Collecting – Exadata Critical Issue EX30

 Collecting – Exadata Critical Issue EX36

 Collecting – Exadata Critical Issue EX56

 Collecting – Exadata Critical Issue EX57

 Collecting – Exadata Critical Issue EX58

 Collecting – Exadata critical issue EX48

 Collecting – Exadata critical issue EX55

 Collecting – Exadata software version on database server

 Collecting – Exadata system model number

 Collecting – Exadata version on database server

 Collecting – HCA firmware version on database server

 Collecting – HCA transfer rate on database server

 Collecting – Infrastructure Software and Configuration for compute

 Collecting – MaxStartups setting in sshd_config

 Collecting – OFED Software version on database server

 Collecting – Obtain hardware information

 Collecting – Operating system and Kernel version on database server

 Collecting – Oracle monitoring agent and/or OS settings on ADR diagnostic directories

 Collecting – Raid controller bus link speed

 Collecting – System Event Log

 Collecting – Validate key sysctl.conf parameters on database servers

 Collecting – Verify Data Network is Separate from Management Network

 Collecting – Verify Database Server Disk Controller Configuration

 Collecting – Verify Database Server Physical Drive Configuration

 Collecting – Verify Database Server Virtual Drive Configuration

 Collecting – Verify Disk Cache Policy on database server

 Collecting – Verify Hardware and Firmware on Database and Storage Servers (CheckHWnFWProfile) [Database Server]

 Collecting – Verify ILOM Power Up Configuration for HOST_AUTO_POWER_ON

 Collecting – Verify ILOM Power Up Configuration for HOST_LAST_POWER_STATE

 Collecting – Verify IP routing configuration on database servers

 Collecting – Verify InfiniBand Address Resolution Protocol (ARP) Configuration on Database Servers

 Collecting – Verify Master (Rack) Serial Number is Set [Database Server]

 Collecting – Verify Quorum disks configuration

 Collecting – Verify RAID Controller Battery Temperature [Database Server]

 Collecting – Verify RAID disk controller CacheVault capacitor condition [Database Server]

 Collecting – Verify RAID disk controller CacheVault capacitor condition [Database Server]

 Collecting – Verify TCP Segmentation Offload (TSO) is set to off

 Collecting – Verify available ksplice fixes are installed [Database Server]

 Collecting – Verify basic Logical Volume(LVM) system devices configuration

 Collecting – Verify database server InfiniBand network MTU size

 Collecting – Verify database server disk controllers use writeback cache

 Collecting – Verify database server file systems have Check interval = 0

 Collecting – Verify database server file systems have Maximum mount count = -1

 Collecting – Verify imageinfo on database server

 Collecting – Verify imageinfo on database server to compare systemwide

 Collecting – Verify installed rpm(s) kernel type match the active kernel version

 Collecting – Verify no database server kernel out of memory errors

 Collecting – Verify proper ACFS drivers are installed for Spectre v2 mitigation

 Collecting – Verify service exachkcfg autostart status on database server

 Collecting – Verify the localhost alias is pingable [Database Server]

 Collecting – Verify the InfiniBand Fabric Topology (verify-topology)

 Collecting – Verify the Name Service Cache Daemon (NSCD) configuration

 Collecting – Verify the Subnet Manager is properly disabled [Database Server]

 Collecting – Verify the currently active image status [Database Server]

 Collecting – Verify the ib_sdp module is not loaded into the kernel

 Collecting – Verify the storage servers in use configuration matches across the cluster

 Collecting – Verify the vm.min_free_kbytes configuration

 Collecting – Verify there are no files present that impact normal firmware update procedures [Database Server]

 Collecting – collect time server data [Database Server]

 Collecting – root time zone check

 Collecting – verify asr exadata configuration check via ASREXACHECK on database server

list index out of range


Data collections completed. Checking best practices on dm01db04.

————————————————————


 FAIL =>     Exadata software version on database server does not meet certified platinum configuration

 FAIL =>     Oracle database does not meet certified platinum configuration for /u01/app/oracle/product/11.2.0.4/dbhome

 WARNING =>  Database parameter AUDIT_SYS_OPERATIONS should be set to the recommended value on testdb4 instance

 WARNING =>  Database parameter AUDIT_SYS_OPERATIONS should be set to the recommended value on orcldb4 instance

 INFO =>     Oracle GoldenGate failure prevention best practices

 WARNING =>  Non-default database Services are not configured for orcldb

 WARNING =>  Database parameter processes should be set to recommended value on testdb4 instance

 WARNING =>  Database parameter processes should be set to recommended value on orcldb4 instance

 FAIL =>     _reconnect_to_cell_attempts parameter in cellinit.ora is not set to recommended value

 FAIL =>     Oracle monitoring agent and Operating systems settings on Automatic diagnostic  repository directories are not correct or not all targets have been scanned or not all diagnostic directories found

 FAIL =>     Downdelay attribute is not set to recommended value on bonded client interface

 WARNING =>  The IP routing configuration is not correct

 FAIL =>     One or more of SYSTEM, SYSAUX, USERS, TEMP tablespaces are not of type bigfile for orcldb

 FAIL =>     The initialization parameter cluster_database_instances should be at the default value for testdb

 FAIL =>     The initialization parameter cluster_database_instances should be at the default value for orcldb

 INFO =>     Database parameter AUDIT_TRAIL should be set to the recommended value for testdb

 INFO =>     Database parameter AUDIT_TRAIL should be set to the recommended value for orcldb

 FAIL =>     Memlock settings do not meet the Oracle best practice recommendations for /u01/app/oracle/product/11.2.0.4/dbhome

 CRITICAL => System is exposed to Exadata Critical Issue EX58

 FAIL =>     Management network is not separate from data network

 CRITICAL => One or more log archive destination and alternate log archive destination settings are not as recommended

 CRITICAL => One or more disk groups which contain critical files do not use high redundancy

 FAIL =>     Database parameter DB_LOST_WRITE_PROTECT is not set to recommended value on testdb4 instance

 FAIL =>     Database parameter DB_LOST_WRITE_PROTECT is not set to recommended value on orcldb4 instance

 FAIL =>     Database parameter GLOBAL_NAMES is not set to recommended value on testdb4 instance

 FAIL =>     Database parameter GLOBAL_NAMES is not set to recommended value on orcldb4 instance

 FAIL =>     Database parameter PARALLEL_ADAPTIVE_MULTI_USER is not set to recommended value on testdb4 instance

 FAIL =>     Database parameter PARALLEL_ADAPTIVE_MULTI_USER is not set to recommended value on orcldb4 instance

 FAIL =>     Database parameter PARALLEL_THREADS_PER_CPU is not set to recommended value on testdb4 instance

 FAIL =>     Database parameter PARALLEL_THREADS_PER_CPU is not set to recommended value on orcldb4 instance

 FAIL =>     Database parameter OS_AUTHENT_PREFIX is not set to recommended value on testdb4 instance

 FAIL =>     Database parameter OS_AUTHENT_PREFIX is not set to recommended value on orcldb4 instance

 FAIL =>     Database parameter sql92_security is not set to recommended value on testdb4 instance

 FAIL =>     Database parameter sql92_security is not set to recommended value on orcldb4 instance

 FAIL =>     Database parameter COMPATIBLE should be set to recommended value for testdb

 FAIL =>     Database parameter COMPATIBLE should be set to recommended value for orcldb

 CRITICAL => Database parameters log_archive_dest_n with Location attribute are not all set to recommended value for orcldb

 CRITICAL => Database parameter Db_create_online_log_dest_n is not set to recommended value for testdb

 CRITICAL => Database control files are not configured as recommended

 WARNING =>  ASM parameter ASM_POWER_LIMIT is not set to the default value.

 INFO =>     While initialization parameter LOG_ARCHIVE_CONFIG is set it should be verified for your environment on Standby Database for testdb

 WARNING =>  Redo log files should be appropriately sized for testdb

 WARNING =>  Redo log files should be appropriately sized for orcldb

 FAIL =>     Database parameter LOG_BUFFER is not set to recommended value on orcldb4 instance

Collecting patch inventory on CRS_HOME /u01/app/11.2.0.4/grid

Collecting patch inventory on ORACLE_HOME /u01/app/oracle/product/11.2.0.4/dbhome


————————————————————

                      CLUSTERWIDE CHECKS

————————————————————


————————————————————

Detailed report (html) –  /u01/app/oracle/oracle.ahf/data/dm01db01/exachk/exachk_dm01db01_orcldb_040620_12376/exachk_dm01db01_orcldb_040620_12376.html


UPLOAD [if required] – /u01/app/oracle/oracle.ahf/data/dm01db01/exachk/exachk_dm01db01_orcldb_040620_12376.zip


Step 7: Review the Exachk report or Upload file to Oracle Support


[root@dm01db01 Exachk]# curl -x webproxy.netsoftmate.com:80 -T /u01/app/oracle/oracle.ahf/data/dm01db01/exachk/exachk_dm01db01_orcldb_040620_12376.zip  -u abdul.mohammed@netsoftmate.com   https://transport.oracle.com/upload/issue/3-XXXXXXXX/ -v


Sample Exadata Output:


Oracle Autonomous Health Check Installation and Execution | Netsoftmate


To Uninstall AHF


[root@dm01db01 ~]# cd /opt/oracle.ahf/ahf/bin


[root@dm01db01 bin]# ls -ltr

total 88

-r-xr-xr-x 1 root root 19623 Mar 17 11:25 uninstallahf.sh

-r-xr-xr-x 1 root root 14504 Mar 17 11:25 uninstallahf.pl

-rwxr-xr-x 1 root root  3296 Mar 17 11:25 tfactl

-r-xr-xr-x 1 root root 45597 Mar 17 11:25 installAHF.pl


[root@dm01db01 bin]# ./uninstallahf.sh -h


   Usage for ./uninstallahf.sh


   ./uninstallahf.sh [-local] [-silent] [-deleterepo]


        -local            –    Uninstall AHF only on the local node

        -silent           –    Do not ask any uninstall questions

        -deleterepo       –    Delete AHF repository


   Note: If -local is not passed, AHF will be uninstalled from all configured nodes.


[root@dm01db01 bin]# ./uninstallahf.sh -deleterepo

Starting AHF Uninstall

AHF will be uninstalled on:

dm01db01

dm01db02


Do you want to continue with AHF uninstall ? [Y]|N : Y


Stopping AHF service on local node dm01db01…

Stopping TFA Support Tools…


TFA-00002 Oracle Trace File Analyzer (TFA) is not running

Stopping exachk scheduler …

Removing exachk cache discovery….

No exachk cache discovery found.


Removed exachk from inittab


Stopping and removing AHF in dm01db02…

TFA-00002 Oracle Trace File Analyzer (TFA) is not running

Removing exachk cache discovery….

Successfully completed exachk cache discovery removal.


Removed exachk from inittab


Successfully uninstalled AHF on node dm01db02

Removing AHF setup on dm01db01:

Removing /etc/rc.d/rc0.d/K17init.tfa

Removing /etc/rc.d/rc1.d/K17init.tfa

Removing /etc/rc.d/rc2.d/K17init.tfa

Removing /etc/rc.d/rc4.d/K17init.tfa

Removing /etc/rc.d/rc6.d/K17init.tfa

Removing /etc/init.d/init.tfa…

Removing /opt/oracle.ahf/jre

Removing /opt/oracle.ahf/common

Removing /opt/oracle.ahf/bin

Removing /opt/oracle.ahf/python

Removing /opt/oracle.ahf/analyzer

Removing /opt/oracle.ahf/tfa

Removing /opt/oracle.ahf/ahf

Removing /opt/oracle.ahf/exachk

Removing /u01/app/oracle/oracle.ahf/data/dm01db01

Removing /opt/oracle.ahf/install.properties

Removing /u01/app/oracle/oracle.ahf/data/repository

Removing /u01/app/oracle/oracle.ahf/data

Removing /u01/app/oracle/oracle.ahf

Removing AHF Home : /opt/oracle.ahf


Conclusion:


In this article we have learned how to install, setup and execute Autonomous Health Check Frame work for Exadata Database Machines. We have also seen how to uninstall the AHF software.


About Netsoftmate: 

Netsoftmate is an Oracle Gold Partner and a boutique IT services company specializing in installation, implementation and 24/7 support for Oracle Engineered Systems like Oracle Exadata, Oracle Database Appliance, Oracle ZDLRA, Oracle ZFS Storage and Oracle Private Cloud Appliance. Apart from OES, we have specialized teams of  experts providing round the clock remote database administration support for any type of database and cyber security compliance and auditing services.


Feel free to get in touch with us by signing up on the link below – 


Priority Suport for Oracle Engineered Systems | Netsoftmate

0

Database Management Services, Oracle Exadata, Oracle Exadata X8M, Remote Database Management

The Oracle Exadata X8M release implements 100 Gb/sec RoCE network fabric, making the world’s fastest database machine even faster.

Oracle Exadata Database Machine X8M introduces a brand new high-bandwidth low-latency 100 Gb/sec RDMA over Converged Ethernet (RoCE) Network Fabric that connects all the components inside an Exadata Database Machine. Specialized database networking protocols deliver much lower latency and higher bandwidth than is possible with generic communication protocols for faster response time for OLTP operations and higher throughput for analytic workloads.

The ORacle Exadata X8M release provides the next generation in ultra-fast cloud scale networking fabric, RDMA over Converged Ethernet (RoCE). RDMA (Remote Direct Memory Access) allows one computer to directly access data from another without Operating System or CPU involvement, for high bandwidth and low latency. The network card directly reads/writes memory with no extra copying or buffering and very low latency.


RDMA is an integral part of the Exadata high-performance architecture, and has been tuned and enhanced over the past decade, underpinning several Exadata-only technologies such as Exafusion Direct-to-Wire Protocol and Smart Fusion Block Transfer. As the RoCE API infrastructure is identical to InfiniBand’s, all existing Exadata performance features are available on RoCE.


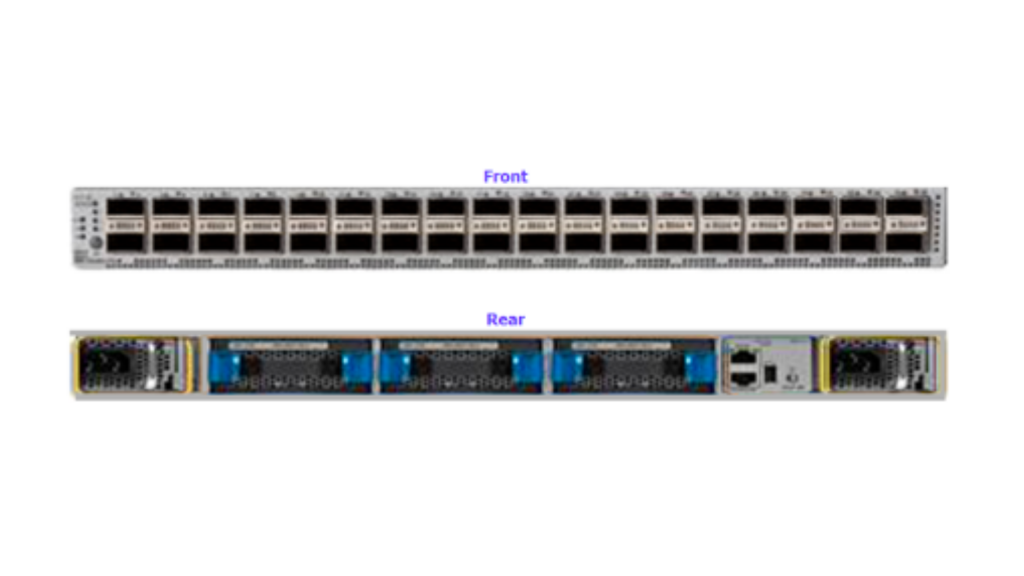
Oracle Exadata RoCE Switch Image:Oracle Exadata RoCE Switch Front & Back | Netsoftmate
In this article we see practically how to patch Exadata X8M RoCE Switches


1. Create a file containing RoCE switch hostname

[root@dm01dbadm01 ~]# cat roce_list

dm01sw-rocea01

dm01sw-roceab1


2. Get the current RoCE Switch software version

[root@dm01dbadm01 ~]# ssh admin@dm01sw-rocea01 show version

User Access Verification

Cisco Nexus Operating System (NX-OS) Software

TAC support: http://www.cisco.com/tac

Copyright (C) 2002-2019, Cisco and/or its affiliates.

All rights reserved.

The copyrights to certain works contained in this software are

owned by other third parties and used and distributed under their own

licenses, such as open source.  This software is provided “as is,” and unless

otherwise stated, there is no warranty, express or implied, including but not

limited to warranties of merchantability and fitness for a particular purpose.

Certain components of this software are licensed under

the GNU General Public License (GPL) version 2.0 or

GNU General Public License (GPL) version 3.0  or the GNU

Lesser General Public License (LGPL) Version 2.1 or

Lesser General Public License (LGPL) Version 2.0.

A copy of each such license is available at

http://www.opensource.org/licenses/gpl-2.0.php and

http://opensource.org/licenses/gpl-3.0.html and

http://www.opensource.org/licenses/lgpl-2.1.php and

http://www.gnu.org/licenses/old-licenses/library.txt.


Software

  BIOS: version 05.39

  NXOS: version 7.0(3)I7(6)

  BIOS compile time:  08/30/2019

  NXOS image file is: bootflash:///nxos.7.0.3.I7.6.bin

  NXOS compile time:  3/5/2019 13:00:00 [03/05/2019 22:04:55]


Hardware

  cisco Nexus9000 C9336C-FX2 Chassis

  Intel(R) Xeon(R) CPU D-1526 @ 1.80GHz with 24571632 kB of memory.

  Processor Board ID FDO23380VQS


  Device name: dm01sw-rocea01

  bootflash:  115805708 kB

Kernel uptime is 8 day(s), 3 hour(s), 14 minute(s), 49 second(s)


Last reset at 145297 usecs after Wed Apr  1 09:29:43 2020

  Reason: Reset Requested by CLI command reload

  System version: 7.0(3)I7(6)

  Service:

plugin

  Core Plugin, Ethernet Plugin


Active Package(s):

[root@dm01dbadm01 ~]#  ssh admin@dm01sw-rocea01 show version | grep “System version:”

User Access Verification

  System version: 7.0(3)I7(6)
eBook - Oracle Exadata X8M Patching Recipes | Netsoftmate

3. Download the the RoCE switch software from MOS note 888828.1 and copy it Exadata compute node 1

[root@dm01dbadm01 ~]# cd /u01/stage/ROCE/


[root@dm01dbadm01 ROCE]# ls -ltr

total 2773832

-rw-r–r– 1 root root 2840400612 Apr  9 00:42 p30893922_193000_Linux-x86-64.zip


4. Unzip the RoCE patch

[root@dm01dbadm01 ROCE]# unzip p30893922_193000_Linux-x86-64.zip

Archive:  p30893922_193000_Linux-x86-64.zip

   creating: patch_switch_19.3.6.0.0.200317/

  inflating: patch_switch_19.3.6.0.0.200317/dcli

  inflating: patch_switch_19.3.6.0.0.200317/exadata.img.hw

  inflating: patch_switch_19.3.6.0.0.200317/sundcs_36p_repository_2.2.7_2.pkg

  inflating: patch_switch_19.3.6.0.0.200317/imageLogger

  inflating:

 patch_switch_19.3.6.0.0.200317/roce_switch_templates/roce_leaf_switch_multi.cfg

  inflating: patch_switch_19.3.6.0.0.200317/sundcs_36p_repository_2.2.14_1.pkg

  inflating: patch_switch_19.3.6.0.0.200317/README.txt


5. Verify the patch directory content after unzip

[root@dm01dbadm01 ROCE]# cd patch_switch_19.3.6.0.0.200317/


[root@dm01dbadm01 patch_switch_19.3.6.0.0.200317]# ls -ltr

total 2794980

-r-xr-x— 1 root root      50674 Mar 18 05:48 exadata.img.hw

-r–r–r– 1 root root       8664 Mar 18 05:48 exadata.img.env

-r–r–r– 1 root root      45349 Mar 18 05:48 imageLogger

-r–r—– 1 root root       6133 Mar 18 05:48 ExaXMLNode.pm

-r–r—– 1 root root      51925 Mar 18 05:48 exadata_img_pylogger.py

-r-xr-xr-x 1 root root      17482 Mar 18 05:48 libxcp.so.1

-r-xr-xr-x 1 root root       4385 Mar 18 05:48 kernelupgrade_oldbios.sh

-r-xr-xr-x 1 root root     176994 Mar 18 05:48 installfw_exadata_ssh

-r-xr-xr-x 1 root root        426 Mar 18 05:48 fwverify

-r-xr-xr-x 1 root root       1570 Mar 18 05:48 ExadataSendNotification.pm

-r-xr-xr-x 1 root root      62499 Mar 18 05:48 ExadataImageNotification.pl

-r-xr-xr-x 1 root root      51616 Mar 18 05:48 dcli

-rw-r–r– 1 root root 1011037696 Mar 18 05:48 nxos.7.0.3.I7.6.bin

-r-xr-xr-x 1 root root      16544 Mar 18 05:48 patchmgr_functions

-rwxr-xr-x 1 root root      11600 Mar 18 05:48 patch_bug_26678971

-rw-r–r– 1 root root  975383040 Mar 18 05:48 nxos.7.0.3.I7.7.bin

-r-xr-xr-x 1 root root  171545108 Mar 18 05:48 sundcs_36p_repository_2.2.13_2.pkg

-r-xr-xr-x 1 root root  172863012 Mar 18 05:48 sundcs_36p_repository_2.2.14_1.pkg

-rwxr-xr-x 1 root root  172946493 Mar 18 05:48 sundcs_36p_repository_2.2.7_2.pkg

-rwxr-xr-x 1 root root  172947929 Mar 18 05:48 sundcs_36p_repository_2.2.7_2_signed.pkg

-r-xr-xr-x 1 root root      15001 Mar 18 05:48 xcp

-rwxr-xr-x 1 root root  184111553 Mar 18 05:48 sundcs_36p_repository_upgrade_2.1_to_2.2.7_2.pkg

-r-xr-xr-x 1 root root     168789 Mar 18 06:05 upgradeIBSwitch.sh

drwxr-xr-x 2 root root        103 Mar 18 06:05 roce_switch_templates

drwxr-xr-x 2 root root         98 Mar 18 06:05 roce_switch_api

drwxr-xr-x 6 root root       4096 Mar 18 06:05 ibdiagtools

drwxrwxr-x 3 root root         20 Mar 18 06:05 etc

-r-xr-xr-x 1 root root     457738 Mar 18 06:05 patchmgr

-rw-rw-r– 1 root root       5156 Mar 18 06:05 md5sum_files.lst

-rwxrwxrwx 1 root root        822 Mar 18 07:15 README.txt


6. Navigate to the patch directory and execute the following to get the patch syntax

[root@dm01dbadm01 patch_switch_19.3.6.0.0.200317]# ./patchmgr -h

Usage:

./patchmgr –roceswitches [roceswitch_list_file]

           –upgrade [–verify-config [yes|no]] [–roceswitch-precheck] [–force]  |

           –downgrade [–verify-config [yes|no]]  [–roceswitch-precheck] [–force]  |

           –verify-config [yes|no]

           [-log_dir <fullpath> ]


./patchmgr –ibswitches [ibswitch_list_file]

          <–upgrade | –downgrade> [–ibswitch_precheck] [–unkey] [–force [yes|no]]


7. Execute the following command to perform configuration verification

Note:  The patching should be performed by a non-root user. In this case I am using oracle user to perform the patching


[root@dm01dbadm01 stage]# chown -R oracle:oinstall ROCE/


[root@dm01dbadm01 stage]# su – oracle

Last login: Thu Apr  9 16:17:25 +03 2020


[oracle@dm01dbadm01 ~]$ cd /u01/stage/ROCE/


[oracle@dm01dbadm01 ROCE]$ ls -ltr

total 2773836

-rw-r–r– 1 oracle oinstall 2840400612 Apr  9 00:42 p30893922_193000_Linux-x86-64.zip

drwxrwxr-x 6 oracle oinstall       4096 Apr  9 16:31 patch_switch_19.3.6.0.0.200317

[oracle@dm01dbadm01 ROCE]$ cd patch_switch_19.3.6.0.0.200317/


[oracle@dm01dbadm01 ~]$ vi roce_list

dm01sw-rocea01

dm01sw-roceab1


[oracle@dm01dbadm01 ~]$ cd /u01/stage/ROCE/patch_switch_19.3.6.0.0.200317


[oracle@dm01dbadm01 patch_switch_19.3.6.0.0.200317]$ ./patchmgr –roceswitches ~/roce_list –verify-config –log_dir /u01/stage/ROCE


2020-04-09 16:59:52 +0300        :Working: Initiate config verify on RoCE switches from . Expect up to 6 minutes for each switch


2020-04-09 16:59:53 +0300 1 of 2 :Verifying config on switch dm01sw-rocea01


2020-04-09 16:59:53 +0300:        [INFO     ] Dumping current running config locally as file: /u01/stage/ROCE/run.dm01sw-rocea01.cfg

2020-04-09 16:59:54 +0300:        [SUCCESS  ] Backed up switch config successfully

2020-04-09 16:59:54 +0300:        [INFO     ] Validating running config against template [1/3]: /u01/stage/ROCE/patch_switch_19.3.6.0.0.200317/roce_switch_templates/roce_leaf_switch.cfg

2020-04-09 16:59:54 +0300:        [INFO     ] Config matches template: /u01/stage/ROCE/patch_switch_19.3.6.0.0.200317/roce_switch_templates/roce_leaf_switch.cfg

2020-04-09 16:59:54 +0300:        [SUCCESS  ] Config validation successful!


2020-04-09 16:59:54 +0300 2 of 2 :Verifying config on switch dm01sw-roceb01


2020-04-09 16:59:54 +0300:        [INFO     ] Dumping current running config locally as file: /u01/stage/ROCE/run.dm01sw-roceb01.cfg

2020-04-09 16:59:55 +0300:        [SUCCESS  ] Backed up switch config successfully

2020-04-09 16:59:55 +0300:        [INFO     ] Validating running config against template [1/3]: /u01/stage/ROCE/patch_switch_19.3.6.0.0.200317/roce_switch_templates/roce_leaf_switch.cfg

2020-04-09 16:59:55 +0300:        [INFO     ] Config matches template: /u01/stage/ROCE/patch_switch_19.3.6.0.0.200317/roce_switch_templates/roce_leaf_switch.cfg

2020-04-09 16:59:55 +0300:        [SUCCESS  ] Config validation successful!


2020-04-09 16:59:55 +0300        :SUCCESS: Config check on RoCE switch(es)

2020-04-09 16:59:56 +0300        :SUCCESS: Completed run of command: ./patchmgr –roceswitches /home/oracle/roce_list –verify-config –log_dir /u01/stage/ROCE

2020-04-09 16:59:56 +0300        :INFO   : config attempted on nodes in file /home/oracle/roce_list: [dm01sw-rocea01 dm01sw-roceb01]

2020-04-09 16:59:56 +0300        :INFO   : For details, check the following files in /u01/stage/ROCE:

2020-04-09 16:59:56 +0300        :INFO   :  – updateRoceSwitch.log

2020-04-09 16:59:56 +0300        :INFO   :  – updateRoceSwitch.trc

2020-04-09 16:59:56 +0300        :INFO   :  – patchmgr.stdout

2020-04-09 16:59:56 +0300        :INFO   :  – patchmgr.stderr

2020-04-09 16:59:56 +0300        :INFO   :  – patchmgr.log

2020-04-09 16:59:56 +0300        :INFO   :  – patchmgr.trc

2020-04-09 16:59:56 +0300        :INFO   : Exit status:0

2020-04-09 16:59:56 +0300        :INFO   : Exiting.


8. Execute the following command to perform prerequisite checks.

Note: During this step it will prompt you setup the SSH between oracle user and RoCE switch. Please enter the admin user password of RoCE switch.


[oracle@dm01dbadm01 patch_switch_19.3.6.0.0.200317]$ ./patchmgr –roceswitches ~/roce_list –upgrade –roceswitch-precheck –log_dir /u01/stage/ROCE


[NOTE     ] Password equivalency is NOT setup for user ‘oracle’ to dm01sw-rocea01 from ‘dm01dbadm01.netsoftmate.com’. Set it up? (y/n): y


enter switch ‘admin’ password:


checking if ‘dm01sw-rocea01’ is reachable… [OK]

setting up SSH equivalency for ‘oracle’ from dm01dbadm01.netsoftmate.com to ‘dm01sw-rocea01’… [OK]


[NOTE     ] Password equivalency is NOT setup for user ‘oracle’ to dm01sw-roceb01 from ‘dm01dbadm01.netsoftmate.com’. Set it up? (y/n): y


enter switch ‘admin’ password:


checking if ‘dm01sw-roceb01’ is reachable… [OK]

setting up SSH equivalency for ‘oracle’ from dm01dbadm01.netsoftmate.com to ‘dm01sw-roceb01’… [OK]

2020-04-09 16:47:46 +0300        :Working: Initiate pre-upgrade validation check on 2 RoCE switch(es).


2020-04-09 16:47:47 +0300 1 of 2 :Updating switch dm01sw-rocea01


2020-04-09 16:47:49 +0300:        [INFO     ] Switch dm01sw-rocea01 will be upgraded from nxos.7.0.3.I7.6.bin to nxos.7.0.3.I7.7.bin

2020-04-09 16:47:49 +0300:        [INFO     ] Checking for free disk space on switch

2020-04-09 16:47:50 +0300:        [INFO     ] disk is 96.00% free,  available: 112371744768 bytes

2020-04-09 16:47:50 +0300:        [SUCCESS  ] There is enough disk space to proceed

2020-04-09 16:47:52 +0300:        [INFO     ] Copying nxos.7.0.3.I7.7.bin onto dm01sw-rocea01 (eta: 1-5 minutes)

2020-04-09 16:50:40 +0300:        [SUCCESS  ] Finished copying image to switch

2020-04-09 16:50:40 +0300:        [INFO     ] Verifying sha256sum of bin file on switch

2020-04-09 16:50:54 +0300:        [SUCCESS  ] sha256sum matches: dce664f1a90927e9dbd86419681d138d3a7a83c5ea7222718c3f6565488ac6d0

2020-04-09 16:50:54 +0300:        [INFO     ] Performing FW install pre-check of nxos.7.0.3.I7.7.bin (eta: 2-3 minutes)

2020-04-09 16:52:55 +0300:        [SUCCESS  ] FW install pre-check completed successfully


2020-04-09 16:52:55 +0300 2 of 2 :Updating switch dm01sw-roceb01


2020-04-09 16:58:26 +0300:        [INFO     ] Dumping current running config locally as file: /u01/stage/ROCE/run.dm01sw-roceb01.cfg

2020-04-09 16:58:27 +0300:        [SUCCESS  ] Backed up switch config successfully

2020-04-09 16:58:27 +0300:        [INFO     ] Validating running config against template [1/3]: /u01/stage/ROCE/patch_switch_19.3.6.0.0.200317/roce_switch_templates/roce_leaf_switch.cfg

2020-04-09 16:58:27 +0300:        [INFO     ] Config matches template: /u01/stage/ROCE/patch_switch_19.3.6.0.0.200317/roce_switch_templates/roce_leaf_switch.cfg

2020-04-09 16:58:27 +0300:        [SUCCESS  ] Config validation successful!


2020-04-09 16:58:27 +0300        :SUCCESS: Config check on RoCE switch(es)


2020-04-09 16:58:27 +0300        :SUCCESS: Initiate pre-upgrade validation check on RoCE switch(es).

2020-04-09 16:58:27 +0300        :SUCCESS: Completed run of command: ./patchmgr –roceswitches /home/oracle/roce_list –upgrade –roceswitch-precheck –log_dir /u01/stage/ROCE

2020-04-09 16:58:27 +0300        :INFO   : upgrade attempted on nodes in file /home/oracle/roce_list: [dm01sw-rocea01 dm01sw-roceb01]

2020-04-09 16:58:27 +0300        :INFO   : For details, check the following files in /u01/stage/ROCE:

2020-04-09 16:58:27 +0300        :INFO   :  – updateRoceSwitch.log

2020-04-09 16:58:27 +0300        :INFO   :  – updateRoceSwitch.trc

2020-04-09 16:58:27 +0300        :INFO   :  – patchmgr.stdout

2020-04-09 16:58:27 +0300        :INFO   :  – patchmgr.stderr

2020-04-09 16:58:27 +0300        :INFO   :  – patchmgr.log

2020-04-09 16:58:27 +0300        :INFO   :  – patchmgr.trc

2020-04-09 16:58:27 +0300        :INFO   : Exit status:0

  • 6:58:27 +0300 :INFO : Exiting.


9. Execute the following command to patch RoCE switches.


[oracle@dm01dbadm01 patch_switch_19.3.6.0.0.200317]$ ./patchmgr –roceswitches ~/roce_list –upgrade –log_dir /u01/stage/ROCE


[NOTE     ] Password equivalency is NOT setup for user ‘oracle’ to dm01sw-rocea01 from ‘dm01dbadm01.netsoftmate.com’. Set it up? (y/n): y


enter switch ‘admin’ password:


checking if ‘dm01sw-rocea01’ is reachable… [OK]

setting up SSH equivalency for ‘oracle’ from dm01dbadm01.netsoftmate.com to ‘dm01sw-rocea01’… [OK]


[NOTE     ] Password equivalency is NOT setup for user ‘oracle’ to dm01sw-roceb01 from ‘dm01dbadm01.netsoftmate.com’. Set it up? (y/n): y


enter switch ‘admin’ password:


checking if ‘dm01sw-roceb01’ is reachable… [OK]

setting up SSH equivalency for ‘oracle’ from dm01dbadm01.netsoftmate.com to ‘dm01sw-roceb01’… [OK]

2020-04-09 17:02:26 +0300        :Working: Initiate upgrade of 2 RoCE switches to 7.0(3)I7(7) Expect up to 15 minutes for each switch


2020-04-09 17:02:26 +0300 1 of 2 :Updating switch dm01sw-rocea01


2020-04-09 17:02:28 +0300:        [INFO     ] Switch dm01sw-rocea01 will be upgraded from nxos.7.0.3.I7.6.bin to nxos.7.0.3.I7.7.bin

2020-04-09 17:02:28 +0300:        [INFO     ] Checking for free disk space on switch

2020-04-09 17:02:28 +0300:        [INFO     ] disk is 95.00% free,  available: 111395401728 bytes

2020-04-09 17:02:28 +0300:        [SUCCESS  ] There is enough disk space to proceed

2020-04-09 17:02:29 +0300:        [INFO     ] Found  nxos.7.0.3.I7.7.bin on switch, skipping download

2020-04-09 17:02:29 +0300:        [INFO     ] Verifying sha256sum of bin file on switch

2020-04-09 17:02:43 +0300:        [SUCCESS  ] sha256sum matches: dce664f1a90927e9dbd86419681d138d3a7a83c5ea7222718c3f6565488ac6d0

2020-04-09 17:02:43 +0300:        [INFO     ] Performing FW install pre-check of nxos.7.0.3.I7.7.bin (eta: 2-3 minutes)

2020-04-09 17:04:44 +0300:        [SUCCESS  ] FW install pre-check completed successfully

2020-04-09 17:04:44 +0300:        [INFO     ] Performing FW install of nxos.7.0.3.I7.7.bin on dm01sw-rocea01 (eta: 3-7 minutes)

2020-04-09 17:09:51 +0300:        [SUCCESS  ] FW install completed

2020-04-09 17:09:51 +0300:        [INFO     ] Waiting for switch to come back online (eta: 6-8 minutes)

2020-04-09 17:17:51 +0300:        [INFO     ] Verifying if FW install is successful

2020-04-09 17:17:53 +0300:        [SUCCESS  ] dm01sw-rocea01 has been successfully  upgraded to nxos.7.0.3.I7.7.bin!


2020-04-09 17:17:53 +0300 2 of 2 :Updating switch dm01sw-roceb01


2020-04-09 17:17:56 +0300:        [INFO     ] Switch dm01sw-roceb01 will be upgraded from nxos.7.0.3.I7.6.bin to nxos.7.0.3.I7.7.bin

2020-04-09 17:17:56 +0300:        [INFO     ] Checking for free disk space on switch

2020-04-09 17:17:57 +0300:        [INFO     ] disk is 95.00% free,  available: 111542112256 bytes

2020-04-09 17:17:57 +0300:        [SUCCESS  ] There is enough disk space to proceed

2020-04-09 17:17:58 +0300:        [INFO     ] Found  nxos.7.0.3.I7.7.bin on switch, skipping download

2020-04-09 17:17:58 +0300:        [INFO     ] Verifying sha256sum of bin file on switch

2020-04-09 17:18:12 +0300:        [SUCCESS  ] sha256sum matches: dce664f1a90927e9dbd86419681d138d3a7a83c5ea7222718c3f6565488ac6d0

2020-04-09 17:18:12 +0300:        [INFO     ] Performing FW install pre-check of nxos.7.0.3.I7.7.bin (eta: 2-3 minutes)

2020-04-09 17:20:12 +0300:        [SUCCESS  ] FW install pre-check completed successfully

2020-04-09 17:20:12 +0300:        [INFO     ] Checking if previous switch dm01sw-rocea01 is fully up before proceeding (attempt 1 of 3)

2020-04-09 17:20:13 +0300:        [SUCCESS  ] dm01sw-rocea01 switch is fully up and running

2020-04-09 17:20:13 +0300:        [INFO     ] Performing FW install of nxos.7.0.3.I7.7.bin on dm01sw-roceb01 (eta: 3-7 minutes)

2020-04-09 17:23:20 +0300:        [SUCCESS  ] FW install completed

2020-04-09 17:23:20 +0300:        [INFO     ] Waiting for switch to come back online (eta: 6-8 minutes)

2020-04-09 17:31:20 +0300:        [INFO     ] Verifying if FW install is successful

2020-04-09 17:31:22 +0300:        [SUCCESS  ] dm01sw-roceb01 has been successfully  upgraded to nxos.7.0.3.I7.7.bin!

2020-04-09 17:31:22 +0300        :Working: Initiate config verify on RoCE switches from . Expect up to 6 minutes for each switch


2020-04-09 17:31:25 +0300 1 of 2 :Verifying config on switch dm01sw-rocea01


2020-04-09 17:31:25 +0300:        [INFO     ] Dumping current running config locally as file: /u01/stage/ROCE/run.dm01sw-rocea01.cfg

2020-04-09 17:31:26 +0300:        [SUCCESS  ] Backed up switch config successfully

2020-04-09 17:31:26 +0300:        [INFO     ] Validating running config against template [1/3]: /u01/stage/ROCE/patch_switch_19.3.6.0.0.200317/roce_switch_templates/roce_leaf_switch.cfg

2020-04-09 17:31:26 +0300:        [INFO     ] Config matches template: /u01/stage/ROCE/patch_switch_19.3.6.0.0.200317/roce_switch_templates/roce_leaf_switch.cfg

2020-04-09 17:31:26 +0300:        [SUCCESS  ] Config validation successful!


2020-04-09 17:31:26 +0300 2 of 2 :Verifying config on switch dm01sw-roceb01


2020-04-09 17:31:26 +0300:        [INFO     ] Dumping current running config locally as file: /u01/stage/ROCE/run.dm01sw-roceb01.cfg

2020-04-09 17:31:27 +0300:        [SUCCESS  ] Backed up switch config successfully

2020-04-09 17:31:27 +0300:        [INFO     ] Validating running config against template [1/3]: /u01/stage/ROCE/patch_switch_19.3.6.0.0.200317/roce_switch_templates/roce_leaf_switch.cfg

2020-04-09 17:31:27 +0300:        [INFO     ] Config matches template: /u01/stage/ROCE/patch_switch_19.3.6.0.0.200317/roce_switch_templates/roce_leaf_switch.cfg

2020-04-09 17:31:27 +0300:        [SUCCESS  ] Config validation successful!


2020-04-09 17:31:27 +0300        :SUCCESS: Config check on RoCE switch(es)


2020-04-09 17:31:27 +0300        :SUCCESS: upgrade 2 RoCE switch(es) to 7.0(3)I7(7)

2020-04-09 17:31:27 +0300        :SUCCESS: Completed run of command: ./patchmgr –roceswitches /home/oracle/roce_list –upgrade –log_dir /u01/stage/ROCE

2020-04-09 17:31:27 +0300        :INFO   : upgrade attempted on nodes in file /home/oracle/roce_list: [dm01sw-rocea01 dm01sw-roceb01]

2020-04-09 17:31:27 +0300        :INFO   : For details, check the following files in /u01/stage/ROCE:

2020-04-09 17:31:27 +0300        :INFO   :  – updateRoceSwitch.log

2020-04-09 17:31:27 +0300        :INFO   :  – updateRoceSwitch.trc

2020-04-09 17:31:27 +0300        :INFO   :  – patchmgr.stdout

2020-04-09 17:31:27 +0300        :INFO   :  – patchmgr.stderr

2020-04-09 17:31:27 +0300        :INFO   :  – patchmgr.log

2020-04-09 17:31:27 +0300        :INFO   :  – patchmgr.trc

2020-04-09 17:31:27 +0300        :INFO   : Exit status:0

2020-04-09 17:31:27 +0300        :INFO   : Exiting.


10. Verify the new patch version on both RoCE switches

[oracle@dm01dbadm01 patch_switch_19.3.6.0.0.200317]$  ssh admin@dm01sw-rocea01 show version

The authenticity of host ‘dm01sw-rocea01 (dm01sw-rocea01)’ can’t be established.

RSA key fingerprint is SHA256:N3/OT3xe4A8xi1zd+bkTfDyqE6yibk2zVlhXHvCk/Jk.

RSA key fingerprint is MD5:c4:1f:ef:f5:f5:ab:f1:29:c0:de:42:19:0e:f3:14:8c.

Are you sure you want to continue connecting (yes/no)? yes

Warning: Permanently added ‘dm01sw-rocea01’ (RSA) to the list of known hosts.

User Access Verification

Password:

Cisco Nexus Operating System (NX-OS) Software

TAC support: http://www.cisco.com/tac

Copyright (C) 2002-2019, Cisco and/or its affiliates.

All rights reserved.

The copyrights to certain works contained in this software are

owned by other third parties and used and distributed under their own

licenses, such as open source.  This software is provided “as is,” and unless

otherwise stated, there is no warranty, express or implied, including but not

limited to warranties of merchantability and fitness for a particular purpose.

Certain components of this software are licensed under

the GNU General Public License (GPL) version 2.0 or

GNU General Public License (GPL) version 3.0  or the GNU

Lesser General Public License (LGPL) Version 2.1 or

Lesser General Public License (LGPL) Version 2.0.

A copy of each such license is available at

http://www.opensource.org/licenses/gpl-2.0.php and

http://opensource.org/licenses/gpl-3.0.html and

http://www.opensource.org/licenses/lgpl-2.1.php and

http://www.gnu.org/licenses/old-licenses/library.txt.


Software

  BIOS: version 05.39

  NXOS: version 7.0(3)I7(7)

  BIOS compile time:  08/30/2019

  NXOS image file is: bootflash:///nxos.7.0.3.I7.7.bin

  NXOS compile time:  3/5/2019 13:00:00 [03/05/2019 22:04:55]


Hardware

  cisco Nexus9000 C9336C-FX2 Chassis

  Intel(R) Xeon(R) CPU D-1526 @ 1.80GHz with 24571632 kB of memory.

  Processor Board ID FDO23380VQS


  Device name: dm01sw-rocea01

  bootflash:  115805708 kB

Kernel uptime is 8 day(s), 5 hour(s), 1 minute(s), 41 second(s)


Last reset at 145297 usecs after Wed Apr  1 09:29:43 2020

  Reason: Reset Requested by CLI command reload

  System version: 7.0(3)I7(7)

  Service:


plugin

  Core Plugin, Ethernet Plugin


Active Package(s):


[oracle@dm01dbadm01 patch_switch_19.3.6.0.0.200317]$ ssh admin@dm01sw-rocea01 show version | grep “System version:”

User Access Verification

Password:

  System version: 7.0(3)I7(7)


Conclusion


In this article we have learned how to patch an Exadata X8M RoCE switches. Oracle continues to use the patchmgr utility to patch the Exadata RoCE switch to simplify the process. The Exadata X8M 100 Gb/sec RoCE network fabric, making the world’s fastest database machine even faster.


About Netsoftmate: 

Netsoftmate is an Oracle Gold Partner and a boutique IT services company specializing in installation, implementation and 24/7 support for Oracle Engineered Systems like Oracle Exadata, Oracle Database Appliance, Oracle ZDLRA, Oracle ZFS Storage and Oracle Private Cloud Appliance. Apart from OES, we have specialized teams of  experts providing round the clock remote database administration support for any type of database and cyber security compliance and auditing services.


Feel free to get in touch with us by signing up on the link below – 

Priority Suport for Oracle Engineered Systems | Netsoftmate
4

Database Management Services, Oracle Database Appliance - ODA, Oracle Database Management Solution, Oracle Databases, Remote Database Management, Technology Consulting Services

September 2019 Oracle announced Oracle Database Appliance X8-2 (Small, Medium and HA). ODA X8-2 comes with more computing resources compared with X7-2 Models.

Let’s take a quick look at few benefits of ODA followed by the technical specification on ODA X8-2 Small/Medium and HA.

Oracle Database Appliance is an Engineered System. Software, server, storage, and networking, all co-engineered and optimized to run Oracle Database and applications.


Benefits of Oracle Database Appliance (ODA):

  1. Software, server, storage, and networking engineered and optimized to run Oracle Database and applications.

  2. Supports Oracle Database Standard Edition, Standard Edition One, Standard Edition 2, and Enterprise Edition. Optimized for Cloud.

  3. Capacity on Demand Licensing – Reduced Cost.

  4. Ease of deployment, patching, management, and support.

  5. Increased performance and reliability with NVMe flash storage.

  6. Reliable hardware architecture with redundant power, cooling, networking, and storage.

  7. Browser User Interface (BUI)


In this article we will compare the technical specifications of ODA X8-2 model family (Small, Medium and HA). This comparison table comes handy when you want to quickly take a look at the resources available for a given model.


For more information on the technical specification loot at the ODA X8-2 HA and Small/Medium Data Sheet at:

https://www.oracle.com/technetwork/database/database-appliance/oda-x8-2-ha-datasheet-5730739.pdf

https://www.oracle.com/technetwork/database/database-appliance/oda-x8-2sm-datasheet-5730738.pdf


Component

ODA X8-2 Small

ODA X8-2 Medium

ODA X8-2 HA


Database Server

1

1

2

Storage Shelf

NA

NA

1 4U DE3-24C Storage Shelf per System

Optional Second Storage Shelf for Expansion

Rack Size

1 2RU Server

1 2RU Server

2 2RU Servers & 1 4U Storage Shelf

Processor

One 16-core Intel Xeon Gold 5218

Two 16-core Intel Xeon Gold 5218

Two 16-core Intel Xeon Gold 5218 Per Server

Physical Memory

192 GB

Expandable to 384 GB

384 GB

Expandable to 768 GB

384 GB

Expandable to 768 GB per server

Storage

Two 6.4 TB NVMe SSDs

12.8 TB (raw)

Base: Two 6.4 TB NVMe SSDs

12.8 TB (raw)

Base: Six 7.68 TB SSDs

46 TB (raw)

Storage Expansion

Not expandable

Expandable up to 76.8 TB (raw)

Expandable up to 369 TB SSD or up to 92 TB SSD / 504 TB HDD (Raw)

Network

4 x 10GBase-T ports (RJ45) expandable up to 12 x 10GBase-T ports or

2 x 10/25 GbE ports (SFP28) expandable up to 6 x 10/25 GbE ports

4 x 10GBase-T ports (RJ45) expandable up to 12 x 10GBase-T ports or

2 x 10/25 GbE ports (SFP28) expandable up to 6 x 10/25 GbE ports

4 x 10GBase-T ports (RJ45) expandable up to 12 x 10GBase-T ports or

2 x 10/25 GbE ports (SFP28) expandable up to 6 x 10/25 GbE ports

Oracle Database

Oracle Database 18c/19c EE & SE 2

Oracle Database 12c R1/R2 EE & SE 2

Oracle Database 11g R2 EE, SE & SE 1

Oracle Database 18c/19c EE & SE 2

Oracle Database 12c R1/R2 EE & SE 2

Oracle Database 11g R2 EE, SE & SE 1

Oracle Database 18c/19c EE & SE 2

Oracle Database 12c R1/R2 EE & SE 2

Oracle Database 11g R2 EE, SE & SE 1

Database Deployment

Single Instance

Single Instance

Single Instance, RAC & RAC One node

Virtualization

Oracle Linux KVM

Oracle Linux KVM

Oracle VM & Oracle Linux KVM

Operating System

Oracle Linux

Oracle Linux

Oracle Linux


Are you and your team considering setting up Oracle Database Appliance? Let Netsoftmate help you choose the right product keeping under consideration your budget, requirement and usage forecasting. Click on the image below to sign-up NOW!


0

Database Management Services, Oracle Database Appliance - ODA, Oracle Database Management Solution, Oracle Databases, Remote Database Management, Technology Consulting Services
In September 2019, Oracle announced Oracle Database Appliance X8-2 (Small, Medium and HA). ODA X8-2 comes with more computing resources compared with X7-2 Models.


Let’s take a quick look at few benefits of ODA followed by the technical specification on ODA X8-2 Small/Medium and HA.


Oracle Database Appliance is an Engineered System. Software, server, storage, and networking, all co-engineered and optimized to run Oracle Database and applications.


Benefits of Oracle Database Appliance (ODA):

  1. Software, server, storage, and networking engineered and optimized to run Oracle Database and applications.
  2. Supports Oracle Database Standard Edition, Standard Edition One, Standard Edition 2, and Enterprise Edition.
  3. Optimized for Cloud
  4. Capacity on Demand Licensing – Reduced Cost
  5. Ease of deployment, patching, management, and support
  6. Increased performance and reliability with NVMe flash storage
  7. Reliable hardware architecture with redundant power, cooling, networking, and storage
  8. Browser User Interface (BUI)


Oracle Database Appliance X8-2 HA Benefits & Technical specification


  1. Support mission-critical applications and consolidation of many databases
  2. Built for high availability
  3. Choice of high-performance flash or high-capacity drives
  4. 32 cores per server (64 cores in total for 2 servers)
  5. 384 GB physical memory per server expandable upto 768 (1.5 TB memory in total for 2 servers)
  6. Storage Shelf
  7. High Capacity: 46 TB SSD and 252 TB SDD raw capacity per shelf
  8. High Performance: 184 TB SSD raw capacity per shelf
  9. Choice of 10GBase-T or 10/25 GbE SFP28 public networking
  10. 25GbE interconnect for cluster communication


For more information on the technical specification loot at the ODA X8-2 HA Data Sheet at:
https://www.oracle.com/technetwork/database/database-appliance/oda-x8-2-ha-datasheet-5730739.pdf


  • Oracle Database Appliance X8-2 Small Technical specification

  1. One server
  2. 1 Intel Xeon processor, 16 Cores
  3. 192GB Physical memory expandable upto 384GB
  4. Choice of 10GBase-T or 10/25 GbE SFP28 public networking
  5. 12.8TB NVMe raw storage


Oracle Database Appliance X8-2 Medium Technical specification

  1. One server
  2. 2 Intel Xeon processor, 32 Cores
  3. 384 GB Physical memory expandable upto 768GB
  4. Choice of 10GBase-T or 10/25 GbE SFP28 public networking
  5. 12.8 TB NVMe raw storage capacity with optional expansion to 76.8 TB NVMe raw storage


For more information on the technical specification loot at the ODA X8-2 S/M Data Sheet at:
https://www.oracle.com/technetwork/database/database-appliance/oda-x8-2sm-datasheet-5730738.pdf


Conclusion


In this article we seen the benefits and the technical specification of latest Oracle Database Appliance X8 model family. ODA is the right choice for all type of Businesses as an on-premises solution and cloud ready option.


Are you and your team considering setting up Oracle Database Appliance? Let Netsoftmate help you choose the right product keeping under consideration your budget, requirement and usage forecasting. Click on the image below to sign-up NOW!


0

Database Management Services, Oracle Databases, Oracle Exadata
In this article we will demonstrate quick steps to deploy Exadata Database Machine in Oracle Cloud Infrastructure (OCI). 

Prerequisites:

  • Exadata Cloud Subscription
  • Credentials to Login Oracle Cloud
  • Access to Deploy Exadata in OCI
  • Compartment
  • VCN & Subnet

Steps to Deploy Exadata on OCI

  • Open a browser and enter the URL you have received from Oracle to connect to the Oracle Cloud
  •  

  • Enter your Oracle Cloud credentials
  •  

  • Click on “Create Instance”
  •  

  • Click on “All Services” and search for Exadata keyword. Click on Create.
  •  

  • Select your “Compartment” on left and Click on “Launch DB System”
  •  

  • Enter the details as per your requirement and the Exadata subscription procured
  •  


  • Browse and upload the public key
  •  

  • Choose your desired storage allocation and timezone
  •  

  • Fill in the required VCN and Subnet details. Work with your network engineer to gather the correct details on VCN and Subnet created for your environment
  •  

  • Fill the database details, name, version, CDB and Password
  •  

  • Select the Workload type and database character set for your database
  •  

  • Optionally specify the TAG Key and click “Launch DB System” to deploy Exadata DBM
  •  


Conclusion

In this article we have learned how to deploy an Exadata Database Machine in Oracle Cloud Infrastructure (OCI).


Expert Support for Oracle Exadata | Netsoftmate


1

Oracle Transparent Data Encryption (TDE) enables the organizations to encrypt sensitive application data on storage media completely transparent to the application. TDE protects the data at rest. TDE encrypts the data in the datafiles so that in case they are obtained by hacker or theft it will not be possible to access the clear text data. In the databases where TDE is configured any user who has access on an encrypted table will be able to see the data in clear text because Oracle will transparently decrypt the data for any user having the necessary privileges. Oracle TDE is available by default in Oracle RDBMS Enteprise Edition. To be able to use this it is necessary to purchase an Oracle Advanced Security license.


In this article we will demonstrate how to implement TDE on Exadata Database Machine to protect sensitive data. Here we are setting up TDE for multiple database running on the same cluster. However same steps are valid for one single database as well.


Steps to configure or implement TDE


Step 1: Create Directories and Grant File Permissions

# dcli -g ~/dbs_group -l root mkdir -p /etc/oracle/wallets/

#dcli -g ~/dbs_group -l root -s “-q” ‘ls -l /etc/oracle/wallets’

#dcli -g ~/dbs_group -l root ‘cd /etc/oracle/wallets;ls -l’

#dcli -g ~/dbs_group -l root ‘cd /etc;chown -R oracle:oinstall oracle’

#dcli -g ~/dbs_group -l root ‘cd /etc;chmod -R 700 oracle’

#dcli -g ~/dbs_group -l oracle ‘cd /etc/oracle/wallets;mkdir orcldb’

#dcli -g ~/dbs_group -l oracle ‘cd /etc/oracle/wallets;mkdir nsmdb’


Step 2: Set the ENCRYPTION_WALLET_LOCATION parameter in sqlnet.ora to the newly created directory.

– backup the sqlnet.ora file on all the nodes

$ dcli -g ~/dbs_group -l oracle ‘cd /u01/app/oracle/product/11.2.0.4/dbhome_1/network/admin;cp sqlnet.ora sqlnet.ora_bkp’

$ dcli -g ~/dbs_group -l oracle ‘cd /u01/app/oracle/product/11.2.0.4/dbhome_1/network/admin;ls -l sqlnet.ora*’

– Update the sqlnet.ora on node 1 add the below line to the sqlnet.ora file

$ cd /u01/app/oracle/product/11.2.0.4/dbhome_1/network/admin
$ vi sqlnet.ora

ENCRYPTION_WALLET_LOCATION = (SOURCE = (METHOD = FILE) (METHOD_DATA = (DIRECTORY = /etc/oracle/wallets/$ORACLE_UNQNAME/)))


Step 3: Copy sqlnet.ora to all the nodes from node 1

dm01db01-nsmdb1 {/home/oracle}:scp sqlnet.ora oracle@dm01db02:/u01/app/oracle/product/11.2.0.4/dbhome_1/network/admin/

dm01db01-nsmdb1 {/home/oracle}:dcli -g ~/dbs_group -l oracle ‘cd /u01/app/oracle/product/11.2.0.4/dbhome_1/network/admin;ls -l sqlnet.ora’

– Verify the contents of sqlnet.ora on all the nodes:

dm01db01-nsmdb1 {/home/oracle}:dcli -g ~/dbs_group -l oracle ‘cd /u01/app/oracle/product/11.2.0.4/dbhome_1/network/admin;cat sqlnet.ora’


Step 4: Initialize the wallet and add the master encryption key using the SQL*Plus command line interface:

 **************************VERY VERY IMPORTANT **************************

AT THE OS PROMPT SET THE ENVIRONMENT VARIABLE export ORACLE_UNQNAME=orcldb

dm01db01-nsmdb1 {/home/oracle}:export ORACLE_UNQNAME=orcldb

dm01db01-nsmdb1 {/home/oracle}: sqlplus / as sysdba

SQL> col WRL_PARAMETER for a60
SQL> set lines 200
SQL> select * from gv$encryption_wallet order by 1;

   INST_ID WRL_TYPE             WRL_PARAMETER                                                STATUS
———- ——————– ———————————————————— ——————
         1 file                 /etc/oracle/wallets/$ORACLE_UNQNAME/                         CLOSED
         2 file                 /etc/oracle/wallets/$ORACLE_UNQNAME/                         CLOSED
         3 file                 /etc/oracle/wallets/$ORACLE_UNQNAME/                         CLOSED
         4 file                 /etc/oracle/wallets/$ORACLE_UNQNAME/                         CLOSED
         5 file                 /etc/oracle/wallets/$ORACLE_UNQNAME/                         CLOSED
         6 file                 /etc/oracle/wallets/$ORACLE_UNQNAME/                         CLOSED
         7 file                 /etc/oracle/wallets/$ORACLE_UNQNAME/                         CLOSED
         8 file                 /etc/oracle/wallets/$ORACLE_UNQNAME/                         CLOSED

8 rows selected.

SQL> alter system set encryption key identified by “welcom1”;

System altered.

SQL> select * from gv$encryption_wallet order by 1;

   INST_ID WRL_TYPE             WRL_PARAMETER                                                STATUS
———- ——————– ———————————————————— ——————
         1 file                 /etc/oracle/wallets/$ORACLE_UNQNAME/                         OPEN
         2 file                 /etc/oracle/wallets/$ORACLE_UNQNAME/                         CLOSED
         3 file                 /etc/oracle/wallets/$ORACLE_UNQNAME/                         CLOSED
         4 file                 /etc/oracle/wallets/$ORACLE_UNQNAME/                         CLOSED
         5 file                 /etc/oracle/wallets/$ORACLE_UNQNAME/                         CLOSED
         6 file                 /etc/oracle/wallets/$ORACLE_UNQNAME/                         CLOSED
         7 file                 /etc/oracle/wallets/$ORACLE_UNQNAME/                         CLOSED
         8 file                 /etc/oracle/wallets/$ORACLE_UNQNAME/                         CLOSED


Step 5: Copy the wallet file ewallet.p12 to all the nodes:

dm01db01-orcldb1 {/home/oracle}:cd /etc/oracle/wallets/orcldb/

dm01db01-orcldb1 {/etc/oracle/wallets/orcldb}:ls -ltr
total 8
-rw——- 1 oracle oinstall 1837 Feb 22 08:28 ewallet.p12_20130226
-rw-r–r– 1 oracle oinstall 1309 Feb 26 05:14 ewallet.p12

dm01db01-orcldb1 {/etc/oracle/wallets/orcldb}:scp ewallet.p12 oracle@dm01db02:/etc/oracle/wallets/orcldb/
ewallet.p12                                                 100% 1309     1.3KB/s   00:00


Step 6: verify at the wallet is opened on all the nodes. This is the default behavior after you copy the wallet file to all the nodes

dm01db01-nsmdb1 {/home/oracle}: sqlplus / as sysdba

SQL> col WRL_PARAMETER for a60
SQL> set lines 200
SQL> select * from gv$encryption_wallet order by 1;

   INST_ID WRL_TYPE             WRL_PARAMETER                                                STATUS
———- ——————– ———————————————————— ——————
         1 file                 /etc/oracle/wallets/$ORACLE_UNQNAME/                         OPEN
         2 file                 /etc/oracle/wallets/$ORACLE_UNQNAME/                         OPEN
         3 file                 /etc/oracle/wallets/$ORACLE_UNQNAME/                         OPEN
         4 file                 /etc/oracle/wallets/$ORACLE_UNQNAME/                         OPEN
         5 file                 /etc/oracle/wallets/$ORACLE_UNQNAME/                         OPEN
         6 file                 /etc/oracle/wallets/$ORACLE_UNQNAME/                         OPEN
         7 file                 /etc/oracle/wallets/$ORACLE_UNQNAME/                         OPEN
         8 file                 /etc/oracle/wallets/$ORACLE_UNQNAME/                         OPEN

8 rows selected.


– IF FOR SOME REASON IF THE WALLET IS NOT OPENED, FOLLOW THE BELOW STEPS

A) set the variable
export ORACLE_UNQNAME=orcldb

B) login to the database
sqlplus / as sysdba

c) open the wallet
ALTER SYSTEM SET WALLET OPEN IDENTIFIED BY “welcome1”;

D) Repeat the A,B and C for all the instances in the cluster.


Step 7: Whenever you bounce the database you must open the wallet manually as follows:

dm01db02-orcldb2 {/home/oracle}:srvctl stop database -d orcldb
dm01db01-orcldb1 {/home/oracle}:srvctl start database -d orcldb

dm01db01-orcldb1 {/home/oracle}:export ORACLE_UNQNAME=orcldb
dm01db01-orcldb1 {/home/oracle}:sqlplus / as sysdba

SQL*Plus: Release 11.2.0.4.0 Production on Tue Feb 26 05:23:02 2013

Copyright (c) 1982, 2011, Oracle.  All rights reserved.

Connected to:
Oracle Database 11g Enterprise Edition Release 11.2.0.4.0 – 64bit Production
With the Partitioning, Real Application Clusters, Automatic Storage Management, OLAP,
Data Mining and Real Application Testing options

SQL> select name,open_mode,database_role from gv$database;

NAME      OPEN_MODE            DATABASE_ROLE
——— ——————– —————-
orcldb   READ WRITE           PRIMARY

8 rows selected.

SQL> col WRL_PARAMETER for a60
SQL> set lines 200
SQL> select * from gv$encryption_wallet order by 1;

   INST_ID WRL_TYPE             WRL_PARAMETER                                                STATUS
———- ——————– ———————————————————— ——————
         1 file                 /etc/oracle/wallets/$ORACLE_UNQNAME/                         CLOSED
         2 file                 /etc/oracle/wallets/$ORACLE_UNQNAME/                         CLOSED
         3 file                 /etc/oracle/wallets/$ORACLE_UNQNAME/                         CLOSED
         4 file                 /etc/oracle/wallets/$ORACLE_UNQNAME/                         CLOSED
         5 file                 /etc/oracle/wallets/$ORACLE_UNQNAME/                         CLOSED
         6 file                 /etc/oracle/wallets/$ORACLE_UNQNAME/                         CLOSED
         7 file                 /etc/oracle/wallets/$ORACLE_UNQNAME/                         CLOSED
         8 file                 /etc/oracle/wallets/$ORACLE_UNQNAME/                         CLOSED

8 rows selected.


SQL> ALTER SYSTEM SET WALLET OPEN IDENTIFIED BY “welcome1”;

System altered.

SQL> select * from gv$encryption_wallet order by 1;

   INST_ID WRL_TYPE             WRL_PARAMETER                                                STATUS
———- ——————– ———————————————————— ——————
         1 file                 /etc/oracle/wallets/$ORACLE_UNQNAME/                         OPEN
         2 file                 /etc/oracle/wallets/$ORACLE_UNQNAME/                         OPEN
         3 file                 /etc/oracle/wallets/$ORACLE_UNQNAME/                         OPEN
         4 file                 /etc/oracle/wallets/$ORACLE_UNQNAME/                         OPEN
         5 file                 /etc/oracle/wallets/$ORACLE_UNQNAME/                         OPEN
         6 file                 /etc/oracle/wallets/$ORACLE_UNQNAME/                         OPEN
         7 file                 /etc/oracle/wallets/$ORACLE_UNQNAME/                         OPEN
         8 file                 /etc/oracle/wallets/$ORACLE_UNQNAME/                         OPEN

8 rows selected.


Step 8:  Making the wallet Auto-Login. If you have a auto-login wallet you don’t need to open the wallet after a database bounce. This is done automatic for you.

dm01db01-orcldb1 {/home/oracle} export ORACLE_UNQNAME=orcldb
   
dm01db01-orcldb1 {/home/oracle}:ls -l /etc/oracle/wallets/$ORACLE_UNQNAME
total 8
-rw-r–r– 1 oracle oinstall 1309 Feb 26 05:14 ewallet.p12

dm01db01-orcldb1 {/home/oracle}:orapki wallet create -wallet /etc/oracle/wallets/$ORACLE_UNQNAME -auto_login
Oracle PKI Tool : Version 11.2.0.4.0 – Production
Copyright (c) 2004, 2011, Oracle and/or its affiliates. All rights reserved.

Enter wallet password:

dm01db01-orcldb1 {/home/oracle}:ls -l /etc/oracle/wallets/$ORACLE_UNQNAME
total 12
-rw——- 1 oracle oinstall 1387 Feb 26 05:26 cwallet.sso
-rw-r–r– 1 oracle oinstall 1309 Feb 26 05:14 ewallet.p12

dm01db01-orcldb1 {/home/oracle}:cd /etc/oracle/wallets/orcldb/
dm01db01-orcldb1 {/etc/oracle/wallets/orcldb}:ls -ltr
total 12
-rw-r–r– 1 oracle oinstall 1309 Feb 26 05:14 ewallet.p12
-rw——- 1 oracle oinstall 1387 Feb 26 05:26 cwallet.sso

– Copy the cwallet.sso to all the nodes:

dm01db01-orcldb1 {/etc/oracle/wallets/orcldb}:scp cwallet.sso oracle@dm01db02:/etc/oracle/wallets/orcldb/

cwallet.sso                                  100% 1387     1.4KB/s   00:00

dm01db01-orcldb1 {/etc/oracle/wallets/orcldb}:sqlplus / as sysdba

SQL*Plus: Release 11.2.0.4.0 Production on Tue Feb 26 05:28:26 2013

Copyright (c) 1982, 2011, Oracle.  All rights reserved.

Connected to:
Oracle Database 11g Enterprise Edition Release 11.2.0.4.0 – 64bit Production
With the Partitioning, Real Application Clusters, Automatic Storage Management, OLAP,
Data Mining and Real Application Testing options

SQL> col WRL_PARAMETER for a60
SQL> set lines 200
SQL> select * from gv$encryption_wallet order by 1;

   INST_ID WRL_TYPE             WRL_PARAMETER                                                STATUS
———- ——————– ———————————————————— ——————
         1 file                 /etc/oracle/wallets/$ORACLE_UNQNAME/                         OPEN
         2 file                 /etc/oracle/wallets/$ORACLE_UNQNAME/                         OPEN
         3 file                 /etc/oracle/wallets/$ORACLE_UNQNAME/                         OPEN
         4 file                 /etc/oracle/wallets/$ORACLE_UNQNAME/                         OPEN
         5 file                 /etc/oracle/wallets/$ORACLE_UNQNAME/                         OPEN
         6 file                 /etc/oracle/wallets/$ORACLE_UNQNAME/                         OPEN
         7 file                 /etc/oracle/wallets/$ORACLE_UNQNAME/                         OPEN
         8 file                 /etc/oracle/wallets/$ORACLE_UNQNAME/                         OPEN

8 rows selected.

SQL> exit
Disconnected from Oracle Database 11g Enterprise Edition Release 11.2.0.4.0 – 64bit Production
With the Partitioning, Real Application Clusters, Automatic Storage Management, OLAP,
Data Mining and Real Application Testing options

– Verify that the wallet is opened following a database bounce:

dm01db01-orcldb1 {/etc/oracle/wallets/orcldb}:srvctl stop database -d orcldb

dm01db01-orcldb1 {/etc/oracle/wallets/orcldb}:srvctl start database -d orcldb

dm01db01-orcldb1 {/etc/oracle/wallets/orcldb}:srvctl status database -d orcldb
Instance orcldb1 is running on node dm01db01
Instance orcldb2 is running on node dm01db02
Instance orcldb3 is running on node dm01db03
Instance orcldb4 is running on node dm01db04
Instance orcldb5 is running on node dm01db05
Instance orcldb6 is running on node dm01db06
Instance orcldb7 is running on node dm01db07
Instance orcldb8 is running on node dm01db08

dm01db01-orcldb1 {/etc/oracle/wallets/orcldb}:sqlplus / as sysdba

SQL*Plus: Release 11.2.0.4.0 Production on Tue Feb 26 05:32:19 2013

Copyright (c) 1982, 2011, Oracle.  All rights reserved.

Connected to:
Oracle Database 11g Enterprise Edition Release 11.2.0.4.0 – 64bit Production
With the Partitioning, Real Application Clusters, Automatic Storage Management, OLAP,
Data Mining and Real Application Testing options

SQL> col WRL_PARAMETER for a60
SQL> set lines 200
SQL> select * from gv$encryption_wallet order by 1;

   INST_ID WRL_TYPE             WRL_PARAMETER                                                STATUS
———- ——————– ———————————————————— ——————
         1 file                 /etc/oracle/wallets/$ORACLE_UNQNAME/                         OPEN
         2 file                 /etc/oracle/wallets/$ORACLE_UNQNAME/                         OPEN
         3 file                 /etc/oracle/wallets/$ORACLE_UNQNAME/                         OPEN
         4 file                 /etc/oracle/wallets/$ORACLE_UNQNAME/                         OPEN
         5 file                 /etc/oracle/wallets/$ORACLE_UNQNAME/                         OPEN
         6 file                 /etc/oracle/wallets/$ORACLE_UNQNAME/                         OPEN
         7 file                 /etc/oracle/wallets/$ORACLE_UNQNAME/                         OPEN
         8 file                 /etc/oracle/wallets/$ORACLE_UNQNAME/                         OPEN

8 rows selected.


############ REAPEAT THE SAME STEPS FOR ALL THE DATABASES #############


Testing Tablespace Encryption (TSE)

Step 1: Create an Encrypted tablespace and grant the users permissions on the tablespace

SQL> CREATE TABLESPACE enc_tbs DATAFILE ‘+DATA’ SIZE 1000M ENCRYPTION USING ‘AES256’ DEFAULT STORAGE(ENCRYPT);

Tablespace created.

SQL> select TABLESPACE_NAME, ENCRYPTED from dba_tablespaces where tablespace_name in (‘USERS’,’ENC_TBS’) order by 1;

TABLESPACE_NAME                ENC
—————————— —
ENC_TBS                        YES
USERS                          NO


SQL> select TABLESPACE_NAME, FILE_NAME from dba_data_files where TABLESPACE_NAME in (‘USERS’,’ENC_TBS’);

TABLESPACE_NAME FILE_NAME
—————————— ——————————
USERS +DATA/nsmdb/datafile/users.529.762113429
ENC_TBS +DATA/nsmdb/datafile/enc_tbs.540.804301513


SQL> alter user test quota unlimited on  ENC_TBS;

User altered.

SQL> alter user test quota unlimited on  USERS;

User altered.


Step 2: Create tables in encypted and non-encrypted tablespaces

SQL> create table test.nonenc(data varchar2(100)) tablespace users;

Table created.

SQL> insert into test.nonenc values (‘ABCDEFGHIJKLMNOPQRSTUVWZYZ’);

1 row created.

SQL> commit;

Commit complete.


SQL> create table test.encrypted(data varchar2(100)) tablespace enc_tbs;

Table created.

SQL> insert into test.encrypted values (‘ABCDEFGHIJKLMNOPQRSTUVWZYZ’);

1 row created.

SQL> commit;

Commit complete.

SQL> alter system checkpoint;

System altered.


Step 3: Verify that the data is encrypted

dm01db01-nsmdb1 {/u01/dba}:asm

dm01db01-+ASM1 {/u01/dba}:asmcmd -p
ASMCMD [+] > cd +DATA/NSMDB/DATA*
ASMCMD [+DATA/NSMDB/DATAFILE] > ls -l

ASMCMD [+DATA/NSMDB/DATAFILE] > cp USERS.529.762113429 /u01/dba/
copying +DATA/NSMDB/DATAFILE/USERS.529.762113429 -> /u01/dba//USERS.529.762113429

ASMCMD [+DATA/NSMDB/DATAFILE] > cp ENC_TBS.540.804301513 /u01/dba/
copying +DATA/NSMDB/DATAFILE/ENC_TBS.540.804301513 -> /u01/dba//ENC_TBS.540.804301513

dm01db01-+ASM1 {/u01/dba}:ls -ltr
-rw-r—– 1 oracle oinstall  703602688 Jan 10 01:30 USERS.529.762113429
-rw-r—– 1 oracle oinstall 1048584192 Jan 10 01:31 ENC_TBS.540.804301513


dm01db01-nsmdb1 {/u01/dba}:strings /u01/dba/USERS.529.762113429 | grep ABCD
89:;<=>?@ABCDEFGHIJKLMNOPQR|STUVWXYZ[]^_`abcdefghijklmnopqrstuvwxyz
ABCDEFGHIJKLMNOPQRSTUVWZYZ

dm01db01-nsmdb1 {/u01/dba}:strings /u01/dba/ENC_TBS.540.804301513 | grep ABCD

– From the above 2 string commands it is clear that the tablespace encryption is indeed working for us.


Conclusion

In this article we have learned how to encrypt sensitive data using Transparent Data Encryption (TDE). TDE protects the data at rest. In the databases where TDE is configured any user who has access on an encrypted table will be able to see the data in clear text because Oracle will transparently decrypt the data for any user having the necessary privileges.

0

In this article we will demonstrate how to flashback a database and recover the truncated table without loosing data. 

In other words we will be performing the following steps to recover a truncated table:

  • Simulate table truncate
  • Make note of the table truncate time
  • Flashback the database before truncate, 
  • Open the database in read only
  • Export the table using traditional export utility
  • Shutdown the database
  • Open the database with reset logs option
  • Import the table data
  • Verify the table data


Prerequisites

  • Database must in using Fast Recovery Area
  • Database must have flashback set to ON


Steps to perform flashback a database to recover the truncated table without loosing data:


Step 1: Connect to the database and make a note of the current time

SQL> alter session set nls_date_format=’dd/mm/yy hh24:mi:ss’;

Session altered.

SQL> set lines 200
SQL> select * from v$instance;

INSTANCE_NUMBER INSTANCE_NAME    HOST_NAME                                                        VERSION           STARTUP_TIME      STATUS          PARALLEL
————— —————- —————————————————————- —————– —————– ———————————————— ————
   THREAD# ARCHIVER                     LOG_SWITCH_WAIT                                              LOGINS                                   SHUTDOWN_PEN
———- —————————- ———————————————————— —————————————- ————
DATABASE_STATUS                                                      INSTANCE_ROLE                                                            ACTIVE_STATE                         BLOCKED
——————————————————————– ———————————————————————— ———————————— ————
              1 orcldb1         racnode1                                                          11.2.0.4.0        30/11/17 07:33:10 OPEN            NO
         1 STARTED                                                                                   ALLOWED                                  NO
ACTIVE                                                               PRIMARY_INSTANCE                                                         NORMAL                               NO


SQL> select sysdate from dual;

SYSDATE
—————–
30/11/17 07:34:30


Step 2: Identify a table for testing

SQL> create table SCOTT.SALES as select * from SCOTT.WAIVER;

Table created.

SQL> select sysdate from dual;

SYSDATE
—————–
30/11/17 07:35:07

SQL> select count(*) from SCOTT.SALES;

  COUNT(*)
———-
     35268


Step 3: Truncate the table

SQL> select sysdate from dual;

SYSDATE
—————–
30/11/17 07:36:20

SQL> truncate table SCOTT.SALES;

Table truncated.

SQL> select count(*) from SCOTT.SALES;

  COUNT(*)
———-
         0


Step 4: Shutdown the database and start it in mount state

racnode1-orcldb1 {/home/oracle}: srvctl status database -d orcldb
Instance orcldb1 is running on node racnode1
Instance orcldb2 is running on node racnode2

racnode1-orcldb1 {/home/oracle}: srvctl stop database -d orcldb

racnode1-orcldb1 {/home/oracle}: srvctl status database -d orcldb
Instance orcldb1 is not running on node racnode1
Instance orcldb2 is not running on node racnode2

SQL> startup mount;
ORACLE instance started.

Total System Global Area 3140026368 bytes
Fixed Size                  2163800 bytes
Variable Size            1996491688 bytes
Database Buffers         1107296256 bytes
Redo Buffers               34074624 bytes
Database mounted.


Step 5: Flashback database as shown below

SQL> alter session set nls_date_format=’dd/mm/yy hh24:mi:ss’;

Session altered.

SQL> flashback database to timestamp to_date(’11/30/17 07:36:00′,’mm/dd/yy hh24:mi:ss’);

Flashback complete.

>>>>>>>>….. alert log ……..>>>>>>>>>>>>>>>>>

flashback database to timestamp to_date(’11/30/17 07:36:00′,’mm/dd/yy hh24:mi:ss’)
Flashback Restore Start
Flashback Restore Complete
Flashback Media Recovery Start
Fast Parallel Media Recovery enabled
 parallel recovery started with 3 processes
Recovery of Online Redo Log: Thread 1 Group 3 Seq 393 Reading mem 0
  Mem# 0: /oradata1/orcldb/redo_t01_g03.log
Incomplete Recovery applied until change 711150562 time 11/30/2012 07:36:01
Flashback Media Recovery Complete
Completed: flashback database to timestamp to_date(’11/30/17 07:36:00′,’mm/dd/yy hh24:mi:ss’)

>>>>>>>>>>>>>>>>…….>>>>>>>>>>>>


Step 6: Open the database in read only mode and verify the table

SQL> alter database open read only;

Database altered.

SQL> select name,open_mode,database_role from v$database;

NAME      OPEN_MODE                                DATABASE_ROLE
——— —————————————- —————————————————————-
orcldb   READ ONLY                                PRIMARY

SQL> select count(*) from SCOTT.SALES;

  COUNT(*)
———-
     35268


Step 7: Perform table export using traditional export utility

racnode1-orcldb1 {/oradata1}: exp system file=test.dmp log=test.log tables=SCOTT.SALES compress=y

Export: Release 11.2.0.4.0 – Production on Fri Nov 30 07:56:59 2012

Copyright (c) 1982, 2007, Oracle.  All rights reserved.

Password:


Connected to: Oracle Database 11g Enterprise Edition Release 11.2.0.4.0 – 64bit Production
With the Partitioning, Real Application Clusters, OLAP, Data Mining
and Real Application Testing options
Export done in AL32UTF8 character set and AL16UTF16 NCHAR character set

About to export specified tables via Conventional Path …
Current user changed to SCOTT
. . exporting table                    SALES      35268 rows exported
Export terminated successfully without warnings.

>>>>>>>>>>>>>>>>…….EXPORT END>>>>>>>>>>>>>>>>>>>>>>>


Step 8: Shutdown the database, recover database and open using resetlogs option

SQL> shutdown immediate;
Database closed.
Database dismounted.
ORACLE instance shut down.

SQL> startup
ORACLE instance started.

Total System Global Area 3140026368 bytes
Fixed Size                  2163800 bytes
Variable Size            1979714472 bytes
Database Buffers         1124073472 bytes
Redo Buffers               34074624 bytes
Database mounted.
ORA-01589: must use RESETLOGS or NORESETLOGS option for database open


SQL> recover database;
Media recovery complete.

SQL> alter database open;

Database altered.


Step 9: Verify the database

SQL> select name,open_mode,database_role from v$database;

NAME      OPEN_MODE                                DATABASE_ROLE
——— —————————————- —————————————————————-
orcldb   READ WRITE                               PRIMARY


Step 10: Import the table data using import utility

SQL> select count(*) from SCOTT.SALES;

  COUNT(*)
———-
         0

racnode1-orcldb1 {/oradata1}: imp system file=test.dmp log=imp_test.log tables=SALES fromuser=SCOTT touser=SCOTT ignore=y

Import: Release 11.2.0.4.0 – Production on Fri Nov 30 08:02:05 2012

Copyright (c) 1982, 2007, Oracle.  All rights reserved.

Password:

Connected to: Oracle Database 11g Enterprise Edition Release 11.2.0.4.0 – 64bit Production
With the Partitioning, Real Application Clusters, OLAP, Data Mining
and Real Application Testing options

Export file created by EXPORT:V11.01.00 via conventional path
import done in AL32UTF8 character set and AL16UTF16 NCHAR character set
. importing SCOTT’s objects into SCOTT
. . importing table                  “SALES”      35268 rows imported
Import terminated successfully without warnings.

>>>>>>>>>>>>. IMPORT END ….>>>>>>>>>>>>>>>>>>>.


Step 11: Verify the table data

SQL> select count(*) from SCOTT.SALES;

  COUNT(*)
———-
     35268


Conclusion

In this article we have learned how to recover a truncated table using flashback database technology without loosing the database. Using flashback database is one of the fastest and easiet method to as it doesn’t require database restore from backup.

1

Oracle Database Appliance (ODA) is an entry level Engineered System. ODA is a pre-configured, highly available Oracle Database Engineered system. ODA system consists of hardware, software, storage and networking. The hardware configuration is designed to provide redundancy and protection against single points of failures in the system.

ODA consists of two physical servers (Node 0 and Node 1), a storage shelf and optionally an additional storage shelf. The two independent physical servers are interconnected and direct attached to SAS and SSD storage.

ODA is basically a 2-node RAC cluster database system running Oracle Linux operating (OEL), Oracle Database Enterprise Edition, Oracle Grid Infrastructure (Clusterware and ASM). All these together provides the Oracle Database high availability running on ODA.

ODA consists of several hardware components such as Mother Board, Processor, Memory, Power Supply, FAN, Network cards and so on. You can monitor the hardware status of these components using OAKCLI command for both Bare Metal and Virtualized platform.

Note: ODACLI is used for Hardware monitoring and administrative tasks on the Oracle Database Appliance on X6-2 S/M/L & X7-2 S/M.


In this article we will demonstrate how to monitor different hardware component status on ODA nodes.

Using OAKCLI command to Get Hardware Status


  • Execute the following command to display ODA server details

[root@odanoden1 ~]# oakcli show server

        Power State              : On
        Open Problems            : 0
        Model                    : ODA X4-2
        Type                     : Rack Mount
        Part Number              : 33060862+1+1
        Serial Number            : 1440XXXXXX
        Primary OS               : Not Available
        ILOM Address             : 10.10.20.1
        ILOM MAC Address         : 00:10:E0:62:3F:F6
        Description              : Oracle Database Appliance X4-2 1440XXXXX
        Locator Light            : Off
        Actual Power Consumption : 261 watts
        Ambient Temperature      : 18.500 degree C
        Open Problems Report     : System is healthy

[root@odanoden2 ~]# oakcli show server

        Power State              : On
        Open Problems            : 0
        Model                    : ODA X4-2
        Type                     : Rack Mount
        Part Number              : 33060862+1+1
        Serial Number            : 1440XXXXXX
        Primary OS               : Not Available
        ILOM Address             : 10.10.20.2
        ILOM MAC Address         : 00:10:E0:62:41:D6
        Description              : Oracle Database Appliance X4-2 1440XXXXX
        Locator Light            : Off
        Actual Power Consumption : 269 watts
        Ambient Temperature      : 17.750 degree C
        Open Problems Report     : System is healthy


  • Execute the following command to display ODA model

[root@odanoden1 ~]# oakcli show env_hw
BM ODA X4-2
Public interface : COPPER


  • Execute the following command to display ODA software version details

[root@odanoden1 ~]# oakcli show version -detail
Reading the metadata. It takes a while…
System Version  Component Name            Installed Version         Supported Version
————–  —————           ——————        —————–
12.1.2.10.0
                Controller_INT            11.05.03.00               Up-to-date
                Controller_EXT            11.05.03.00               Up-to-date
                Expander                  0018                      Up-to-date
                SSD_SHARED                944A                      Up-to-date
                HDD_LOCAL                 A72A                      Up-to-date
                HDD_SHARED                A72A                      Up-to-date
                ILOM                      3.2.8.25 r114493          Up-to-date
                BIOS                      25040100                  Up-to-date
                IPMI                      1.8.12.4                  Up-to-date
                HMP                       2.3.5.2.8                 Up-to-date
                OAK                       12.1.2.10.0               Up-to-date
                OL                        6.8                       Up-to-date
                GI_HOME                   12.1.0.2.170117(2473      Up-to-date
                                          2082,24828633)
                DB_HOME                   12.1.0.2.170117(2473      Up-to-date
                                          2082,24828633)


  • Execute the following command to display ‘oakcli show’ help

[root@odanoden1 ~]# oakcli show -h
Usage:
oakcli show {disk|diskgroup|expander|fs|raidsycstatus|controller|server|processor|memory|power|cooling|network|enclosure|storage|core_config_key|version|dbhomes|dbstorage|databases|db_config_params|asr|env_hw} [<options>]
where:
        disk                     – About the disk
        diskgroup                – ASM disk group
        expander                 – Expander
        fs                       – Filesystem
        controller               – Controller
        storage                  – All storage components
        version                  – Running software version
        dbhomes                  – Installed oracle database homes
        dbstorage                – Details of ACFS storage setup for the databases
        databases                – Database names
        db_config_params         – db_config_params file
        asr                      – ASR configuration
        env_hw                   – Environment and Hardware information
        server                   – Details of server sub-system
        processor                – Details of processor sub-system
        memory                   – Details of memory sub-system
        power                    – Details of power supply sub-system
        cooling                  – Details of cooling sub-system
        network                  – Details of network sub-system
        enclosure                – Details of enclosure sub-system
        raidsyncstatus           – RAID sync status information
        core_config_key          – Core configuration
For detailed help on each command and object and its options use:
oakcli <command> <object> -h


  • Execute the following command to monitor the Processor Status

[root@odanoden1 ~]# oakcli show processor

        NAME  HEALTH HEALTH_DETAILS PART_NO. LOCATION   MODEL                         MAX_CLK_SPEED TOTAL_CORES ENABLED_CORES

        CPU_0 OK     –              060E     P0 (CPU 0) Intel(R) Xeon(R) CPU E5-2697  2.700 GHz       12        NA
        CPU_1 OK     –              060E     P1 (CPU 1) Intel(R) Xeon(R) CPU E5-2697  2.700 GHz       12        NA


  • Execute the following command to monitor the Memory Status

[root@odanoden1 ~]# oakcli show memory

        NAME    HEALTH HEALTH_DETAILS PART_NO.         SERIAL_NO.         LOCATION MANUFACTURER MEMORY_SIZE CURR_CLK_SPEED ECC_Errors

        DIMM_0  OK     –              M393B2G70DB0-YK0 00CE03143317593248 P0/D0    Samsung      16 GB       1600 MHz       0
        DIMM_1  OK     –              M393B2G70DB0-YK0 00CE0314331759238B P0/D1    Samsung      16 GB       1600 MHz       0
        DIMM_10 OK     –              M393B2G70DB0-YK0 00CE031433175926CD P1/D2    Samsung      16 GB       1600 MHz       0
        DIMM_11 OK     –              M393B2G70DB0-YK0 00CE031433175927AD P1/D3    Samsung      16 GB       1600 MHz       0
        DIMM_12 OK     –              M393B2G70DB0-YK0 00CE031433175922C3 P1/D4    Samsung      16 GB       1600 MHz       0
        DIMM_13 OK     –              M393B2G70DB0-YK0 00CE03143317593250 P1/D5    Samsung      16 GB       1600 MHz       0
        DIMM_14 OK     –              M393B2G70DB0-YK0 00CE0314331759367A P1/D6    Samsung      16 GB       1600 MHz       0
        DIMM_15 OK     –              M393B2G70DB0-YK0 00CE03143317593319 P1/D7    Samsung      16 GB       1600 MHz       0
        DIMM_2  OK     –              M393B2G70DB0-YK0 00CE031433175927A8 P0/D2    Samsung      16 GB       1600 MHz       0
        DIMM_3  OK     –              M393B2G70DB0-YK0 00CE03143317592B31 P0/D3    Samsung      16 GB       1600 MHz       0
        DIMM_4  OK     –              M393B2G70DB0-YK0 00CE03143317592B35 P0/D4    Samsung      16 GB       1600 MHz       0
        DIMM_5  OK     –              M393B2G70DB0-YK0 00CE03143317591C3C P0/D5    Samsung      16 GB       1600 MHz       0
        DIMM_6  OK     –              M393B2G70DB0-YK0 00CE031433175922C7 P0/D6    Samsung      16 GB       1600 MHz       0
        DIMM_7  OK     –              M393B2G70DB0-YK0 00CE0314331759324E P0/D7    Samsung      16 GB       1600 MHz       0
        DIMM_8  OK     –              M393B2G70DB0-YK0 00CE0314331759324B P1/D0    Samsung      16 GB       1600 MHz       0
        DIMM_9  OK     –              M393B2G70DB0-YK0 00CE0314331759331A P1/D1    Samsung      16 GB       1600 MHz       0


  • Execute the following command to monitor Power Status

[root@odanoden1 ~]# oakcli show power

        NAME            HEALTH HEALTH_DETAILS PART_NO. SERIAL_NO.         LOCATION INPUT_POWER OUTPUT_POWER INLET_TEMP     EXHAUST_TEMP

        Power_Supply_0  OK     –              7079395  476856Z+1435CE00EU PS0      Present     119 watts    32.250 degree C 36.562 degree C
        Power_Supply_1  OK     –              7079395  476856Z+1435CE00F6 PS1      Present     112 watts    37.000 degree C 40.375 degree C


  • Execute the following command to monitor Network Status

[root@odanoden1 ~]# oakcli show network

        NAME           HEALTH HEALTH_DETAILS LOCATION PART_NO MANUFACTURER MAC_ADDRESS        LINK_DETECTED DIE_TEMP

        Ethernet_NIC_0 OK     –              NET0     X540    INTEL        00:10:E0:62:3F:F2  yes (eth2)    46.250 degree C
        Ethernet_NIC_1 OK     –              NET1     X540    INTEL        00:10:E0:62:3F:F3  no (eth3)     46.250 degree C
        Ethernet_NIC_2 OK     –              NET2     X540    INTEL        00:10:E0:62:3F:F4  no (eth4)     51.000 degree C
        Ethernet_NIC_3 OK     –              NET3     X540    INTEL        00:10:E0:62:3F:F5  no (eth5)     51.500 degree C
        Ethernet_NIC_4 –      –              NET4     X540    INTEL        90:E2:BA:81:2B:B4  yes (eth0)    –
        Ethernet_NIC_5 –      –              NET5     X540    INTEL        90:E2:BA:81:2B:B5  yes (eth1)    –


  • Execute the following command to monitor Storage Status

[root@odanoden1 ~]# oakcli show storage
==== BEGIN STORAGE DUMP ========
Host Description: Oracle Corporation:SUN SERVER X4-2
Total number of controllers: 3
        Id         = 1
        Serial Num = 500605b008030030
        Vendor     = LSI Logic
        Model      = SGX-SAS6-EXT-Z
        FwVers     = 11.05.03.00
        strId      = mpt2sas:30:00.0

        Id         = 2
        Serial Num = 500605b00802fbc0
        Vendor     = LSI Logic
        Model      = SGX-SAS6-EXT-Z
        FwVers     = 11.05.03.00
        strId      = mpt2sas:40:00.0

        Id         = 0
        Serial Num = 500605b008071240
        Vendor     = LSI Logic
        Model      = SGX-SAS6-INT-Z
        FwVers     = 11.05.03.00
        strId      = mpt2sas:50:00.0

Total number of expanders: 2
        Id         = 1
        Serial Num = 50800200019f0002
        Vendor     = ORACLE
        Model      = DE2-24P
        FwVers     = 0018
        strId      = Primary
        WWN        = 5080020001a6b97e

        Id         = 0
        Serial Num = 50800200019f0002
        Vendor     = ORACLE
        Model      = DE2-24P
        FwVers     = 0018
        strId      = Secondary
        WWN        = 5080020001a6babe

Total number of PDs: 24
        /dev/sdl        LSI Logic         HDD  900gb slot:  0  exp:  0
        /dev/sdn        LSI Logic         HDD  900gb slot:  1  exp:  0
        /dev/sdah       LSI Logic         HDD  900gb slot:  2  exp:  0
        /dev/sdai       LSI Logic         HDD  900gb slot:  3  exp:  0
        /dev/sdaj       LSI Logic         HDD  900gb slot:  4  exp:  0
        /dev/sdak       LSI Logic         HDD  900gb slot:  5  exp:  0
        /dev/sdal       LSI Logic         HDD  900gb slot:  6  exp:  0
        /dev/sdam       LSI Logic         HDD  900gb slot:  7  exp:  0
        /dev/sdan       LSI Logic         HDD  900gb slot:  8  exp:  0
        /dev/sdao       LSI Logic         HDD  900gb slot:  9  exp:  0
        /dev/sdap       LSI Logic         HDD  900gb slot: 10  exp:  0
        /dev/sdaq       LSI Logic         HDD  900gb slot: 11  exp:  0
        /dev/sdar       LSI Logic         HDD  900gb slot: 12  exp:  0
        /dev/sdaa       LSI Logic         HDD  900gb slot: 13  exp:  0
        /dev/sdab       LSI Logic         HDD  900gb slot: 14  exp:  0
        /dev/sdac       LSI Logic         HDD  900gb slot: 15  exp:  0
        /dev/sdad       LSI Logic         HDD  900gb slot: 16  exp:  0
        /dev/sdae       LSI Logic         HDD  900gb slot: 17  exp:  0
        /dev/sdaf       LSI Logic         HDD  900gb slot: 18  exp:  0
        /dev/sdag       LSI Logic         HDD  900gb slot: 19  exp:  0
        /dev/sda        LSI Logic         SSD  200gb slot: 20  exp:  0
        /dev/sdb        LSI Logic         SSD  200gb slot: 21  exp:  0
        /dev/sdc        LSI Logic         SSD  200gb slot: 22  exp:  0
        /dev/sdd        LSI Logic         SSD  200gb slot: 23  exp:  0
==== END STORAGE DUMP =========


  • Execute the following command to monitor Shared Disk Status

[root@odanoden1 ~]# oakcli show disk
        NAME            PATH            TYPE            STATE           STATE_DETAILS

        e0_pd_00        /dev/sdl        HDD             ONLINE          Good
        e0_pd_01        /dev/sdn        HDD             ONLINE          Good
        e0_pd_02        /dev/sdah       HDD             ONLINE          Good
        e0_pd_03        /dev/sdai       HDD             ONLINE          Good
        e0_pd_04        /dev/sdaj       HDD             ONLINE          Good
        e0_pd_05        /dev/sdak       HDD             ONLINE          Good
        e0_pd_06        /dev/sdal       HDD             ONLINE          Good
        e0_pd_07        /dev/sdam       HDD             ONLINE          Good
        e0_pd_08        /dev/sdan       HDD             ONLINE          Good
        e0_pd_09        /dev/sdao       HDD             ONLINE          Good
        e0_pd_10        /dev/sdap       HDD             ONLINE          Good
        e0_pd_11        /dev/sdaq       HDD             ONLINE          Good
        e0_pd_12        /dev/sdar       HDD             ONLINE          Good
        e0_pd_13        /dev/sdaa       HDD             ONLINE          Good
        e0_pd_14        /dev/sdab       HDD             ONLINE          Good
        e0_pd_15        /dev/sdac       HDD             ONLINE          Good
        e0_pd_16        /dev/sdad       HDD             ONLINE          Good
        e0_pd_17        /dev/sdae       HDD             ONLINE          Good
        e0_pd_18        /dev/sdaf       HDD             ONLINE          Good
        e0_pd_19        /dev/sdag       HDD             ONLINE          Good
        e0_pd_20        /dev/sda        SSD             ONLINE          Good
        e0_pd_21        /dev/sdb        SSD             ONLINE          Good
        e0_pd_22        /dev/sdc        SSD             ONLINE          Good
        e0_pd_23        /dev/sdd        SSD             ONLINE          Good


  • Execute the following command to monitor ODA server enclosure

[root@odanoden1 ~]# oakcli show enclosure

        NAME        SUBSYSTEM         STATUS      METRIC

        E0_FAN0     Cooling           OK          3450 rpm
        E0_FAN1     Cooling           OK          3070 rpm
        E0_FAN2     Cooling           OK          3070 rpm
        E0_FAN3     Cooling           OK          3070 rpm
        E0_IOM0     Encl_Electronics  OK          –
        E0_IOM1     Encl_Electronics  OK          –
        E0_PSU0     Power_Supply      OK          –
        E0_PSU1     Power_Supply      OK          –
        E0_TEMP0    Amb_Temp          OK          19 C
        E0_TEMP1    Midplane_Temp     OK          27 C
        E0_TEMP2    PCM0_Inlet_Temp   OK          32 C
        E0_TEMP3    PCM0_Hotspot_Temp OK          38 C
        E0_TEMP4    PCM1_Inlet_Temp   OK          27 C
        E0_TEMP5    PCM1_Hotspot_Temp OK          36 C
        E0_TEMP6    IOM0_Temp         OK          38 C
        E0_TEMP7    IOM1_Temp         OK          45 C


Using ILOM CLI to Get the Hardware Status


  • Execute the following command to connect to ILOM and monitor Hardware Status

[root@odanoden2 ~]# ssh odanoden2-ilom
Password:

Oracle(R) Integrated Lights Out Manager

Version 3.2.8.25 r114493

Copyright (c) 2016, Oracle and/or its affiliates. All rights reserved.

Warning: password is set to factory default.

Warning: HTTPS certificate is set to factory default.

Hostname: odanoden2-ilom

-> show -level all -output table /SP/faultmgmt
Target                          | Property                             | Value
——————————–+————————————–+———————————————————

-> show -l all /SYS type==’Hard Disk’

 /SYS/DBP0/HDD0
    Targets:
        OK2RM
        PRSNT
        SERVICE
        STATE

    Properties:
        type = Hard Disk
        ipmi_name = HDD0

    Commands:
        cd
        show

 /SYS/DBP0/HDD1
    Targets:
        OK2RM
        PRSNT
        SERVICE
        STATE

    Properties:
        type = Hard Disk
        ipmi_name = HDD1

    Commands:
        cd
        show


Using ILOM GUI to Get the Hardware Status


Conclusion

In this article we have learned how to monitor various hardware components status on ODA nodes using oakcli and ILOM. ODA server comes with different hardware components and monitoring them is key for ODA availability.

2

Cloud security, Cloud Services, Database Management Services, Oracle Databases
Overview
 
Amazon Web Services is a comprehensive, evolving cloud computing platform provided by Amazon. Amazon Relational Database Service (Amazon RDS) is a web service that makes it easier to set up, operate, and scale a relational database in the cloud.
 
In this article we demonstrate how to establish connection to AWS RDS Oracle Database Using SQL Client.

Prerequisites
  • Install Oracle SQL Client on your client machine (Windows/Linux)
  • Use can also use Oracle SQL*Developer tool to establish connection


Procedure to Connect to AWS RDS Oracle Database

  • Put tns entry in tnsnames.ora file client machine. 
    • Review the blog article on how to find end point details of AWS RDS instance at http://netsoftmate.blogspot.com/2018/07/how-to-find-hostname-from-aws-console.html

nsmprd =
  (DESCRIPTION =
    (ADDRESS = (PROTOCOL = TCP)(HOST = nsmprd.cjhtbujgykil.us-east-1.rds.amazonaws.com)(PORT = 1521))
    (CONNECT_DATA =
      (SERVER = DEDICATED)
      (SERVICE_NAME = nsmprd)
    )
  )

  • Check connectivity to AWS RDS Oracle instance using tnsping utility
C:Users>tnsping nsmprd

TNS Ping Utility for 64-bit Windows: Version 12.2.0.1.0 – Production on 13-JUN-2018 16:19:34

Copyright (c) 1997, 2016, Oracle.  All rights reserved.

Used parameter files:
D:oracle12cproduct12.2.0dbhome_1networkadminsqlnet.ora

Used TNSNAMES adapter to resolve the alias
Attempting to contact (DESCRIPTION = (ADDRESS = (PROTOCOL = TCP)(HOST = nsmprd.cjhtbujgykil.us-east-1.rds.amazonaws.com)(PORT = 1521)) (CONNECT_DATA = (SERVER = DEDICATED) (SERVICE_NAME = nsmprd)))
TNS-12535: TNS:operation timed out


Follow the steps below to resolve the timed out issue. 

  • Check security group and add rules to VPC security group. While Database instance creation if it is default security group then this instance firewall prevents connections.

To know more about security group please go through following link
https://docs.aws.amazon.com/AmazonRDS/latest/UserGuide/Overview.RDSSecurityGroups.html

Add rule to security group

  • Login to console and click on VPC under Networking and content delivery


  • Under vpc dashboard navigation pane click on security group 


  • Select the security group for update.


    • Click on inbound rules and edit to add new rules.


  • Click on add another rule.


  • Select from drop down list


  • Choose oracle port in in-bound traffic


  • Click on save

Now check the connectivity again using tnsping

C:Users>tnsping nsmprd

TNS Ping Utility for 64-bit Windows: Version 12.2.0.1.0 – Production on 13-JUN-2018 18:37:22

Copyright (c) 1997, 2016, Oracle.  All rights reserved.

Used parameter files:
D:oracle12cproduct12.2.0dbhome_1networkadminsqlnet.ora


Used TNSNAMES adapter to resolve the alias
Attempting to contact (DESCRIPTION = (ADDRESS = (PROTOCOL = TCP)(HOST = nsmprd.cjhtbujgykil.us-east-1.rds.amazonaws.com)(PORT = 1521)) (CONNECT_DATA = (SERVER = DEDICATED) (SERVICE_NAME = nsmprd)))
OK (1500 msec)

We can see that the tnsping is now successful.


  • Now Establish the connection to AWS RDS Oracle Instance

C:Users>sqlplus

SQL*Plus: Release 12.2.0.1.0 Production on Wed Jun 13 18:37:30 2018

Copyright (c) 1982, 2016, Oracle.  All rights reserved.

Enter user-name: nsmsystem@nsmprd
Enter password:
Last Successful login time: Wed Jun 13 2018 14:31:06 +05:30

Connected to:
Oracle Database 12c Enterprise Edition Release 12.1.0.2.0 – 64bit Production
With the Partitioning, OLAP, Advanced Analytics and Real Application Testing options

SQL> select name,INSTANCE_NAME,OPEN_MODE,HOST_NAME,DATABASE_STATUS,logins,to_char(STARTUP_TIME,’DD-MON-YYYY HH24:MI:SS’) “UP TIME”from v$database,v$instance;

NAME      INSTANCE_NAME    OPEN_MODE            HOST_NAME                      DATABASE_STATUS   LOGINS     UP TIME
——— —————- ——————– —————————— —————– ———- ————————-
NSMPRD    NSMPRD           READ WRITE           ip-10-1-2-24                   ACTIVE            ALLOWED    10-JUN-2018 09:27:22


Conclusion

In this article we have learned that how to establish connection to to AWS RDS Oracle Instance using SQL Client and also we have seen how to add rules to the VPC security group.

eBook - Oracle Exadata X8M Patching Recipes | Netsoftmate 
3

PREVIOUS POSTSPage 1 of 2NO NEW POSTS