Database Management Services, Oracle Database Management Solution, Oracle Databases
Recently Oracle introduced “Autonomous Health Framework”. Oracle Autonomous Health Framework contains Oracle ORAchk, Oracle EXAchk, and Oracle Trace File Analyzer.
You have access to Oracle Autonomous Health Framework as a value add-on to your existing support contract. There is no additional fee or license required to run Oracle Autonomous Health Framework.
In this article we will learn how to Install, setup and execute AHF for Oracle Exadata Database machine in detail.
Step 1: Download AHF for Linux operating system as shown below. Here we are using the wget command to download file directly to the server. If you don’t have proxy you can download the file MOS to your desktop and copy it the server using WinSCP.
[root@dm01db01 ~]# cd /u01/app/oracle/software/
[root@dm01db01 software]# mkdir Exachk
[root@dm01db01 software]# cd Exachk/
[root@dm01db01 Exachk]# export use_proxy=on
[root@dm01db01 Exachk]# export http_proxy=”webproxy.netsoftmate.come:80/”
- Download the AHF zip file
[root@dm01db01 Exachk]# wget –http-user=abdul.mohammed@netsoftmate.com –http-password=************ –no-check-certificate –output-document=AHF-LINUX_v20.1.1.zip “https://updates.oracle.com/Orion/Services/download/AHF-LINUX_v20.1.1.zip?aru=23443431&patch_file=AHF-LINUX_v20.1.1.zip”
- Download the latest cvu. This will be used by the exachk to run the cluster verification
[root@dm01db01 Exachk]# wget –http-user=abdul.mohammed@netsoftmate.com –http-password=************ –no-check-certificate –output-document=cvupack_Linux_x86_64.zip “https://download.oracle.com/otndocs/products/clustering/cvu/cvupack_Linux_x86_64.zip”
[root@dm01db01 Exachk]# ls -ltr
total 356748
-rw-r–r– 1 root root 365267646 Mar 17 16:02 AHF-LINUX_v20.1.1.zip
-rw-r–r– 1 root root 293648959 Jul 13 2018 cvupack_Linux_x86_64.zip

Step 2: Unzip the AHF zip file
[root@dm01db01 Exachk]# unzip AHF-LINUX_v20.1.1.zip
Archive: AHF-LINUX_v20.1.1.zip
inflating: README.txt
inflating: ahf_setup
[root@dm01db01 Exachk]# ./ahf_setup -v
AHF Build ID : 20110020200317092524
AHF Build Platform : Linux
AHF Build Architecture : x86_64
Step 3: Execute the AHF setup
[root@dm01db01 Exachk]# ./ahf_setup
AHF Installer for Platform Linux Architecture x86_64
AHF Installation Log : /tmp/ahf_install_344489_2020_04_06-12_20_51.log
Starting Autonomous Health Framework (AHF) Installation
AHF Version: 20.1.1.0.0 Build Date: 202003170925
TFA is already installed at : /u01/app/11.2.0.4/grid/tfa/dm01db01/tfa_home
Installed TFA Version : 122111 Build ID : 20170612164756
Default AHF Location : /opt/oracle.ahf
Do you want to install AHF at [/opt/oracle.ahf] ? [Y]|N : Y
AHF Location : /opt/oracle.ahf
AHF Data Directory stores diagnostic collections and metadata.
AHF Data Directory requires at least 5GB (Recommended 10GB) of free space.
Choose Data Directory from below options :
- /u01/app/oracle [Free Space : 50454 MB]
- Enter a different Location
Choose Option [1 – 2] : 1
AHF Data Directory : /u01/app/oracle/oracle.ahf/data
exachk scheduler is already running at : /root/Exachk
Installed exachk version : EXACHK VERSION: 19.2.0_20190717
Stopping exachk scheduler
Copying exachk configuration from /root/Exachk
Shutting down TFA : /u01/app/11.2.0.4/grid/tfa/dm01db01/tfa_home
Copying TFA Data Files from /u01/app/11.2.0.4/grid/tfa/dm01db01/tfa_home
Uninstalling TFA : /u01/app/11.2.0.4/grid/tfa/dm01db01/tfa_home
Do you want to add AHF Notification Email IDs ? [Y]|N : Y
Enter Email IDs separated by space : abdul.mohammed@netsoftmate.com
AHF will also be installed/upgraded on these Cluster Nodes :
- dm01db02
- dm01db03
- dm01db04
The AHF Location and AHF Data Directory must exist on the above nodes
AHF Location : /opt/oracle.ahf
AHF Data Directory : /u01/app/oracle/oracle.ahf/data
Do you want to install/upgrade AHF on Cluster Nodes ? [Y]|N : Y
Extracting AHF to /opt/oracle.ahf
Configuring TFA Services
Copying TFA Data Files to AHF
Discovering Nodes and Oracle Resources
TFA will configure Storage Cells using SSH Setup:
.———————————–.
| | EXADATA CELL | CURRENT STATUS |
+—+————–+—————-+
| 1 | dm01cel01 | ONLINE |
| 2 | dm01cel02 | ONLINE |
| 3 | dm01cel03 | ONLINE |
| 4 | dm01cel04 | ONLINE |
| 5 | dm01cel05 | ONLINE |
| 6 | dm01cel06 | ONLINE |
| 7 | dm01cel07 | ONLINE |
‘—+————–+—————-‘
Not generating certificates as GI discovered
Starting TFA Services
.——————————————————————————-.
| Host | Status of TFA | PID | Port | Version | Build ID |
+———–+—————+——–+——+————+———————-+
| dm01db01 | RUNNING | 365382 | 5000 | 20.1.1.0.0 | 20110020200317092524 |
‘———–+—————+——–+——+————+———————-‘
Running TFA Inventory…
Adding default users to TFA Access list…
.——————————————————————.
| Summary of AHF Configuration |
+—————–+————————————————+
| Parameter | Value |
+—————–+————————————————+
| AHF Location | /opt/oracle.ahf |
| TFA Location | /opt/oracle.ahf/tfa |
| Exachk Location | /opt/oracle.ahf/exachk |
| Data Directory | /u01/app/oracle/oracle.ahf/data |
| Repository | /u01/app/oracle/oracle.ahf/data/repository |
| Diag Directory | /u01/app/oracle/oracle.ahf/data/dm01db01/diag |
‘—————–+————————————————‘
Retrieving legacy exachk wallet details …
Storing exachk wallet details into AHF config/wallet …
Starting exachk daemon from AHF …
AHF install completed on dm01db01
Installing AHF on Remote Nodes :
AHF will be installed on dm01db02, Please wait.
Installing AHF on dm01db02 :
[dm01db02] Copying AHF Installer
[dm01db02] Running AHF Installer
AHF will be installed on dm01db03, Please wait.
Installing AHF on dm01db03 :
[dm01db03] Copying AHF Installer
[dm01db03] Running AHF Installer
AHF will be installed on dm01db04, Please wait.
Installing AHF on dm01db04 :
[dm01db04] Copying AHF Installer
[dm01db04] Running AHF Installer
AHF binaries are available in /opt/oracle.ahf/bin
AHF is successfully installed
Moving /tmp/ahf_install_251936_2020_04_06-13_07_32.log to /u01/app/oracle/oracle.ahf/data/dm01db01/diag/ahf/
Step 4: Verify AHF setup
[root@dm01db01 Exachk]# cd /opt/oracle.ahf/
[root@dm01db01 oracle.ahf]# ls -ltr
total 36
drwxr-xr-x 7 root root 4096 Nov 19 02:38 python
drwxr-xr-x 5 root root 4096 Mar 17 11:25 ahf
drwxr-xr-x 6 root root 4096 Mar 17 11:25 common
drwxr-x–x 5 root root 4096 Mar 17 11:25 jre
drwxr-xr-x 8 root root 4096 Apr 6 12:28 exachk
drwxr-x–x 2 root root 4096 Apr 6 12:28 analyzer
-rw-r–r– 1 root root 1057 Apr 6 12:28 install.properties
drwxr-x–x 9 root root 4096 Apr 6 12:28 tfa
drwxr-x–x 2 root root 4096 Apr 6 12:28 bin
[root@dm01db01 oracle.ahf]# cd exachk/
[root@dm01db01 exachk]# ls -ltr
total 81772
-rw-r–r– 1 root root 186651 Mar 17 11:20 exachk.pyc
-rw-r–r– 1 root root 65423079 Mar 17 11:23 collections.dat
-rw-r–r– 1 root root 9674765 Mar 17 11:23 rules.dat
-rw-r–r– 1 root root 8341706 Mar 17 11:24 Apex5_CollectionManager_App.sql
-rw-r–r– 1 root root 43473 Mar 17 11:24 sample_user_defined_checks.xml
-r–r–r– 1 root root 3217 Mar 17 11:24 user_defined_checks.xsd
drwxr-xr-x 2 root root 4096 Mar 17 11:24 messages
drwxr-xr-x 2 root root 4096 Mar 17 11:25 web
drwxr-xr-x 3 root root 4096 Mar 17 11:25 lib
drwxr-xr-x 2 root root 4096 Mar 17 11:25 build
drwxr-xr-x 2 root root 4096 Apr 6 12:28 bash
-rwxr-xr-x 1 root root 25788 Apr 6 12:28 exachk
Step 5: unzip the cvu zip file under AHF home as show below
[root@dm01db01 Exachk]# unzip cvupack_Linux_x86_64.zip -d /opt/oracle.ahf/common/cvu
[root@dm01db01 Exachk]# ls -ltr /opt/oracle.ahf/common/cvu
total 92
drwxrwxr-x 7 root root 4096 Jun 13 2018 jdk
drwxrwxr-x 3 root root 4096 Jun 13 2018 srvm
drwxrwxr-x 3 root root 4096 Jun 13 2018 has
drwxrwxr-x 3 root root 4096 Jun 13 2018 crs
drwxrwxr-x 3 root root 4096 Jun 13 2018 suptools
drwxrwxr-x 3 root root 4096 Jun 13 2018 oss
drwxrwxr-x 7 root root 4096 Jun 13 2018 cv
drwxrwxr-x 3 root root 4096 Jun 13 2018 xdk
drwxrwxr-x 2 root root 4096 Jun 13 2018 utl
drwxrwxr-x 4 root root 4096 Jun 13 2018 rdbms
drwxrwxr-x 6 root root 4096 Jun 13 2018 install
drwxrwxr-x 4 root root 4096 Jun 13 2018 deinstall
drwxrwxr-x 4 root root 4096 Jun 13 2018 clone
drwxrwxr-x 8 root root 4096 Jun 13 2018 oui
drwxrwxr-x 3 root root 4096 Jun 13 2018 diagnostics
drwxrwxr-x 3 root root 4096 Jun 13 2018 oracore
drwxrwxr-x 3 root root 4096 Jun 13 2018 nls
drwxrwxr-x 3 root root 4096 Jun 13 2018 jdbc
drwxrwxr-x 3 root root 4096 Jun 13 2018 dbjava
drwxrwxr-x 6 root root 4096 Jun 13 2018 network
drwxrwxr-x 2 root root 4096 Jun 13 2018 jlib
drwxrwxr-x 2 root root 4096 Jun 13 2018 lib
drwxrwxr-x 2 root root 4096 Jun 13 2018 bin
Note: If you don’t download and extract the cvupack you will get the following warning message.
“Either Cluster Verification Utility pack (cvupack) does not exist at /opt/oracle.ahf/common/cvu or it is an old or invalid cvupack”
Step 6: Execute Exachk for Exadata
[root@dm01db01 ~]# cd /opt/oracle.ahf/exachk/
[root@dm01db01 exachk]# ./exachk
Checking ssh user equivalency settings on all nodes in cluster for root
Node dm01db02 is configured for ssh user equivalency for root user
Node dm01db03 is configured for ssh user equivalency for root user
Node dm01db04 is configured for ssh user equivalency for root user
Searching for running databases . . . . .
. . . .
List of running databases registered in OCR
- testdb
- orcldb
- All of above
- None of above
Select databases from list for checking best practices. For multiple databases, select 3 for All or comma separated number like 1,2 etc [1-4][3].
Searching out ORACLE_HOME for selected databases.
. . . . . . .
.
Checking Status of Oracle Software Stack – Clusterware, ASM, RDBMS
. . . . . . . . . . . . .
. . . . . . . . . . . . . . . . . . . . . . . . . . . . . . . . . . . . . . . . . . . . . . . . . . . . . . . . . . . . . . . . . .
——————————————————————————————————-
Oracle Stack Status
——————————————————————————————————-
Host Name CRS Installed RDBMS Installed CRS UP ASM UP RDBMS UP DB Instance Name
——————————————————————————————————-
dm01db01 Yes Yes Yes Yes Yes orcldb1 testdb1
dm01db02 Yes Yes Yes Yes Yes testdb2 orcldb2
dm01db03 Yes Yes Yes Yes Yes orcldb3 testdb3
dm01db04 Yes Yes Yes Yes Yes testdb4 orcldb4
——————————————————————————————————-
Copying plug-ins
. .
Node dm01cel01-priv2 is configured for ssh user equivalency for root user
Node dm01cel02-priv2 is configured for ssh user equivalency for root user
Node dm01cel03-priv2 is configured for ssh user equivalency for root user
Node dm01cel04-priv2 is configured for ssh user equivalency for root user
Node dm01cel05-priv2 is configured for ssh user equivalency for root user
Node dm01cel06-priv2 is configured for ssh user equivalency for root user
Node dm01cel07-priv2 is configured for ssh user equivalency for root user
. . . . . . . . . . . . . . . . . . . . . . . . . .
dm01sw-ibb01 is configured for ssh user equivalency for root user
.
dm01sw-iba01 is configured for ssh user equivalency for root user
dm01sw-iba01 is configured for ssh user equivalency for root user
*** Checking Best Practice Recommendations ( Pass / Warning / Fail ) ***
. .
Collections and audit checks log file is
/u01/app/oracle/oracle.ahf/data/dm01db01/exachk/exachk_dm01db01_orcldb_040620_12376/log/exachk.log
Starting to run exachk in background on dm01db02
Starting to run exachk in background on dm01db03
Starting to run exachk in background on dm01db04
============================================================
Node name – dm01db01
============================================================
Collecting – ASM Disk Group for Infrastructure Software and Configuration
Collecting – ASM Diskgroup Attributes
Collecting – ASM diskgroup usable free space
Collecting – ASM initialization parameters
Collecting – Database Parameters for testdb database
Collecting – Database Parameters for orcldb database
Collecting – Database Undocumented Parameters for orcldb database
Collecting – RDBMS Feature Usage for orcldb database
Collecting – CPU Information
Collecting – Clusterware and RDBMS software version
Collecting – Compute node PCI bus slot speed for infiniband HCAs
Collecting – Kernel parameters
Collecting – Maximum number of semaphore sets on system
Collecting – Maximum number of semaphores on system
Collecting – OS Packages
Collecting – Patches for Grid Infrastructure
Collecting – Patches for RDBMS Home
Collecting – RDBMS patch inventory
Collecting – Switch Version Information
Collecting – number of semaphore operations per semop system call
Collecting – CRS user limits configuration
Collecting – CRS user time zone check
Collecting – Check alerthistory for non-test open stateless alerts [Database Server]
Collecting – Check alerthistory for stateful alerts not cleared [Database Server]
Collecting – Clusterware patch inventory
Collecting – Discover switch type(spine or leaf)
Collecting – Enterprise Manager agent targets
Collecting – Exadata Critical Issue DB09
Collecting – Exadata Critical Issue EX30
Collecting – Exadata Critical Issue EX36
Collecting – Exadata Critical Issue EX56
Collecting – Exadata Critical Issue EX57
Collecting – Exadata Critical Issue EX58
Collecting – Exadata critical issue EX48
Collecting – Exadata critical issue EX55
Collecting – Exadata software version on database server
Collecting – Exadata system model number
Collecting – Exadata version on database server
Collecting – HCA firmware version on database server
Collecting – HCA transfer rate on database server
Collecting – Infrastructure Software and Configuration for compute
Collecting – MaxStartups setting in sshd_config
Collecting – OFED Software version on database server
Collecting – Obtain hardware information
Collecting – Operating system and Kernel version on database server
Collecting – Oracle monitoring agent and/or OS settings on ADR diagnostic directories
Collecting – Raid controller bus link speed
Collecting – Review Non-Exadata components in use on the InfiniBand fabric
Collecting – System Event Log
Collecting – Validate key sysctl.conf parameters on database servers
Collecting – Verify Data Network is Separate from Management Network
Collecting – Verify Database Server Disk Controller Configuration
Collecting – Verify Database Server Physical Drive Configuration
Collecting – Verify Database Server Virtual Drive Configuration
Collecting – Verify Disk Cache Policy on database server
Collecting – Verify Hardware and Firmware on Database and Storage Servers (CheckHWnFWProfile) [Database Server]
Collecting – Verify ILOM Power Up Configuration for HOST_AUTO_POWER_ON
Collecting – Verify ILOM Power Up Configuration for HOST_LAST_POWER_STATE
Collecting – Verify IP routing configuration on database servers
Collecting – Verify InfiniBand Address Resolution Protocol (ARP) Configuration on Database Servers
Collecting – Verify Master (Rack) Serial Number is Set [Database Server]
Collecting – Verify Quorum disks configuration
Collecting – Verify RAID Controller Battery Temperature [Database Server]
Collecting – Verify RAID disk controller CacheVault capacitor condition [Database Server]
Collecting – Verify RAID disk controller CacheVault capacitor condition [Database Server]
Collecting – Verify TCP Segmentation Offload (TSO) is set to off
Collecting – Verify available ksplice fixes are installed [Database Server]
Collecting – Verify basic Logical Volume(LVM) system devices configuration
Collecting – Verify database server InfiniBand network MTU size
Collecting – Verify database server disk controllers use writeback cache
Collecting – Verify database server file systems have Check interval = 0
Collecting – Verify database server file systems have Maximum mount count = -1
Collecting – Verify imageinfo on database server
Collecting – Verify imageinfo on database server to compare systemwide
Collecting – Verify installed rpm(s) kernel type match the active kernel version
Collecting – Verify key InfiniBand fabric error counters are not present
Collecting – Verify no database server kernel out of memory errors
Collecting – Verify proper ACFS drivers are installed for Spectre v2 mitigation
Collecting – Verify service exachkcfg autostart status on database server
Collecting – Verify the localhost alias is pingable [Database Server]
Collecting – Verify the InfiniBand Fabric Topology (verify-topology)
Collecting – Verify the Master Subnet Manager is running on an InfiniBand switch
Collecting – Verify the Name Service Cache Daemon (NSCD) configuration
Collecting – Verify the Subnet Manager is properly disabled [Database Server]
Collecting – Verify the currently active image status [Database Server]
Collecting – Verify the ib_sdp module is not loaded into the kernel
Collecting – Verify the storage servers in use configuration matches across the cluster
Collecting – Verify the vm.min_free_kbytes configuration
Collecting – Verify there are no files present that impact normal firmware update procedures [Database Server]
Collecting – collect time server data [Database Server]
Collecting – root time zone check
Collecting – verify asr exadata configuration check via ASREXACHECK on database server
Starting to run root privileged commands in background on storage server dm01cel01 (192.168.1.6)
Starting to run root privileged commands in background on storage server dm01cel02 (192.168.1.8)
Starting to run root privileged commands in background on storage server dm01cel03 (192.168.1.10)
Starting to run root privileged commands in background on storage server dm01cel04 (192.168.1.16)
Starting to run root privileged commands in background on storage server dm01cel05 (192.168.1.18)
Starting to run root privileged commands in background on storage server dm01cel06 (192.168.1.20)
Starting to run root privileged commands in background on storage server dm01cel07 (192.168.1.22)
Starting to run root privileged commands in background on infiniband switch (dm01sw-ibb01)
Starting to run root privileged commands in background on infiniband switch (dm01sw-iba01)
Collections from storage server:
————————————————————
Collections from Infiniband Switch:
————————————————————
Collecting – Exadata Critical Issue IB5
Collecting – Exadata Critical Issue IB6
Collecting – Exadata Critical Issue IB8
Collecting – Hostname in /etc/hosts
Collecting – Infiniband Switch NTP configuration
Collecting – Infiniband subnet manager status
Collecting – Infiniband switch HCA status
Collecting – Infiniband switch HOSTNAME configuration
Collecting – Infiniband switch firmware version
Collecting – Infiniband switch health
Collecting – Infiniband switch localtime configuration
Collecting – Infiniband switch module configuration
Collecting – Infiniband switch subnet manager configuration
Collecting – Infiniband switch type(Spine or leaf)
Collecting – Infrastructure Software and Configuration for switch
Collecting – Verify average ping times to DNS nameserver [IB Switch]
Collecting – Verify no IB switch ports disabled due to excessive symbol errors
Collecting – Verify the localhost alias is pingable [IB Switch]
Collecting – Verify there are no unhealthy InfiniBand switch sensors
Collecting – sm_priority configuration on Infiniband switch
Data collections completed. Checking best practices on dm01db01.
————————————————————
FAIL => Exadata software version on database server does not meet certified platinum configuration
FAIL => Oracle database does not meet certified platinum configuration for /u01/app/oracle/product/11.2.0.4/dbhome
WARNING => Database parameter AUDIT_SYS_OPERATIONS should be set to the recommended value on testdb1 instance
WARNING => Database parameter AUDIT_SYS_OPERATIONS should be set to the recommended value on orcldb1 instance
INFO => Oracle GoldenGate failure prevention best practices
INFO => One or more non-default AWR baselines should be created for orcldb
WARNING => Non-default database Services are not configured for orcldb
WARNING => Database parameter processes should be set to recommended value on testdb1 instance
WARNING => Database parameter processes should be set to recommended value on orcldb1 instance
FAIL => _reconnect_to_cell_attempts parameter in cellinit.ora is not set to recommended value
FAIL => Oracle monitoring agent and Operating systems settings on Automatic diagnostic repository directories are not correct or not all targets have been scanned or not all diagnostic directories found
FAIL => Storage Server user “CELLDIAG” should exist
FAIL => Downdelay attribute is not set to recommended value on bonded client interface
FAIL => One or more of SYSTEM, SYSAUX, USERS, TEMP tablespaces are not of type bigfile for orcldb
FAIL => The initialization parameter cluster_database_instances should be at the default value for testdb
FAIL => The initialization parameter cluster_database_instances should be at the default value for orcldb
WARNING => SYS or SYSTEM objects were found to be INVALID for orcldb
WARNING => There are non-Exadata components in use on the InfiniBand fabric
INFO => Database parameter AUDIT_TRAIL should be set to the recommended value for testdb
INFO => Database parameter AUDIT_TRAIL should be set to the recommended value for orcldb
FAIL => Memlock settings do not meet the Oracle best practice recommendations for /u01/app/oracle/product/11.2.0.4/dbhome
WARNING => All disk groups should have compatible.advm attribute set to recommended values
WARNING => All disk groups should have compatible.rdbms attribute set to recommended values
WARNING => Database has one or more dictionary managed tablespace for orcldb
CRITICAL => System is exposed to Exadata Critical Issue EX58
CRITICAL => System is exposed to Exadata Critical Issue EX58
FAIL => Some data or temp files are not autoextensible for orcldb
WARNING => Key InfiniBand fabric error counters should not be present
CRITICAL => One or more log archive destination and alternate log archive destination settings are not as recommended for orcldb
FAIL => Database parameter DB_LOST_WRITE_PROTECT is not set to recommended value on testdb1 instance
FAIL => Database parameter DB_LOST_WRITE_PROTECT is not set to recommended value on orcldb1 instance
FAIL => Database parameter GLOBAL_NAMES is not set to recommended value on testdb1 instance
FAIL => Database parameter GLOBAL_NAMES is not set to recommended value on orcldb1 instance
FAIL => Database parameter PARALLEL_ADAPTIVE_MULTI_USER is not set to recommended value on testdb1 instance
FAIL => Database parameter PARALLEL_ADAPTIVE_MULTI_USER is not set to recommended value on orcldb1 instance
FAIL => Database parameter PARALLEL_THREADS_PER_CPU is not set to recommended value on testdb1 instance
FAIL => Database parameter PARALLEL_THREADS_PER_CPU is not set to recommended value on orcldb1 instance
FAIL => Database parameter OS_AUTHENT_PREFIX is not set to recommended value on testdb1 instance
FAIL => Database parameter OS_AUTHENT_PREFIX is not set to recommended value on orcldb1 instance
FAIL => Database parameter sql92_security is not set to recommended value on testdb1 instance
FAIL => Database parameter sql92_security is not set to recommended value on orcldb1 instance
FAIL => Database parameter COMPATIBLE should be set to recommended value for testdb
FAIL => Database parameter COMPATIBLE should be set to recommended value for orcldb
CRITICAL => Database parameters log_archive_dest_n with Location attribute are not all set to recommended value for orcldb
CRITICAL => Database parameter Db_create_online_log_dest_n is not set to recommended value for testdb
FAIL => Flashback on PRIMARY is not configured for orcldb
FAIL => Flashback on STANDBY is not configured for testdb
INFO => Operational Best Practices
INFO => Database Consolidation Best Practices
INFO => Computer failure prevention best practices
INFO => Data corruption prevention best practices
INFO => Logical corruption prevention best practices
INFO => Database/Cluster/Site failure prevention best practices
INFO => Client failover operational best practices
INFO => Verify the percent of available celldisk space used by the griddisks
WARNING => Application objects were found to be invalid for orcldb
CRITICAL => Database control files are not configured as recommended for testdb
CRITICAL => Database control files are not configured as recommended for orcldb
WARNING => ASM parameter ASM_POWER_LIMIT is not set to the default value.
INFO => While initialization parameter LOG_ARCHIVE_CONFIG is set it should be verified for your environment on Standby Database for testdb
WARNING => Redo log files should be appropriately sized for testdb
WARNING => Redo log files should be appropriately sized for orcldb
FAIL => Table AUD$[FGA_LOG$] should use Automatic Segment Space Management for orcldb
INFO => Database failure prevention best practices
WARNING => Database has one or more dictionary managed tablespace for orcldb
FAIL => Primary database is not protected with Data Guard (standby database) for real-time data protection and availability for orcldb
FAIL => Database parameter LOG_BUFFER is not set to recommended value on orcldb1 instance
INFO => Storage failures prevention best practices
INFO => Software maintenance best practices
CRITICAL => The data files should be recoverable for testdb
CRITICAL => The data files should be recoverable for orcldb
FAIL => FRA space management problem file types are present without an RMAN backup completion within the last 7 days for testdb
INFO => Oracle recovery manager(rman) best practices
WARNING => control_file_record_keep_time should be within recommended range [1-9] for testdb
INFO => Exadata Critical Issues (Doc ID 1270094.1):- DB1-DB4,DB6,DB9-DB44, EX1-EX60 and IB1-IB3,IB5-IB8
Collecting patch inventory on CRS_HOME /u01/app/11.2.0.4/grid
Collecting patch inventory on ORACLE_HOME /u01/app/oracle/product/11.2.0.4/dbhome
Copying results from dm01db02 and generating report. This might take a while. Be patient.
.
============================================================
Node name – dm01db02
============================================================
Collecting – CPU Information
Collecting – Clusterware and RDBMS software version
Collecting – Compute node PCI bus slot speed for infiniband HCAs
Collecting – Kernel parameters
Collecting – Maximum number of semaphore sets on system
Collecting – Maximum number of semaphores on system
Collecting – OS Packages
Collecting – Patches for Grid Infrastructure
Collecting – Patches for RDBMS Home
Collecting – RDBMS patch inventory
Collecting – number of semaphore operations per semop system call
Collecting – CRS user limits configuration
Collecting – CRS user time zone check
Collecting – Check alerthistory for non-test open stateless alerts [Database Server]
Collecting – Check alerthistory for stateful alerts not cleared [Database Server]
Collecting – Clusterware patch inventory
Collecting – Exadata Critical Issue DB09
Collecting – Exadata Critical Issue EX30
Collecting – Exadata Critical Issue EX36
Collecting – Exadata Critical Issue EX56
Collecting – Exadata Critical Issue EX57
Collecting – Exadata Critical Issue EX58
Collecting – Exadata critical issue EX48
Collecting – Exadata critical issue EX55
Collecting – Exadata software version on database server
Collecting – Exadata system model number
Collecting – Exadata version on database server
Collecting – HCA firmware version on database server
Collecting – HCA transfer rate on database server
Collecting – Infrastructure Software and Configuration for compute
Collecting – MaxStartups setting in sshd_config
Collecting – OFED Software version on database server
Collecting – Obtain hardware information
Collecting – Operating system and Kernel version on database server
Collecting – Oracle monitoring agent and/or OS settings on ADR diagnostic directories
Collecting – Raid controller bus link speed
Collecting – System Event Log
Collecting – Validate key sysctl.conf parameters on database servers
Collecting – Verify Data Network is Separate from Management Network
Collecting – Verify Database Server Disk Controller Configuration
Collecting – Verify Database Server Physical Drive Configuration
Collecting – Verify Database Server Virtual Drive Configuration
Collecting – Verify Disk Cache Policy on database server
Collecting – Verify Hardware and Firmware on Database and Storage Servers (CheckHWnFWProfile) [Database Server]
Collecting – Verify ILOM Power Up Configuration for HOST_AUTO_POWER_ON
Collecting – Verify ILOM Power Up Configuration for HOST_LAST_POWER_STATE
Collecting – Verify IP routing configuration on database servers
Collecting – Verify InfiniBand Address Resolution Protocol (ARP) Configuration on Database Servers
Collecting – Verify Master (Rack) Serial Number is Set [Database Server]
Collecting – Verify Quorum disks configuration
Collecting – Verify RAID Controller Battery Temperature [Database Server]
Collecting – Verify RAID disk controller CacheVault capacitor condition [Database Server]
Collecting – Verify RAID disk controller CacheVault capacitor condition [Database Server]
Collecting – Verify TCP Segmentation Offload (TSO) is set to off
Collecting – Verify available ksplice fixes are installed [Database Server]
Collecting – Verify basic Logical Volume(LVM) system devices configuration
Collecting – Verify database server InfiniBand network MTU size
Collecting – Verify database server disk controllers use writeback cache
Collecting – Verify database server file systems have Check interval = 0
Collecting – Verify database server file systems have Maximum mount count = -1
Collecting – Verify imageinfo on database server
Collecting – Verify imageinfo on database server to compare systemwide
Collecting – Verify installed rpm(s) kernel type match the active kernel version
Collecting – Verify no database server kernel out of memory errors
Collecting – Verify proper ACFS drivers are installed for Spectre v2 mitigation
Collecting – Verify service exachkcfg autostart status on database server
Collecting – Verify the localhost alias is pingable [Database Server]
Collecting – Verify the InfiniBand Fabric Topology (verify-topology)
Collecting – Verify the Name Service Cache Daemon (NSCD) configuration
Collecting – Verify the Subnet Manager is properly disabled [Database Server]
Collecting – Verify the currently active image status [Database Server]
Collecting – Verify the ib_sdp module is not loaded into the kernel
Collecting – Verify the storage servers in use configuration matches across the cluster
Collecting – Verify the vm.min_free_kbytes configuration
Collecting – Verify there are no files present that impact normal firmware update procedures [Database Server]
Collecting – collect time server data [Database Server]
Collecting – root time zone check
Collecting – verify asr exadata configuration check via ASREXACHECK on database server
list index out of range
Data collections completed. Checking best practices on dm01db02.
————————————————————
FAIL => Exadata software version on database server does not meet certified platinum configuration
FAIL => Oracle database does not meet certified platinum configuration for /u01/app/oracle/product/11.2.0.4/dbhome
WARNING => Database parameter AUDIT_SYS_OPERATIONS should be set to the recommended value on testdb2 instance
WARNING => Database parameter AUDIT_SYS_OPERATIONS should be set to the recommended value on orcldb2 instance
INFO => Oracle GoldenGate failure prevention best practices
WARNING => Non-default database Services are not configured for orcldb
WARNING => Database parameter processes should be set to recommended value on testdb2 instance
WARNING => Database parameter processes should be set to recommended value on orcldb2 instance
FAIL => _reconnect_to_cell_attempts parameter in cellinit.ora is not set to recommended value
FAIL => Oracle monitoring agent and Operating systems settings on Automatic diagnostic repository directories are not correct or not all targets have been scanned or not all diagnostic directories found
FAIL => Downdelay attribute is not set to recommended value on bonded client interface
FAIL => One or more of SYSTEM, SYSAUX, USERS, TEMP tablespaces are not of type bigfile for orcldb
FAIL => The initialization parameter cluster_database_instances should be at the default value for testdb
FAIL => The initialization parameter cluster_database_instances should be at the default value for orcldb
INFO => Database parameter AUDIT_TRAIL should be set to the recommended value for testdb
INFO => Database parameter AUDIT_TRAIL should be set to the recommended value for orcldb
FAIL => Memlock settings do not meet the Oracle best practice recommendations for /u01/app/oracle/product/11.2.0.4/dbhome
CRITICAL => System is exposed to Exadata Critical Issue EX58
CRITICAL => One or more log archive destination and alternate log archive destination settings are not as recommended
CRITICAL => One or more disk groups which contain critical files do not use high redundancy
FAIL => Database parameter DB_LOST_WRITE_PROTECT is not set to recommended value on testdb2 instance
FAIL => Database parameter DB_LOST_WRITE_PROTECT is not set to recommended value on orcldb2 instance
FAIL => Database parameter GLOBAL_NAMES is not set to recommended value on testdb2 instance
FAIL => Database parameter GLOBAL_NAMES is not set to recommended value on orcldb2 instance
FAIL => Database parameter PARALLEL_ADAPTIVE_MULTI_USER is not set to recommended value on testdb2 instance
FAIL => Database parameter PARALLEL_ADAPTIVE_MULTI_USER is not set to recommended value on orcldb2 instance
FAIL => Database parameter PARALLEL_THREADS_PER_CPU is not set to recommended value on testdb2 instance
FAIL => Database parameter PARALLEL_THREADS_PER_CPU is not set to recommended value on orcldb2 instance
FAIL => Database parameter OS_AUTHENT_PREFIX is not set to recommended value on testdb2 instance
FAIL => Database parameter OS_AUTHENT_PREFIX is not set to recommended value on orcldb2 instance
FAIL => Database parameter sql92_security is not set to recommended value on testdb2 instance
FAIL => Database parameter sql92_security is not set to recommended value on orcldb2 instance
FAIL => Database parameter COMPATIBLE should be set to recommended value for testdb
FAIL => Database parameter COMPATIBLE should be set to recommended value for orcldb
CRITICAL => Database parameters log_archive_dest_n with Location attribute are not all set to recommended value for orcldb
CRITICAL => Database parameter Db_create_online_log_dest_n is not set to recommended value for testdb
CRITICAL => Database control files are not configured as recommended
WARNING => ASM parameter ASM_POWER_LIMIT is not set to the default value.
INFO => While initialization parameter LOG_ARCHIVE_CONFIG is set it should be verified for your environment on Standby Database for testdb
WARNING => Redo log files should be appropriately sized for testdb
WARNING => Redo log files should be appropriately sized for orcldb
FAIL => Database parameter LOG_BUFFER is not set to recommended value on orcldb2 instance
Collecting patch inventory on CRS_HOME /u01/app/11.2.0.4/grid
Collecting patch inventory on ORACLE_HOME /u01/app/oracle/product/11.2.0.4/dbhome
Copying results from dm01db03 and generating report. This might take a while. Be patient.
.
============================================================
Node name – dm01db03
============================================================
Collecting – CPU Information
Collecting – Clusterware and RDBMS software version
Collecting – Compute node PCI bus slot speed for infiniband HCAs
Collecting – Kernel parameters
Collecting – Maximum number of semaphore sets on system
Collecting – Maximum number of semaphores on system
Collecting – OS Packages
Collecting – Patches for Grid Infrastructure
Collecting – Patches for RDBMS Home
Collecting – RDBMS patch inventory
Collecting – number of semaphore operations per semop system call
Collecting – CRS user limits configuration
Collecting – CRS user time zone check
Collecting – Check alerthistory for non-test open stateless alerts [Database Server]
Collecting – Check alerthistory for stateful alerts not cleared [Database Server]
Collecting – Clusterware patch inventory
Collecting – Exadata Critical Issue DB09
Collecting – Exadata Critical Issue EX30
Collecting – Exadata Critical Issue EX36
Collecting – Exadata Critical Issue EX56
Collecting – Exadata Critical Issue EX57
Collecting – Exadata Critical Issue EX58
Collecting – Exadata critical issue EX48
Collecting – Exadata critical issue EX55
Collecting – Exadata software version on database server
Collecting – Exadata system model number
Collecting – Exadata version on database server
Collecting – HCA firmware version on database server
Collecting – HCA transfer rate on database server
Collecting – Infrastructure Software and Configuration for compute
Collecting – MaxStartups setting in sshd_config
Collecting – OFED Software version on database server
Collecting – Obtain hardware information
Collecting – Operating system and Kernel version on database server
Collecting – Oracle monitoring agent and/or OS settings on ADR diagnostic directories
Collecting – Raid controller bus link speed
Collecting – System Event Log
Collecting – Validate key sysctl.conf parameters on database servers
Collecting – Verify Data Network is Separate from Management Network
Collecting – Verify Database Server Disk Controller Configuration
Collecting – Verify Database Server Physical Drive Configuration
Collecting – Verify Database Server Virtual Drive Configuration
Collecting – Verify Disk Cache Policy on database server
Collecting – Verify Hardware and Firmware on Database and Storage Servers (CheckHWnFWProfile) [Database Server]
Collecting – Verify ILOM Power Up Configuration for HOST_AUTO_POWER_ON
Collecting – Verify ILOM Power Up Configuration for HOST_LAST_POWER_STATE
Collecting – Verify IP routing configuration on database servers
Collecting – Verify InfiniBand Address Resolution Protocol (ARP) Configuration on Database Servers
Collecting – Verify Master (Rack) Serial Number is Set [Database Server]
Collecting – Verify Quorum disks configuration
Collecting – Verify RAID Controller Battery Temperature [Database Server]
Collecting – Verify RAID disk controller CacheVault capacitor condition [Database Server]
Collecting – Verify RAID disk controller CacheVault capacitor condition [Database Server]
Collecting – Verify TCP Segmentation Offload (TSO) is set to off
Collecting – Verify available ksplice fixes are installed [Database Server]
Collecting – Verify basic Logical Volume(LVM) system devices configuration
Collecting – Verify database server InfiniBand network MTU size
Collecting – Verify database server disk controllers use writeback cache
Collecting – Verify database server file systems have Check interval = 0
Collecting – Verify database server file systems have Maximum mount count = -1
Collecting – Verify imageinfo on database server
Collecting – Verify imageinfo on database server to compare systemwide
Collecting – Verify installed rpm(s) kernel type match the active kernel version
Collecting – Verify no database server kernel out of memory errors
Collecting – Verify proper ACFS drivers are installed for Spectre v2 mitigation
Collecting – Verify service exachkcfg autostart status on database server
Collecting – Verify the localhost alias is pingable [Database Server]
Collecting – Verify the InfiniBand Fabric Topology (verify-topology)
Collecting – Verify the Name Service Cache Daemon (NSCD) configuration
Collecting – Verify the Subnet Manager is properly disabled [Database Server]
Collecting – Verify the currently active image status [Database Server]
Collecting – Verify the ib_sdp module is not loaded into the kernel
Collecting – Verify the storage servers in use configuration matches across the cluster
Collecting – Verify the vm.min_free_kbytes configuration
Collecting – Verify there are no files present that impact normal firmware update procedures [Database Server]
Collecting – collect time server data [Database Server]
Collecting – root time zone check
Collecting – verify asr exadata configuration check via ASREXACHECK on database server
list index out of range
Data collections completed. Checking best practices on dm01db03.
————————————————————
FAIL => Exadata software version on database server does not meet certified platinum configuration
FAIL => Oracle database does not meet certified platinum configuration for /u01/app/oracle/product/11.2.0.4/dbhome
WARNING => Database parameter AUDIT_SYS_OPERATIONS should be set to the recommended value on testdb3 instance
WARNING => Database parameter AUDIT_SYS_OPERATIONS should be set to the recommended value on orcldb3 instance
INFO => Oracle GoldenGate failure prevention best practices
WARNING => Non-default database Services are not configured for orcldb
WARNING => Database parameter processes should be set to recommended value on testdb3 instance
WARNING => Database parameter processes should be set to recommended value on orcldb3 instance
FAIL => _reconnect_to_cell_attempts parameter in cellinit.ora is not set to recommended value
FAIL => Oracle monitoring agent and Operating systems settings on Automatic diagnostic repository directories are not correct or not all targets have been scanned or not all diagnostic directories found
FAIL => Downdelay attribute is not set to recommended value on bonded client interface
WARNING => The IP routing configuration is not correct
FAIL => One or more of SYSTEM, SYSAUX, USERS, TEMP tablespaces are not of type bigfile for orcldb
FAIL => The initialization parameter cluster_database_instances should be at the default value for testdb
FAIL => The initialization parameter cluster_database_instances should be at the default value for orcldb
INFO => Database parameter AUDIT_TRAIL should be set to the recommended value for testdb
INFO => Database parameter AUDIT_TRAIL should be set to the recommended value for orcldb
FAIL => Memlock settings do not meet the Oracle best practice recommendations for /u01/app/oracle/product/11.2.0.4/dbhome
CRITICAL => System is exposed to Exadata Critical Issue EX58
FAIL => Management network is not separate from data network
CRITICAL => One or more log archive destination and alternate log archive destination settings are not as recommended
CRITICAL => One or more disk groups which contain critical files do not use high redundancy
FAIL => Database parameter DB_LOST_WRITE_PROTECT is not set to recommended value on testdb3 instance
FAIL => Database parameter DB_LOST_WRITE_PROTECT is not set to recommended value on orcldb3 instance
FAIL => Database parameter GLOBAL_NAMES is not set to recommended value on testdb3 instance
FAIL => Database parameter GLOBAL_NAMES is not set to recommended value on orcldb3 instance
FAIL => Database parameter PARALLEL_ADAPTIVE_MULTI_USER is not set to recommended value on testdb3 instance
FAIL => Database parameter PARALLEL_ADAPTIVE_MULTI_USER is not set to recommended value on orcldb3 instance
FAIL => Database parameter PARALLEL_THREADS_PER_CPU is not set to recommended value on testdb3 instance
FAIL => Database parameter PARALLEL_THREADS_PER_CPU is not set to recommended value on orcldb3 instance
FAIL => Database parameter OS_AUTHENT_PREFIX is not set to recommended value on testdb3 instance
FAIL => Database parameter OS_AUTHENT_PREFIX is not set to recommended value on orcldb3 instance
FAIL => Database parameter sql92_security is not set to recommended value on testdb3 instance
FAIL => Database parameter sql92_security is not set to recommended value on orcldb3 instance
FAIL => Database parameter COMPATIBLE should be set to recommended value for testdb
FAIL => Database parameter COMPATIBLE should be set to recommended value for orcldb
CRITICAL => Database parameters log_archive_dest_n with Location attribute are not all set to recommended value for orcldb
CRITICAL => Database parameter Db_create_online_log_dest_n is not set to recommended value for testdb
CRITICAL => Database control files are not configured as recommended
WARNING => ASM parameter ASM_POWER_LIMIT is not set to the default value.
INFO => While initialization parameter LOG_ARCHIVE_CONFIG is set it should be verified for your environment on Standby Database for testdb
WARNING => Redo log files should be appropriately sized for testdb
WARNING => Redo log files should be appropriately sized for orcldb
FAIL => Database parameter LOG_BUFFER is not set to recommended value on orcldb3 instance
Collecting patch inventory on CRS_HOME /u01/app/11.2.0.4/grid
Collecting patch inventory on ORACLE_HOME /u01/app/oracle/product/11.2.0.4/dbhome
Copying results from dm01db04 and generating report. This might take a while. Be patient.
.
============================================================
Node name – dm01db04
============================================================
Collecting – CPU Information
Collecting – Clusterware and RDBMS software version
Collecting – Compute node PCI bus slot speed for infiniband HCAs
Collecting – Kernel parameters
Collecting – Maximum number of semaphore sets on system
Collecting – Maximum number of semaphores on system
Collecting – OS Packages
Collecting – Patches for Grid Infrastructure
Collecting – Patches for RDBMS Home
Collecting – RDBMS patch inventory
Collecting – number of semaphore operations per semop system call
Collecting – CRS user limits configuration
Collecting – CRS user time zone check
Collecting – Check alerthistory for non-test open stateless alerts [Database Server]
Collecting – Check alerthistory for stateful alerts not cleared [Database Server]
Collecting – Clusterware patch inventory
Collecting – Exadata Critical Issue DB09
Collecting – Exadata Critical Issue EX30
Collecting – Exadata Critical Issue EX36
Collecting – Exadata Critical Issue EX56
Collecting – Exadata Critical Issue EX57
Collecting – Exadata Critical Issue EX58
Collecting – Exadata critical issue EX48
Collecting – Exadata critical issue EX55
Collecting – Exadata software version on database server
Collecting – Exadata system model number
Collecting – Exadata version on database server
Collecting – HCA firmware version on database server
Collecting – HCA transfer rate on database server
Collecting – Infrastructure Software and Configuration for compute
Collecting – MaxStartups setting in sshd_config
Collecting – OFED Software version on database server
Collecting – Obtain hardware information
Collecting – Operating system and Kernel version on database server
Collecting – Oracle monitoring agent and/or OS settings on ADR diagnostic directories
Collecting – Raid controller bus link speed
Collecting – System Event Log
Collecting – Validate key sysctl.conf parameters on database servers
Collecting – Verify Data Network is Separate from Management Network
Collecting – Verify Database Server Disk Controller Configuration
Collecting – Verify Database Server Physical Drive Configuration
Collecting – Verify Database Server Virtual Drive Configuration
Collecting – Verify Disk Cache Policy on database server
Collecting – Verify Hardware and Firmware on Database and Storage Servers (CheckHWnFWProfile) [Database Server]
Collecting – Verify ILOM Power Up Configuration for HOST_AUTO_POWER_ON
Collecting – Verify ILOM Power Up Configuration for HOST_LAST_POWER_STATE
Collecting – Verify IP routing configuration on database servers
Collecting – Verify InfiniBand Address Resolution Protocol (ARP) Configuration on Database Servers
Collecting – Verify Master (Rack) Serial Number is Set [Database Server]
Collecting – Verify Quorum disks configuration
Collecting – Verify RAID Controller Battery Temperature [Database Server]
Collecting – Verify RAID disk controller CacheVault capacitor condition [Database Server]
Collecting – Verify RAID disk controller CacheVault capacitor condition [Database Server]
Collecting – Verify TCP Segmentation Offload (TSO) is set to off
Collecting – Verify available ksplice fixes are installed [Database Server]
Collecting – Verify basic Logical Volume(LVM) system devices configuration
Collecting – Verify database server InfiniBand network MTU size
Collecting – Verify database server disk controllers use writeback cache
Collecting – Verify database server file systems have Check interval = 0
Collecting – Verify database server file systems have Maximum mount count = -1
Collecting – Verify imageinfo on database server
Collecting – Verify imageinfo on database server to compare systemwide
Collecting – Verify installed rpm(s) kernel type match the active kernel version
Collecting – Verify no database server kernel out of memory errors
Collecting – Verify proper ACFS drivers are installed for Spectre v2 mitigation
Collecting – Verify service exachkcfg autostart status on database server
Collecting – Verify the localhost alias is pingable [Database Server]
Collecting – Verify the InfiniBand Fabric Topology (verify-topology)
Collecting – Verify the Name Service Cache Daemon (NSCD) configuration
Collecting – Verify the Subnet Manager is properly disabled [Database Server]
Collecting – Verify the currently active image status [Database Server]
Collecting – Verify the ib_sdp module is not loaded into the kernel
Collecting – Verify the storage servers in use configuration matches across the cluster
Collecting – Verify the vm.min_free_kbytes configuration
Collecting – Verify there are no files present that impact normal firmware update procedures [Database Server]
Collecting – collect time server data [Database Server]
Collecting – root time zone check
Collecting – verify asr exadata configuration check via ASREXACHECK on database server
list index out of range
Data collections completed. Checking best practices on dm01db04.
————————————————————
FAIL => Exadata software version on database server does not meet certified platinum configuration
FAIL => Oracle database does not meet certified platinum configuration for /u01/app/oracle/product/11.2.0.4/dbhome
WARNING => Database parameter AUDIT_SYS_OPERATIONS should be set to the recommended value on testdb4 instance
WARNING => Database parameter AUDIT_SYS_OPERATIONS should be set to the recommended value on orcldb4 instance
INFO => Oracle GoldenGate failure prevention best practices
WARNING => Non-default database Services are not configured for orcldb
WARNING => Database parameter processes should be set to recommended value on testdb4 instance
WARNING => Database parameter processes should be set to recommended value on orcldb4 instance
FAIL => _reconnect_to_cell_attempts parameter in cellinit.ora is not set to recommended value
FAIL => Oracle monitoring agent and Operating systems settings on Automatic diagnostic repository directories are not correct or not all targets have been scanned or not all diagnostic directories found
FAIL => Downdelay attribute is not set to recommended value on bonded client interface
WARNING => The IP routing configuration is not correct
FAIL => One or more of SYSTEM, SYSAUX, USERS, TEMP tablespaces are not of type bigfile for orcldb
FAIL => The initialization parameter cluster_database_instances should be at the default value for testdb
FAIL => The initialization parameter cluster_database_instances should be at the default value for orcldb
INFO => Database parameter AUDIT_TRAIL should be set to the recommended value for testdb
INFO => Database parameter AUDIT_TRAIL should be set to the recommended value for orcldb
FAIL => Memlock settings do not meet the Oracle best practice recommendations for /u01/app/oracle/product/11.2.0.4/dbhome
CRITICAL => System is exposed to Exadata Critical Issue EX58
FAIL => Management network is not separate from data network
CRITICAL => One or more log archive destination and alternate log archive destination settings are not as recommended
CRITICAL => One or more disk groups which contain critical files do not use high redundancy
FAIL => Database parameter DB_LOST_WRITE_PROTECT is not set to recommended value on testdb4 instance
FAIL => Database parameter DB_LOST_WRITE_PROTECT is not set to recommended value on orcldb4 instance
FAIL => Database parameter GLOBAL_NAMES is not set to recommended value on testdb4 instance
FAIL => Database parameter GLOBAL_NAMES is not set to recommended value on orcldb4 instance
FAIL => Database parameter PARALLEL_ADAPTIVE_MULTI_USER is not set to recommended value on testdb4 instance
FAIL => Database parameter PARALLEL_ADAPTIVE_MULTI_USER is not set to recommended value on orcldb4 instance
FAIL => Database parameter PARALLEL_THREADS_PER_CPU is not set to recommended value on testdb4 instance
FAIL => Database parameter PARALLEL_THREADS_PER_CPU is not set to recommended value on orcldb4 instance
FAIL => Database parameter OS_AUTHENT_PREFIX is not set to recommended value on testdb4 instance
FAIL => Database parameter OS_AUTHENT_PREFIX is not set to recommended value on orcldb4 instance
FAIL => Database parameter sql92_security is not set to recommended value on testdb4 instance
FAIL => Database parameter sql92_security is not set to recommended value on orcldb4 instance
FAIL => Database parameter COMPATIBLE should be set to recommended value for testdb
FAIL => Database parameter COMPATIBLE should be set to recommended value for orcldb
CRITICAL => Database parameters log_archive_dest_n with Location attribute are not all set to recommended value for orcldb
CRITICAL => Database parameter Db_create_online_log_dest_n is not set to recommended value for testdb
CRITICAL => Database control files are not configured as recommended
WARNING => ASM parameter ASM_POWER_LIMIT is not set to the default value.
INFO => While initialization parameter LOG_ARCHIVE_CONFIG is set it should be verified for your environment on Standby Database for testdb
WARNING => Redo log files should be appropriately sized for testdb
WARNING => Redo log files should be appropriately sized for orcldb
FAIL => Database parameter LOG_BUFFER is not set to recommended value on orcldb4 instance
Collecting patch inventory on CRS_HOME /u01/app/11.2.0.4/grid
Collecting patch inventory on ORACLE_HOME /u01/app/oracle/product/11.2.0.4/dbhome
————————————————————
CLUSTERWIDE CHECKS
————————————————————
————————————————————
Detailed report (html) – /u01/app/oracle/oracle.ahf/data/dm01db01/exachk/exachk_dm01db01_orcldb_040620_12376/exachk_dm01db01_orcldb_040620_12376.html
UPLOAD [if required] – /u01/app/oracle/oracle.ahf/data/dm01db01/exachk/exachk_dm01db01_orcldb_040620_12376.zip
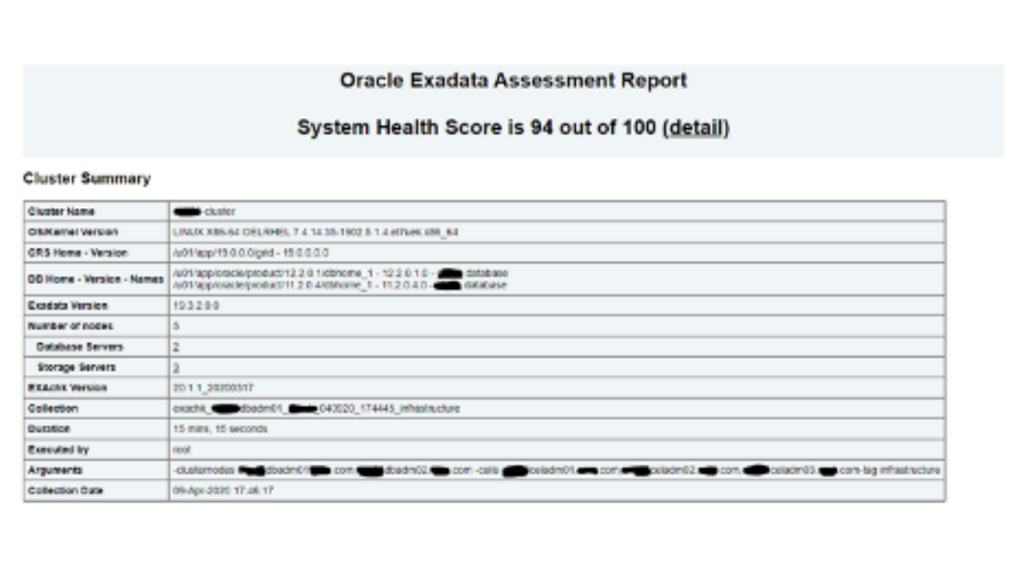
Step 7: Review the Exachk report or Upload file to Oracle Support
[root@dm01db01 Exachk]# curl -x webproxy.netsoftmate.com:80 -T /u01/app/oracle/oracle.ahf/data/dm01db01/exachk/exachk_dm01db01_orcldb_040620_12376.zip -u abdul.mohammed@netsoftmate.com https://transport.oracle.com/upload/issue/3-XXXXXXXX/ -v
Sample Exadata Output:
To Uninstall AHF
[root@dm01db01 ~]# cd /opt/oracle.ahf/ahf/bin
[root@dm01db01 bin]# ls -ltr
total 88
-r-xr-xr-x 1 root root 19623 Mar 17 11:25 uninstallahf.sh
-r-xr-xr-x 1 root root 14504 Mar 17 11:25 uninstallahf.pl
-rwxr-xr-x 1 root root 3296 Mar 17 11:25 tfactl
-r-xr-xr-x 1 root root 45597 Mar 17 11:25 installAHF.pl
[root@dm01db01 bin]# ./uninstallahf.sh -h
Usage for ./uninstallahf.sh
./uninstallahf.sh [-local] [-silent] [-deleterepo]
-local – Uninstall AHF only on the local node
-silent – Do not ask any uninstall questions
-deleterepo – Delete AHF repository
Note: If -local is not passed, AHF will be uninstalled from all configured nodes.
[root@dm01db01 bin]# ./uninstallahf.sh -deleterepo
Starting AHF Uninstall
AHF will be uninstalled on:
dm01db01
dm01db02
Do you want to continue with AHF uninstall ? [Y]|N : Y
Stopping AHF service on local node dm01db01…
Stopping TFA Support Tools…
TFA-00002 Oracle Trace File Analyzer (TFA) is not running
Stopping exachk scheduler …
Removing exachk cache discovery….
No exachk cache discovery found.
Removed exachk from inittab
Stopping and removing AHF in dm01db02…
TFA-00002 Oracle Trace File Analyzer (TFA) is not running
Removing exachk cache discovery….
Successfully completed exachk cache discovery removal.
Removed exachk from inittab
Successfully uninstalled AHF on node dm01db02
Removing AHF setup on dm01db01:
Removing /etc/rc.d/rc0.d/K17init.tfa
Removing /etc/rc.d/rc1.d/K17init.tfa
Removing /etc/rc.d/rc2.d/K17init.tfa
Removing /etc/rc.d/rc4.d/K17init.tfa
Removing /etc/rc.d/rc6.d/K17init.tfa
Removing /etc/init.d/init.tfa…
Removing /opt/oracle.ahf/jre
Removing /opt/oracle.ahf/common
Removing /opt/oracle.ahf/bin
Removing /opt/oracle.ahf/python
Removing /opt/oracle.ahf/analyzer
Removing /opt/oracle.ahf/tfa
Removing /opt/oracle.ahf/ahf
Removing /opt/oracle.ahf/exachk
Removing /u01/app/oracle/oracle.ahf/data/dm01db01
Removing /opt/oracle.ahf/install.properties
Removing /u01/app/oracle/oracle.ahf/data/repository
Removing /u01/app/oracle/oracle.ahf/data
Removing /u01/app/oracle/oracle.ahf
Removing AHF Home : /opt/oracle.ahf
Conclusion:
In this article we have learned how to install, setup and execute Autonomous Health Check Frame work for Exadata Database Machines. We have also seen how to uninstall the AHF software.
About Netsoftmate:
Netsoftmate is an Oracle Gold Partner and a boutique IT services company specializing in installation, implementation and 24/7 support for Oracle Engineered Systems like Oracle Exadata, Oracle Database Appliance, Oracle ZDLRA, Oracle ZFS Storage and Oracle Private Cloud Appliance. Apart from OES, we have specialized teams of experts providing round the clock remote database administration support for any type of database and cyber security compliance and auditing services.
Feel free to get in touch with us by signing up on the link below –