You want to execute Operating System or Exadata commands on multiple Exadata Compute nodes and Storage Cell in parallel. To accomplish this you must setup passwordless SSH across compute nodes and storage cells.
If SSH equivalence is NOT setup and you execute the dcli command you will see the follow messages. This mean the SSH equivalence is not configured.
[root@dm01db01 ~]# dcli -g dbs_group -l root ‘uptime’
The authenticity of host ‘dm01db03 (10.10.10.195)’ can’t be established.
RSA key fingerprint is 40:81:3c:6d:ef:e7:1f:d7:a0:df:eb:f5:ea:92:a5:db.
Are you sure you want to continue connecting (yes/no)? The authenticity of host ‘dm01db05 (10.10.10.197)’ can’t be established.
RSA key fingerprint is 1b:95:47:0b:92:b4:13:9f:55:b7:a3:2a:56:27:9f:1c.
Are you sure you want to continue connecting (yes/no)? The authenticity of host ‘dm01db02 (10.10.10.194)’ can’t be established.
RSA key fingerprint is e1:0d:90:46:16:88:74:01:02:5a:11:90:63:b1:6b:1c.
Are you sure you want to continue connecting (yes/no)? The authenticity of host ‘dm01db01 (10.10.10.193)’ can’t be established.
RSA key fingerprint is 2b:6f:43:4b:86:29:bb:ed:a6:03:c5:34:75:cf:45:34.
Are you sure you want to continue connecting (yes/no)? The authenticity of host ‘dm01db04 (10.10.10.196)’ can’t be established.
RSA key fingerprint is 44:a7:ad:65:c3:1c:fb:0b:0b:28:2c:b6:a5:f3:59:99.
Are you sure you want to continue connecting (yes/no)? The authenticity of host ‘dm01db07 (10.10.10.199)’ can’t be established.
RSA key fingerprint is 25:5f:9a:e6:a4:7a:13:ba:e2:e7:7d:2e:79:53:49:2b.
Are you sure you want to continue connecting (yes/no)? root@dm01db06’s password: root@dm01db08’s password:
In this article we will demonstrate how to setup SSH equivalence on Exadata Database Machine.
Steps to Setup SSH Equivalence
1. Create the following files if doesn’t exist
[root@dm01db08 ~]# cat dbs_group
dm01db01
dm01db02
dm01db03
dm01db04
dm01db05
dm01db06
dm01db07
dm01db08
[root@dm01db08 ~]# cat cell_group
dm01cel01
dm01cel02
dm01cel03
dm01cel04
dm01cel05
dm01cel06
dm01cel07
[root@dm01db08 ~]# cat all_group
dm01db01
dm01db02
dm01db03
dm01db04
dm01db05
dm01db06
dm01db07
dm01db08
dm01cel01
dm01cel02
dm01cel03
dm01cel04
dm01cel05
dm01cel06
dm01cel07
dm01sw-iba01
dm01sw-ibb01
2. Navigate to Support directory on Compute node 1 as shown below
[root@dm01db01 ~]# cd /opt/oracle.SupportTools/
3. Oracle has provided a script *setup_ssh_eq.sh* to configure SSH equivalence across Exadata components. Execute the script as shown below. Here we are setting the SSH equivalence for root user
[root@dm01db01 oracle.SupportTools]# ./setup_ssh_eq.sh ~/all_group root welcome1
/root/.ssh/id_dsa already exists.
Overwrite (y/n)?
/root/.ssh/id_rsa already exists.
Overwrite (y/n)?
spawn dcli -c dm01db01 -l root -k
dm01db01: ssh key already exists
expect: spawn id exp4 not open
while executing
“expect “*?assword:*””
spawn dcli -c dm01db02 -l root -k
dm01db02: ssh key already exists
expect: spawn id exp4 not open
while executing
“expect “*?assword:*””
spawn dcli -c dm01db03 -l root -k
dm01db03: ssh key already exists
expect: spawn id exp4 not open
while executing
“expect “*?assword:*””
spawn dcli -c dm01db04 -l root -k
dm01db04: ssh key already exists
expect: spawn id exp4 not open
while executing
“expect “*?assword:*””
spawn dcli -c dm01db05 -l root -k
dm01db05: ssh key already exists
expect: spawn id exp4 not open
while executing
“expect “*?assword:*””
spawn dcli -c dm01db06 -l root -k
dm01db06: ssh key already exists
expect: spawn id exp4 not open
while executing
“expect “*?assword:*””
spawn dcli -c dm01db07 -l root -k
dm01db07: ssh key already exists
expect: spawn id exp4 not open
while executing
“expect “*?assword:*””
spawn dcli -c dm01db08 -l root -k
dm01db08: ssh key already exists
expect: spawn id exp4 not open
while executing
“expect “*?assword:*””
spawn dcli -c dm01cel01 -l root -k
dm01cel01: ssh key already exists
expect: spawn id exp4 not open
while executing
“expect “*?assword:*””
spawn dcli -c dm01cel02 -l root -k
dm01cel02: ssh key already exists
expect: spawn id exp4 not open
while executing
“expect “*?assword:*””
spawn dcli -c dm01cel03 -l root -k
dm01cel03: ssh key already exists
expect: spawn id exp4 not open
while executing
“expect “*?assword:*””
spawn dcli -c dm01cel04 -l root -k
dm01cel04: ssh key already exists
expect: spawn id exp4 not open
while executing
“expect “*?assword:*””
spawn dcli -c dm01cel05 -l root -k
dm01cel05: ssh key already exists
expect: spawn id exp4 not open
while executing
“expect “*?assword:*””
spawn dcli -c dm01cel06 -l root -k
dm01cel06: ssh key already exists
expect: spawn id exp4 not open
while executing
“expect “*?assword:*””
spawn dcli -c dm01cel07 -l root -k
dm01cel07: ssh key already exists
expect: spawn id exp4 not open
while executing
“expect “*?assword:*””
spawn dcli -c dm01sw-iba01 -l root -k
dm01sw-iba01: ssh key already exists
expect: spawn id exp4 not open
while executing
“expect “*?assword:*””
spawn dcli -c dm01sw-ibb01 -l root -k
dm01sw-ibb01: ssh key already exists
expect: spawn id exp4 not open
while executing
“expect “*?assword:*””
4. Verify SSH equivalence is working fine
[root@dm01db08 ~]# dcli -g ~/all_group -l root ‘uptime’
dm01db01: 09:16:41 up 21 days, 15:47, 1 user, load average: 1.80, 3.02, 3.35
dm01db02: 09:16:41 up 21 days, 15:38, 0 users, load average: 2.93, 2.44, 2.37
dm01db03: 09:16:41 up 21 days, 15:19, 0 users, load average: 2.16, 2.27, 2.77
dm01db04: 09:16:41 up 21 days, 15:12, 0 users, load average: 4.07, 4.33, 4.14
dm01db05: 09:16:41 up 21 days, 15:09, 0 users, load average: 2.45, 2.82, 2.75
dm01db06: 09:16:41 up 21 days, 15:06, 0 users, load average: 1.70, 2.04, 2.60
dm01db07: 09:16:41 up 21 days, 15:02, 0 users, load average: 6.39, 4.46, 4.20
dm01db08: 09:16:41 up 21 days, 14:59, 1 user, load average: 1.66, 1.81, 1.97
dm01cel01: 09:16:41 up 203 days, 19:00, 0 users, load average: 1.40, 1.97, 2.21
dm01cel02: 09:16:41 up 203 days, 18:59, 0 users, load average: 1.52, 2.08, 2.38
dm01cel03: 09:16:41 up 203 days, 18:59, 0 users, load average: 1.00, 1.71, 2.02
dm01cel04: 09:16:41 up 203 days, 18:59, 0 users, load average: 1.08, 1.59, 1.92
dm01cel05: 09:16:41 up 203 days, 18:59, 0 users, load average: 1.24, 1.53, 1.82
dm01cel06: 09:16:41 up 203 days, 18:59, 0 users, load average: 1.09, 1.60, 1.96
dm01cel07: 09:16:41 up 203 days, 19:00, 0 users, load average: 1.01, 1.37, 1.60
dm01sw-iba01: 09:16:42 up 539 days, 6:21, 0 users, load average: 0.79, 0.99, 1.07
dm01sw-ibb01: 14:49:54 up 539 days, 9:43, 0 users, load average: 1.26, 1.44, 1.41
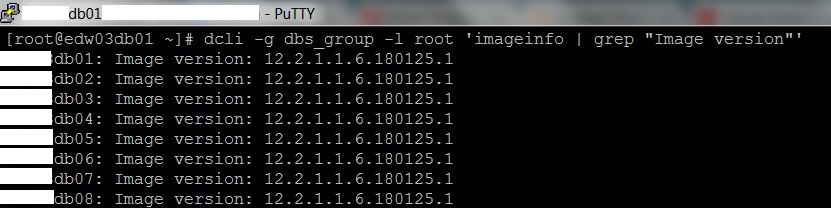
[root@dm01db08 ~]# dcli -g dbs_group -l root ‘imageinfo | grep “Image version”‘
dm01db01: Image version: 12.1.2.3.6.170713
dm01db02: Image version: 12.1.2.3.6.170713
dm01db03: Image version: 12.1.2.3.6.170713
dm01db04: Image version: 12.1.2.3.6.170713
dm01db05: Image version: 12.1.2.3.6.170713
dm01db06: Image version: 12.1.2.3.6.170713
dm01db07: Image version: 12.1.2.3.6.170713
dm01db08: Image version: 12.1.2.3.6.170713

[root@dm01db08 ~]# dcli -g cell_group -l root ‘imageinfo | grep “Active image version”‘
dm01cel01: Active image version: 12.1.2.3.6.170713
dm01cel02: Active image version: 12.1.2.3.6.170713
dm01cel03: Active image version: 12.1.2.3.6.170713
dm01cel04: Active image version: 12.1.2.3.6.170713
dm01cel05: Active image version: 12.1.2.3.6.170713
dm01cel06: Active image version: 12.1.2.3.6.170713
dm01cel07: Active image version: 12.1.2.3.6.170713
[root@dm01db08 ~]# ssh dm01sw-iba01 version
SUN DCS 36p version: 2.1.8-1
Build time: Sep 18 2015 10:26:47
SP board info:
Manufacturing Date: 2015.05.13
Serial Number: “NCDKO0980”
Hardware Revision: 0x0200
Firmware Revision: 0x0000
BIOS version: SUN0R100
BIOS date: 06/22/2010
Conclusion
In this article we have learned how to configure SSH equivalence on Exadata Database Machine. Using the setup_ssh_eq.sh script is very easy setup SSH equivalence.
0


