Good Contents Are Everywhere, But Here, We Deliver The Best of The Best.Please Hold on!
Database Management Services, Oracle Database Appliance - ODA, Oracle Database Management Solution, Oracle Databases, Remote Database Management, Technology Consulting Services
In September 2019, Oracle announced Oracle Database Appliance X8-2 (Small, Medium and HA). ODA X8-2 comes with more computing resources compared with X7-2 Models.


Let’s take a quick look at few benefits of ODA followed by the technical specification on ODA X8-2 Small/Medium and HA.


Oracle Database Appliance is an Engineered System. Software, server, storage, and networking, all co-engineered and optimized to run Oracle Database and applications.


Benefits of Oracle Database Appliance (ODA):

  1. Software, server, storage, and networking engineered and optimized to run Oracle Database and applications.
  2. Supports Oracle Database Standard Edition, Standard Edition One, Standard Edition 2, and Enterprise Edition.
  3. Optimized for Cloud
  4. Capacity on Demand Licensing – Reduced Cost
  5. Ease of deployment, patching, management, and support
  6. Increased performance and reliability with NVMe flash storage
  7. Reliable hardware architecture with redundant power, cooling, networking, and storage
  8. Browser User Interface (BUI)


Oracle Database Appliance X8-2 HA Benefits & Technical specification


  1. Support mission-critical applications and consolidation of many databases
  2. Built for high availability
  3. Choice of high-performance flash or high-capacity drives
  4. 32 cores per server (64 cores in total for 2 servers)
  5. 384 GB physical memory per server expandable upto 768 (1.5 TB memory in total for 2 servers)
  6. Storage Shelf
  7. High Capacity: 46 TB SSD and 252 TB SDD raw capacity per shelf
  8. High Performance: 184 TB SSD raw capacity per shelf
  9. Choice of 10GBase-T or 10/25 GbE SFP28 public networking
  10. 25GbE interconnect for cluster communication


For more information on the technical specification loot at the ODA X8-2 HA Data Sheet at:
https://www.oracle.com/technetwork/database/database-appliance/oda-x8-2-ha-datasheet-5730739.pdf


  • Oracle Database Appliance X8-2 Small Technical specification

  1. One server
  2. 1 Intel Xeon processor, 16 Cores
  3. 192GB Physical memory expandable upto 384GB
  4. Choice of 10GBase-T or 10/25 GbE SFP28 public networking
  5. 12.8TB NVMe raw storage


Oracle Database Appliance X8-2 Medium Technical specification

  1. One server
  2. 2 Intel Xeon processor, 32 Cores
  3. 384 GB Physical memory expandable upto 768GB
  4. Choice of 10GBase-T or 10/25 GbE SFP28 public networking
  5. 12.8 TB NVMe raw storage capacity with optional expansion to 76.8 TB NVMe raw storage


For more information on the technical specification loot at the ODA X8-2 S/M Data Sheet at:
https://www.oracle.com/technetwork/database/database-appliance/oda-x8-2sm-datasheet-5730738.pdf


Conclusion


In this article we seen the benefits and the technical specification of latest Oracle Database Appliance X8 model family. ODA is the right choice for all type of Businesses as an on-premises solution and cloud ready option.


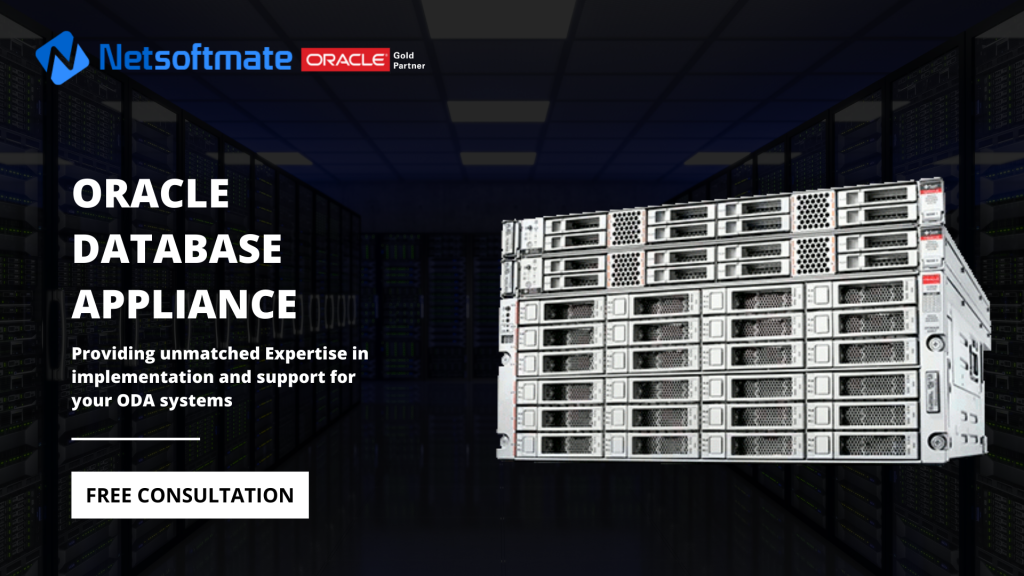
Are you and your team considering setting up Oracle Database Appliance? Let Netsoftmate help you choose the right product keeping under consideration your budget, requirement and usage forecasting. Click on the image below to sign-up NOW!


0

Cloud Services, Oracle Database Management Solution, Oracle Databases, Oracle Exadata


  • What is Oracle Autonomous Database?


    Oracle Autonomous Database allows you rapidly & easily create mission critical databases, It protects data from both external and internal threats, automates all infrastructure & database maintenance, recovers from any failure without downtime and scales online for highest performance & lower cost.


    Components of Oracle Autonomous Database:

    An Oracle Autonomous database comprises of 3 components:

    Oracle Exadata
    Oracle database
    Automated Data Center Operations and Machine Learning


    How Does Oracle Database Works:

    An Oracle Autonomous Database is self driving, self securing and self repairing.

  • Self Driving: It Automates all databases and infrastructure management, Patching, tune Queries and Monitoring

  • Self Securing: Protects database from both external and malicious internal users by automatically encrypting data both at rest and in transit

  • Self Repairing: Automatically recover from any failure. Protects from all downtime including planned maintenance


    Machine Learning:

    Automation  built up on the revolutionary machine learning platform enables the Customers with greater database autonomy and capabilities.

  • Workload Optimization: Automatically adapts to the changing workload and optimization of query execution. So Customers doesn’t have to tune queries manually.

  • Monitoring & Diagnostics: Detects anomalies and fixes issues ensuring optimal performance and availability. So Customers doesn’t have to install or waiting for monitoring and alerting notification.

  • Security: Protects database from both external attacks and malicious internal users by automatically encrypting data and apply security updates.


    Oracle Autonomous Database Family:

  • Oracle Autonomous Data Warehouse (ADW): It is optimized for Data Warehouse, Data Mart & Data lake. Easy provision, connect, load data and execute queries.

  • Oracle Autonomous Transaction Processing (ATP): It is optimized for Transaction processing, batch, Report, Mixed workload, IoT & Application Development. Easy provision, connect, load data and execute queries.
  •  


  •  

    Benefits of Autonomous Database:

  • Fast Provisioning: Create the database in minutes, load data & execute queries
  •  
  • Autonomous: Automatically tune queries without DBA intervention
  •  
  • Extreme Performance: Run Oracle workload up to 13x faster on Oracle Exadata


    Steps to create an Autonomous Database:

    It just takes 4 steps to create an Autonomous Database (DW, Data mart or OLTP) and in few minutes the customers can have Autonomous database ready to connect and load data and start using it. 


    Migrating to Oracle Autonomous Database:

  • Oracle Database is same in the cloud as on-premises. You can move it to the cloud without having to change application code.Quickly obtain environments for testing and development. Take on-premises data, move onto the cloud storage for fast analysis, backup or archiving. Get an enterprise production ready database in minutes for fast migration to cloud. Tuning, patching, backup, disaster recovery, high availability for them automatically.


    Oracle Autonomous database Security Capabilities:

  • Autonomous database automatically applies patches and upgrades eliminating human error, keeping the system protected. Oracle Database Vault protects the database from internal administrator access, allows administrators to perform their job, but not access the data itself. By default, Oracle Autonomous database uses TDE to protect data at rest. It also protects data in transit when the client uses SSL/TLS 1.2.


    Oracle Autonomous Database Deployment option:

  • Autonomous Database Serverless: Simple & Elastic. Oracle automates and manages everything. You just choose the compute , storage and region. Start with minimum 1 OCPU & 1 hour minimum commitment time and Instantly grow or shrink online.

  • Autonomous Database Dedicated: Provides a Private database cloud running on a dedicated Exadata cloud infrastructure in the Public cloud. Highly isolated and Customizable operation policies. Available as Cloud at Customer solution.


    Which Autonomous Database Deployment is best for me?

    Regardless of which Autonomous Database deployment you chose you will get the same great features, functionality, security and performance you have grown to expect from the Oracle Database.

    For users that are simply looking for a database for a specific application or project and don’t want to be involved in choosing any database details like versions, patching, etc., Serverless is right choice. Whereas users that want to rethink their IT strategy and care about things like patching schedules, software versions, workload isolation, and want to be involved in choosing these, then Dedicated is the right choice.


    Conclusion:

    In this article we have learned about Oracle Autonomous database cloud, its components, benefits and capabilities and different autonomous database deployment options available.


3

Database Management Services, Oracle Databases, Oracle Exadata
In this article we will demonstrate quick steps to deploy Exadata Database Machine in Oracle Cloud Infrastructure (OCI). 

Prerequisites:

  • Exadata Cloud Subscription
  • Credentials to Login Oracle Cloud
  • Access to Deploy Exadata in OCI
  • Compartment
  • VCN & Subnet

Steps to Deploy Exadata on OCI

  • Open a browser and enter the URL you have received from Oracle to connect to the Oracle Cloud
  •  

  • Enter your Oracle Cloud credentials
  •  

  • Click on “Create Instance”
  •  

  • Click on “All Services” and search for Exadata keyword. Click on Create.
  •  

  • Select your “Compartment” on left and Click on “Launch DB System”
  •  

  • Enter the details as per your requirement and the Exadata subscription procured
  •  


  • Browse and upload the public key
  •  

  • Choose your desired storage allocation and timezone
  •  

  • Fill in the required VCN and Subnet details. Work with your network engineer to gather the correct details on VCN and Subnet created for your environment
  •  

  • Fill the database details, name, version, CDB and Password
  •  

  • Select the Workload type and database character set for your database
  •  

  • Optionally specify the TAG Key and click “Launch DB System” to deploy Exadata DBM
  •  


Conclusion

In this article we have learned how to deploy an Exadata Database Machine in Oracle Cloud Infrastructure (OCI).


Expert Support for Oracle Exadata | Netsoftmate


1

In this article we will demonstrate how to flashback a database and recover the truncated table without loosing data. 

In other words we will be performing the following steps to recover a truncated table:

  • Simulate table truncate
  • Make note of the table truncate time
  • Flashback the database before truncate, 
  • Open the database in read only
  • Export the table using traditional export utility
  • Shutdown the database
  • Open the database with reset logs option
  • Import the table data
  • Verify the table data


Prerequisites

  • Database must in using Fast Recovery Area
  • Database must have flashback set to ON


Steps to perform flashback a database to recover the truncated table without loosing data:


Step 1: Connect to the database and make a note of the current time

SQL> alter session set nls_date_format=’dd/mm/yy hh24:mi:ss’;

Session altered.

SQL> set lines 200
SQL> select * from v$instance;

INSTANCE_NUMBER INSTANCE_NAME    HOST_NAME                                                        VERSION           STARTUP_TIME      STATUS          PARALLEL
————— —————- —————————————————————- —————– —————– ———————————————— ————
   THREAD# ARCHIVER                     LOG_SWITCH_WAIT                                              LOGINS                                   SHUTDOWN_PEN
———- —————————- ———————————————————— —————————————- ————
DATABASE_STATUS                                                      INSTANCE_ROLE                                                            ACTIVE_STATE                         BLOCKED
——————————————————————– ———————————————————————— ———————————— ————
              1 orcldb1         racnode1                                                          11.2.0.4.0        30/11/17 07:33:10 OPEN            NO
         1 STARTED                                                                                   ALLOWED                                  NO
ACTIVE                                                               PRIMARY_INSTANCE                                                         NORMAL                               NO


SQL> select sysdate from dual;

SYSDATE
—————–
30/11/17 07:34:30


Step 2: Identify a table for testing

SQL> create table SCOTT.SALES as select * from SCOTT.WAIVER;

Table created.

SQL> select sysdate from dual;

SYSDATE
—————–
30/11/17 07:35:07

SQL> select count(*) from SCOTT.SALES;

  COUNT(*)
———-
     35268


Step 3: Truncate the table

SQL> select sysdate from dual;

SYSDATE
—————–
30/11/17 07:36:20

SQL> truncate table SCOTT.SALES;

Table truncated.

SQL> select count(*) from SCOTT.SALES;

  COUNT(*)
———-
         0


Step 4: Shutdown the database and start it in mount state

racnode1-orcldb1 {/home/oracle}: srvctl status database -d orcldb
Instance orcldb1 is running on node racnode1
Instance orcldb2 is running on node racnode2

racnode1-orcldb1 {/home/oracle}: srvctl stop database -d orcldb

racnode1-orcldb1 {/home/oracle}: srvctl status database -d orcldb
Instance orcldb1 is not running on node racnode1
Instance orcldb2 is not running on node racnode2

SQL> startup mount;
ORACLE instance started.

Total System Global Area 3140026368 bytes
Fixed Size                  2163800 bytes
Variable Size            1996491688 bytes
Database Buffers         1107296256 bytes
Redo Buffers               34074624 bytes
Database mounted.


Step 5: Flashback database as shown below

SQL> alter session set nls_date_format=’dd/mm/yy hh24:mi:ss’;

Session altered.

SQL> flashback database to timestamp to_date(’11/30/17 07:36:00′,’mm/dd/yy hh24:mi:ss’);

Flashback complete.

>>>>>>>>….. alert log ……..>>>>>>>>>>>>>>>>>

flashback database to timestamp to_date(’11/30/17 07:36:00′,’mm/dd/yy hh24:mi:ss’)
Flashback Restore Start
Flashback Restore Complete
Flashback Media Recovery Start
Fast Parallel Media Recovery enabled
 parallel recovery started with 3 processes
Recovery of Online Redo Log: Thread 1 Group 3 Seq 393 Reading mem 0
  Mem# 0: /oradata1/orcldb/redo_t01_g03.log
Incomplete Recovery applied until change 711150562 time 11/30/2012 07:36:01
Flashback Media Recovery Complete
Completed: flashback database to timestamp to_date(’11/30/17 07:36:00′,’mm/dd/yy hh24:mi:ss’)

>>>>>>>>>>>>>>>>…….>>>>>>>>>>>>


Step 6: Open the database in read only mode and verify the table

SQL> alter database open read only;

Database altered.

SQL> select name,open_mode,database_role from v$database;

NAME      OPEN_MODE                                DATABASE_ROLE
——— —————————————- —————————————————————-
orcldb   READ ONLY                                PRIMARY

SQL> select count(*) from SCOTT.SALES;

  COUNT(*)
———-
     35268


Step 7: Perform table export using traditional export utility

racnode1-orcldb1 {/oradata1}: exp system file=test.dmp log=test.log tables=SCOTT.SALES compress=y

Export: Release 11.2.0.4.0 – Production on Fri Nov 30 07:56:59 2012

Copyright (c) 1982, 2007, Oracle.  All rights reserved.

Password:


Connected to: Oracle Database 11g Enterprise Edition Release 11.2.0.4.0 – 64bit Production
With the Partitioning, Real Application Clusters, OLAP, Data Mining
and Real Application Testing options
Export done in AL32UTF8 character set and AL16UTF16 NCHAR character set

About to export specified tables via Conventional Path …
Current user changed to SCOTT
. . exporting table                    SALES      35268 rows exported
Export terminated successfully without warnings.

>>>>>>>>>>>>>>>>…….EXPORT END>>>>>>>>>>>>>>>>>>>>>>>


Step 8: Shutdown the database, recover database and open using resetlogs option

SQL> shutdown immediate;
Database closed.
Database dismounted.
ORACLE instance shut down.

SQL> startup
ORACLE instance started.

Total System Global Area 3140026368 bytes
Fixed Size                  2163800 bytes
Variable Size            1979714472 bytes
Database Buffers         1124073472 bytes
Redo Buffers               34074624 bytes
Database mounted.
ORA-01589: must use RESETLOGS or NORESETLOGS option for database open


SQL> recover database;
Media recovery complete.

SQL> alter database open;

Database altered.


Step 9: Verify the database

SQL> select name,open_mode,database_role from v$database;

NAME      OPEN_MODE                                DATABASE_ROLE
——— —————————————- —————————————————————-
orcldb   READ WRITE                               PRIMARY


Step 10: Import the table data using import utility

SQL> select count(*) from SCOTT.SALES;

  COUNT(*)
———-
         0

racnode1-orcldb1 {/oradata1}: imp system file=test.dmp log=imp_test.log tables=SALES fromuser=SCOTT touser=SCOTT ignore=y

Import: Release 11.2.0.4.0 – Production on Fri Nov 30 08:02:05 2012

Copyright (c) 1982, 2007, Oracle.  All rights reserved.

Password:

Connected to: Oracle Database 11g Enterprise Edition Release 11.2.0.4.0 – 64bit Production
With the Partitioning, Real Application Clusters, OLAP, Data Mining
and Real Application Testing options

Export file created by EXPORT:V11.01.00 via conventional path
import done in AL32UTF8 character set and AL16UTF16 NCHAR character set
. importing SCOTT’s objects into SCOTT
. . importing table                  “SALES”      35268 rows imported
Import terminated successfully without warnings.

>>>>>>>>>>>>. IMPORT END ….>>>>>>>>>>>>>>>>>>>.


Step 11: Verify the table data

SQL> select count(*) from SCOTT.SALES;

  COUNT(*)
———-
     35268


Conclusion

In this article we have learned how to recover a truncated table using flashback database technology without loosing the database. Using flashback database is one of the fastest and easiet method to as it doesn’t require database restore from backup.

1

Uncategorized
While creating a tablespace on Oracle Database 11g I ran into a issue related to DB_CREATE_FILE_DEST (OMF parameter).  The DB_CREATE_FILE_DEST parameter was pointing to incorrect ASM Disk Group name which doesn’t existing. The issues was fixed by correcting the DB_CREATE_FILE_DEST parameter to point to the correct ASM Disk Group name.

In this article I would like to demonstrate how to fix create tablespace error which is to incorrect DB_CREATE_FILE_DEST parameter.

Create Tablespace ran the into the issue as below:


The create tablespace failed as the ASM Disk Group +DATA doesn’t existing.

ORA Errors:
 
ORA-01119: error in creating database file ‘+DATA’
ORA-17502: ksfdcre:4 Failed to create file +DATA
ORA-15001: diskgroup “DATA” does not exist or is not mounted
 
Reason for above error:

The above error is due to initialization parameter DB_CREATE_FILE_DEST pointing to incorrect value. Change/Modify the parameter to fix the issue. 
 

Check  parameter db_create_file_dest Value:


About DB_CREATE_FILE_DEST

DB_CREATE_FILE_DEST specifies the default location for Oracle-managed datafiles.

DB_CREATE_FILE_DEST : directory or disk group
Default value : NO Default value.
Modifiable :  ALTER SESSION, ALTER SYSTEM

Identify the ASM Disk Group


Here the Data Disk Group name is +DATA_DM01


Modify the parameter DB_CREATE_FILE_DEST parameter to point it to correct ASM Disk Group name. You can use ALTER SYSTEM SET command to make it permanent as well.


Now you can Create a Tablespace again as follows:


This time the tablespace was created successfully without errors as the default OMF datafile location is pointing to correct ASM Disk Group

Conclusion:

In this article we have demonstrated how to fix ORA errors “ORA-15001”, “ORA-17502″,”ORA-01119” which due to incorrect defualt ASM Diskgroup set at Database using parameter DB_CREATE_FILE_DEST. 


eBook - Oracle Exadata X8M Patching Recipes | Netsoftmate
0

Overview

Oracle Recovery Manager (RMAN) provides a comprehensive foundation for efficiently backing up and recovering the Oracle databases, it provides a common interface, via command line and Enterprise Manager, for backup tasks across different host operating systems, automates administration of your backup strategies.

Environment Details

Target (Source) details
Database Name
prod
Hostname
Snsm-linux02
Ip Address
172.16.110.18
OS
Linux
Version
x86_64
Datafile Location
/data2/prod
Backup Location
/backup/rman_backup

Tns details:
PROD =
  (DESCRIPTION =
    (ADDRESS = (PROTOCOL = TCP)(HOST = 172.16.110.18)(PORT = 1521))
    (CONNECT_DATA =
      (SERVER = DEDICATED)
      (SERVICE_NAME = prod)
    )
  )


Destination (Auxiliary) details:
Database Name
Prod
Hostname
Nsm-linux01
Ip Address
172.16.110.16
OS
Linux
Version
x86_64
Datafile Location
/data2/prod
Backup Location
/backup/rman_backup

Tns details:
DUP =
  (DESCRIPTION =
    (ADDRESS = (PROTOCOL = TCP)(HOST = 172.16.110.16)(PORT = 1521))
    (CONNECT_DATA =
      (SERVER = DEDICATED)
      (SERVICE_NAME = dup)
    )
  )

Pre-requisites

  • Oracle net configuration
  • Both target and destination server should have tns entries
  • Static listener registration on auxiliary site
  • Service should be register on aux listener
  • Password files from target database
  • Sqlnet.ora should have correct parameters
  • Target database should be running through spfile
  • Check connectivity between target and destination server

Steps on target (source) server

  • Put tns entry of auxiliary database into target $ORACLE_HOME/network/admin directory
[oracle@Snsm-linux02 admin]$ cd /data2/app/oracle/product/11.2.0/network/admin
[oracle@Snsm-linux02 admin]$ vi tnsnames.ora

DUP =
  (DESCRIPTION =
    (ADDRESS = (PROTOCOL = TCP)(HOST = 172.16.110.16)(PORT = 1521))
    (CONNECT_DATA =
      (SERVER = DEDICATED)
      (SERVICE_NAME = dup)
    )
  )

[oracle@Snsm-linux02 admin]$ tnsping dup

TNS Ping Utility for Linux: Version 11.2.0.1.0 – Production on 01-APR-2015 12:34:19

Copyright (c) 1997, 2009, Oracle.  All rights reserved.

Used parameter files:
/data2/app/oracle/product/11.2.0/network/admin/sqlnet.ora


Used TNSNAMES adapter to resolve the alias
Attempting to contact (DESCRIPTION = (ADDRESS = (PROTOCOL = TCP)(HOST = 172.16.110.16)(PORT = 1521)) (CONNECT_DATA = (SERVER = DEDICATED)

(SERVICE_NAME = dup)))
OK (0 msec)
  •  Check database whether it is running in archive log mode.
SQL> select name, open_mode, log_mode from v$database;

NAME       OPEN_MODE            LOG_MODE
———- ——————– —————
PROD       READ WRITE           ARCHIVELOG
  • Check database is running from spfile.
SQL> select value from v$parameter where name=’spfile’;

VALUE
—————————————————————–
/data2/app/oracle/product/11.2.0/dbs/spfileprod.ora

or


SQL> show parameter pfile

NAME                                 TYPE                              VALUE
———————————— ——————————— ——————————
spfile                               string                            /data2/app/oracle/product/11.2
                                                                       .0/dbs/spfileprod.ora

  • Create pfile from spfile.
SQL> create pfile=’/backup/rman_backup/initprod.ora’ from spfile;

File created.

  • Create password file.
[oracle@Snsm-linux02 dbs]$ pwd
/data2/app/oracle/product/11.2.0/dbs
[oracle@Snsm-linux02 dbs]$orapwd file=orapwprod password=oracle

  • Copy the password file and init file to destination $ORACLE_HOME/dbs directory using scp or ftp
scp orapwprod oracle@172.16.110.18:/data2/app/oracle/product/11.2.0/dbs/
scp /backup/rman_backup/initprod.ora oracle@172.16.110.18:/data2/app/oracle/product/11.2.0/dbs/

Steps on destination server

  • Put static listener entry into listener.ora file in $ORACLE_HOME/network/admin directory.
[oracle@Nsm-linux01 admin]$ cd /data2/app/oracle/product/11.2.0/network/admin
[oracle@Nsm-linux01 admin]$

SID_LIST_LISTENER =
  (SID_LIST =
    (SID_DESC =
      (GLOBAL_DBNAME = dup)
      (ORACLE_HOME = /data2/app/oracle/product/11.2.0)
      (SID_NAME = prod)
    )
  )
LISTENER =
  (DESCRIPTION_LIST =
    (DESCRIPTION =
      (ADDRESS = (PROTOCOL = TCP)(HOST = 172.16.110.16)(PORT = 1521))
    )
    (DESCRIPTION =
      (ADDRESS = (PROTOCOL = IPC)(KEY = EXTPROC1521))
    )
  )

Here global_name is nothing but service name and sid_name is instance name
Now reload the listener and check the services

[oracle@Nsm-linux01 admin]$ lsnrctl

LSNRCTL for Linux: Version 11.2.0.1.0 – Production on 01-APR-2015 12:46:41

Copyright (c) 1991, 2009, Oracle.  All rights reserved.

Welcome to LSNRCTL, type “help” for information.

LSNRCTL> reload
Connecting to (DESCRIPTION=(ADDRESS=(PROTOCOL=TCP)(HOST=172.16.110.16)(PORT=1521)))
The command completed successfully

LSNRCTL> services
Connecting to (DESCRIPTION=(ADDRESS=(PROTOCOL=TCP)(HOST=172.16.110.16)(PORT=1521)))
Services Summary…
Service “dup” has 1 instance(s).
  Instance “prod”, status UNKNOWN, has 1 handler(s) for this service…
    Handler(s):
      “DEDICATED” established:0 refused:0
         LOCAL SERVER
Service “prod” has 1 instance(s).
      “DEDICATED” established:0 refused:0 state:ready
         LOCAL SERVER
The command completed successfully
  • Put Tns entry for target (source) database in $ORACLE_HOME/network/admin directory
[oracle@Nsm-linux01 admin]$ vi tnsnames.ora
PROD =
  (DESCRIPTION =
    (ADDRESS = (PROTOCOL = TCP)(HOST = 172.16.110.18)(PORT = 1521))
    (CONNECT_DATA =
      (SERVER = DEDICATED)
      (SERVICE_NAME = prod)
    )
  )

[oracle@Nsm-linux01 admin]$ tnsping prod

TNS Ping Utility for Linux: Version 11.2.0.1.0 – Production on 01-APR-2015 12:49:28

Copyright (c) 1997, 2009, Oracle.  All rights reserved.

Used parameter files:
/data2/app/oracle/product/11.2.0/network/admin/sqlnet.ora


Used TNSNAMES adapter to resolve the alias
Attempting to contact (DESCRIPTION = (ADDRESS = (PROTOCOL = TCP)(HOST = 172.16.110.18)(PORT = 1521)) (CONNECT_DATA = (SERVER = DEDICATED)

(SERVICE_NAME = prod)))
OK (10 msec)

  • Create the directory structure same as target(source) server.
[oracle@Nsm-linux01 admin]$ mkdir -p /data2/prod
[oracle@Nsm-linux01 admin]$ mkdir -p /backup/archive
  • Set the oracle Sid and start the instance in no mount stage.
[oracle@Nsm-linux01 admin]$ export ORACLE_SID=prod
[oracle@Nsm-linux01 admin]$ sqlplus

SQL*Plus: Release 11.2.0.1.0 Production on Wed Apr 1 12:54:37 2015

Copyright (c) 1982, 2009, Oracle.  All rights reserved.

Enter user-name: sys as sysdba
Enter password:
Connected to an idle instance.

SQL> startup nomount
ORACLE instance started.

Total System Global Area 1152450560 bytes
Fixed Size                  2212696 bytes
Variable Size             335547560 bytes
Database Buffers          805306368 bytes
Redo Buffers                9383936 bytes
SQL>
  • Now connect to Rman
[oracle@Nsm-linux01 admin]$ rman target sys/oracle@prod auxiliary sys/oracle@dup

Recovery Manager: Release 11.2.0.1.0 – Production on Wed Apr 1 12:56:39 2015

Copyright (c) 1982, 2009, Oracle and/or its affiliates.  All rights reserved.

connected to target database: PROD (DBID=284539893)
connected to auxiliary database: PROD (not mounted)

RMAN>
  • Issue the command to duplicate the database

RMAN> DUPLICATE TARGET DATABASE TO prod FROM ACTIVE DATABASE NOFILENAMECHECK;

Starting Duplicate Db at 01-APR-15
using target database control file instead of recovery catalog
allocated channel: ORA_AUX_DISK_1
channel ORA_AUX_DISK_1: SID=63 device type=DISK

Following is the output.

contents of Memory Script:
{
   sql clone “alter system set  db_name =
”PROD” comment=
”Modified by RMAN duplicate” scope=spfile”;
   sql clone “alter system set  db_unique_name =
”PROD” comment=
”Modified by RMAN duplicate” scope=spfile”;
   shutdown clone immediate;
   startup clone force nomount
   backup as copy current controlfile auxiliary format  ‘/data2/prod/control01.ctl’;
   restore clone controlfile to  ‘/data2/prod/control02.ctl’ from
‘/data2/prod/control01.ctl’;
   alter clone database mount;
}
executing Memory Script

sql statement: alter system set  db_name =  ”PROD” comment= ”Modified by RMAN duplicate” scope=spfile

sql statement: alter system set  db_unique_name =  ”PROD” comment= ”Modified by RMAN duplicate” scope=spfile

Oracle instance shut down

Oracle instance started

Total System Global Area    1152450560 bytes

Fixed Size                     2212696 bytes
Variable Size                335547560 bytes
Database Buffers             805306368 bytes
Redo Buffers                   9383936 bytes

Starting backup at 01-APR-15
allocated channel: ORA_DISK_1
channel ORA_DISK_1: SID=76 device type=DISK
channel ORA_DISK_1: starting datafile copy
copying current control file
output file name=/data2/app/oracle/product/11.2.0/dbs/snapcf_prod.f tag=TAG20150401T124940 RECID=4 STAMP=875882981
channel ORA_DISK_1: datafile copy complete, elapsed time: 00:00:03
Finished backup at 01-APR-15

Starting restore at 01-APR-15
allocated channel: ORA_AUX_DISK_1
channel ORA_AUX_DISK_1: SID=63 device type=DISK

channel ORA_AUX_DISK_1: copied control file copy
Finished restore at 01-APR-15

database mounted

contents of Memory Script:
{
   set newname for datafile  1 to
“/data2/prod/system01.dbf”;
   set newname for datafile  2 to
“/data2/prod/sysaux01.dbf”;
   set newname for datafile  3 to
“/data2/prod/undotbs01.dbf”;
   set newname for datafile  4 to
“/data2/prod/users01.dbf”;
   set newname for datafile  5 to
“/data2/prod/example01.dbf”;
   backup as copy reuse
   datafile  1 auxiliary format
“/data2/prod/system01.dbf”   datafile
2 auxiliary format
“/data2/prod/sysaux01.dbf”   datafile
3 auxiliary format
“/data2/prod/undotbs01.dbf”   datafile
4 auxiliary format
“/data2/prod/users01.dbf”   datafile
5 auxiliary format
“/data2/prod/example01.dbf”   ;
   sql ‘alter system archive log current’;
}
executing Memory Script

executing command: SET NEWNAME

executing command: SET NEWNAME

executing command: SET NEWNAME

executing command: SET NEWNAME

executing command: SET NEWNAME

Starting backup at 01-APR-15
using channel ORA_DISK_1
channel ORA_DISK_1: starting datafile copy
input datafile file number=00001 name=/data2/prod/system01.dbf
output file name=/data2/prod/system01.dbf tag=TAG20150401T124955
channel ORA_DISK_1: datafile copy complete, elapsed time: 00:01:15
channel ORA_DISK_1: starting datafile copy
input datafile file number=00002 name=/data2/prod/sysaux01.dbf
output file name=/data2/prod/sysaux01.dbf tag=TAG20150401T124955
channel ORA_DISK_1: datafile copy complete, elapsed time: 00:01:05
channel ORA_DISK_1: starting datafile copy
input datafile file number=00005 name=/data2/prod/example01.dbf
output file name=/data2/prod/example01.dbf tag=TAG20150401T124955
channel ORA_DISK_1: datafile copy complete, elapsed time: 00:00:15
channel ORA_DISK_1: starting datafile copy
input datafile file number=00003 name=/data2/prod/undotbs01.dbf
output file name=/data2/prod/undotbs01.dbf tag=TAG20150401T124955
channel ORA_DISK_1: datafile copy complete, elapsed time: 00:00:07
channel ORA_DISK_1: starting datafile copy
input datafile file number=00004 name=/data2/prod/users01.dbf
output file name=/data2/prod/users01.dbf tag=TAG20150401T124955
channel ORA_DISK_1: datafile copy complete, elapsed time: 00:00:01
Finished backup at 01-APR-15

sql statement: alter system archive log current

contents of Memory Script:
{
   backup as copy reuse
   archivelog like  “/backup/archive/1_116_872701561.dbf” auxiliary format
“/backup/archive/1_116_872701561.dbf”   ;
   catalog clone archivelog  “/backup/archive/1_116_872701561.dbf”;
   switch clone datafile all;
}
executing Memory Script

Starting backup at 01-APR-15
using channel ORA_DISK_1
channel ORA_DISK_1: starting archived log copy
input archived log thread=1 sequence=116 RECID=112 STAMP=875883160
output file name=/backup/archive/1_116_872701561.dbf RECID=0 STAMP=0
channel ORA_DISK_1: archived log copy complete, elapsed time: 00:00:03
Finished backup at 01-APR-15

cataloged archived log
archived log file name=/backup/archive/1_116_872701561.dbf RECID=112 STAMP=875883644

datafile 1 switched to datafile copy
input datafile copy RECID=4 STAMP=875883644 file name=/data2/prod/system01.dbf
datafile 2 switched to datafile copy
input datafile copy RECID=5 STAMP=875883644 file name=/data2/prod/sysaux01.dbf
datafile 3 switched to datafile copy
input datafile copy RECID=6 STAMP=875883645 file name=/data2/prod/undotbs01.dbf
datafile 4 switched to datafile copy
input datafile copy RECID=7 STAMP=875883645 file name=/data2/prod/users01.dbf
datafile 5 switched to datafile copy
input datafile copy RECID=8 STAMP=875883645 file name=/data2/prod/example01.dbf

contents of Memory Script:
{
   set until scn  4529390;
   recover
   clone database
    delete archivelog
   ;
}
executing Memory Script

executing command: SET until clause

Starting recover at 01-APR-15
using channel ORA_AUX_DISK_1

starting media recovery

archived log for thread 1 with sequence 116 is already on disk as file /backup/archive/1_116_872701561.dbf
archived log file name=/backup/archive/1_116_872701561.dbf thread=1 sequence=116
media recovery complete, elapsed time: 00:00:02
Finished recover at 01-APR-15

contents of Memory Script:
{
   shutdown clone immediate;
   startup clone nomount;
   sql clone “alter system set  db_name =
”PROD” comment=
”Reset to original value by RMAN” scope=spfile”;
   sql clone “alter system reset  db_unique_name scope=spfile”;
   shutdown clone immediate;
   startup clone nomount;
}
executing Memory Script

database dismounted
Oracle instance shut down

connected to auxiliary database (not started)
Oracle instance started

Total System Global Area    1152450560 bytes

Fixed Size                     2212696 bytes
Variable Size                335547560 bytes
Database Buffers             805306368 bytes
Redo Buffers                   9383936 bytes

sql statement: alter system set  db_name =  ”PROD” comment= ”Reset to original value by RMAN” scope=spfile

sql statement: alter system reset  db_unique_name scope=spfile

Oracle instance shut down

connected to auxiliary database (not started)
Oracle instance started

Total System Global Area    1152450560 bytes

Fixed Size                     2212696 bytes
Variable Size                335547560 bytes
Database Buffers             805306368 bytes
Redo Buffers                   9383936 bytes
sql statement: CREATE CONTROLFILE REUSE SET DATABASE “PROD” RESETLOGS ARCHIVELOG
  MAXLOGFILES     16
  MAXLOGMEMBERS      3
  MAXDATAFILES      100
  MAXINSTANCES     8
  MAXLOGHISTORY      292
LOGFILE
  GROUP  1 ( ‘/data2/prod/redo01.log’ ) SIZE 50 M  REUSE,
  GROUP  2 ( ‘/data2/prod/redo02.log’ ) SIZE 50 M  REUSE,
  GROUP  3 ( ‘/data2/prod/redo03.log’ ) SIZE 50 M  REUSE
DATAFILE
  ‘/data2/prod/system01.dbf’
CHARACTER SET WE8MSWIN1252


contents of Memory Script:
{
   set newname for tempfile  1 to
“/data2/prod/temp01.dbf”;
   switch clone tempfile all;
   catalog clone datafilecopy  “/data2/prod/sysaux01.dbf”,
“/data2/prod/undotbs01.dbf”,
“/data2/prod/users01.dbf”,
“/data2/prod/example01.dbf”;
   switch clone datafile all;
}
executing Memory Script

executing command: SET NEWNAME

renamed tempfile 1 to /data2/prod/temp01.dbf in control file

cataloged datafile copy
datafile copy file name=/data2/prod/sysaux01.dbf RECID=1 STAMP=875883671
cataloged datafile copy
datafile copy file name=/data2/prod/undotbs01.dbf RECID=2 STAMP=875883671
cataloged datafile copy
datafile copy file name=/data2/prod/users01.dbf RECID=3 STAMP=875883671
cataloged datafile copy
datafile copy file name=/data2/prod/example01.dbf RECID=4 STAMP=875883672

datafile 2 switched to datafile copy
input datafile copy RECID=1 STAMP=875883671 file name=/data2/prod/sysaux01.dbf
datafile 3 switched to datafile copy
input datafile copy RECID=2 STAMP=875883671 file name=/data2/prod/undotbs01.dbf
datafile 4 switched to datafile copy
input datafile copy RECID=3 STAMP=875883671 file name=/data2/prod/users01.dbf
datafile 5 switched to datafile copy
input datafile copy RECID=4 STAMP=875883672 file name=/data2/prod/example01.dbf

contents of Memory Script:
{
   Alter clone database open resetlogs;
}
executing Memory Script

database opened
Finished Duplicate Db at 01-APR-15


 Issues which we have faced are as follows              

Everything has went well listener services were also worked fine, RMAN connectivity from auxiliary server also fine using net service name but  When issue the duplicate database command from RMAN> prompt it has thrown following error.

RMAN-00571: ===========================================================
RMAN-00569: =============== ERROR MESSAGE STACK FOLLOWS ===============
RMAN-00571: ===========================================================
RMAN-03002: failure of Duplicate Db command at 03/31/2015 16:01:01
RMAN-03015: error occurred in stored script Memory Script
RMAN-03009: failure of backup command on ORA_DISK_1 channel at 03/31/2015 16:01:01
ORA-17629: Cannot connect to the remote database server
ORA-17627: ORA-12154: TNS:could not resolve the connect identifier specified
ORA-17629: Cannot connect to the remote database server


Then we have searched for solutions, we get one MOS note 1144273.1

This note gives some idea like causes and solutions from that we have checked in our databases on destination server there are wrong parameters in sqlnet.ora then we have corrected the sqlnet.ora file as follows

[oracle@Nsm-linux01 admin]$ cat sqlnet.ora
# sqlnet.ora Network Configuration File: /data2/app/oracle/product/11.2.0/network/admin/sqlnet.ora
# Generated by Oracle configuration tools.
SQLNET.AUTHENTICATION_SERVICES = (NTS,NONE)
#NAMES.DIRECTORY_PATH= (TNSNAMES, EZCONNECT)

ADR_BASE = /data2/app/oracle


Now we have executed again, this time we get different error, check below.

RMAN-00571: ===========================================================
RMAN-00569: =============== ERROR MESSAGE STACK FOLLOWS ===============
RMAN-00571: ===========================================================
RMAN-03002: failure of Duplicate Db command at 03/31/2015 16:23:02
RMAN-03015: error occurred in stored script Memory Script
RMAN-03009: failure of backup command on ORA_DISK_1 channel at 03/31/2015 16:23:02
ORA-17628: Oracle error 19505 returned by remote Oracle server

After dig out the error we get to know that there is no directory structure is available on destination server to accommodate data files and control  Files, we have created the directory structure and execute the duplicate command again, this time has successful.
 Additionally there is one more MOS note for known issues while duplicating RMAN. 1366290.1


Conclusion

In the above article, we have learned that Active Duplication using Rman utility with same database name and same directory structure, and we have faced some errors and their work around.


BY
Name: Omer
Designation: Senior Database Engineer
Organization: Netsoftmate IT Solutions.
Email: info@netsoftmate.com


Avast logo
This email has been checked for viruses by Avast antivirus software.
www.avast.com

1

In this article, I would like to demonstrate how to create a shell script to perform an RMAN SCN based backup and execute in background. 


Tip: Scripting is a powerful tool to automate and execute jobs in background.

Below example shows how to perform an SCN based RMAN Incremental backup using 4 Channels when we perform Roll-forward of Physical Standby.

Step 1. Make a RMAN command file with RMAN Commands.


Create a cmd script and include RMAN backup command.


Get current SCN of Physical Standby and select a location to store RMAN backup files.

SQL> column BYTES current_scn 99999999999999
SQL> select current_scn from v$database;
CURRENT_SCN
———–
7707430599033

$ cd /orac01/orclprd_standby
$ vi SCN_based_backup.cmd
run
{
allocate channel t1 type disk ;
allocate channel t2 type disk ;
allocate channel t3 type disk ;
allocate channel t4 type disk ;
backup incremental from scn 7707430599033 database format ‘/ora01/orclprd_standby/stnd_backp_%U.bak’;
release channel t1;
release channel t2;
release channel t3;
release channel t4;
}

Step 2. Prepare shell script and include above .cmd RMAN


$ vi rman_scn_based_incremental_bkup_for_standby.ksh
#!/bin/ksh
export ORACLE_SID=orclprd
export ORACLE_HOME=/u01/app/oracle/product/11.2.0.4/db
export PATH=$PATH1:$ORACLE_HOME/bin
rman target /   msglog /ora01/orclprd_standby/rman_SCN_backup.log cmdfile=/ora01/orclprd/RMAN_SCN_backup_from_primary/SCN_ based_backup.cmd

Step 3. Change permissions of above shell scripts


$ chmod 755 rman_scn_based_incremental_bkup_for_standby

Step 4. Start RMAN using nohup to run in background


$ nohup ./rman_scn_based_incremental_bkup_for_standby &


Monitor RMAN log

$ tail -300f /ora01/orclprd_standby/rman_SCN_backup.log


Conclusion:  In this article we have learned how to perform RMAN SCN based backup using Unix shell script. Incremental backup are very useful such as rolling forward an standby database.


Author : Hameed
0


Overview:

Oracle Enterprise Manager is Oracle’s integrated enterprise information technology management product line, which provides the industry’s only complete, integrated, and business-driven enterprise cloud management solution. Oracle Enterprise Manager Cloud Control 13c is Oracle’s single, integrated solution for managing all aspects of the Oracle Cloud and the applications running on it.


Media:

Download the software from following link.


Required Packages for Oracle Cloud Control Installation (Linux 6)

make
binutils
gcc
libaio
glibc-common
libstdc++
libXtst
sysstat
glibc
glibc-devel
glibc-devel.i686

Assumptions:

Here we are assuming that:

Oracle RDMS software Installed and
Oracle Database has been created for Repository.


Steps to Install OEM Cloud Control 13c.

      1. Download media and unzip
     2. Execute runInstaller.
     3. Uncheck the box to prevent from receive security updates from Oracle Support and click next.
    4. Click yes on warning pop-up window.
    5. Provide Inventory Location.   

6. Prerequisites window will appear where all pre-check must succeeded.  

   7. In Installation types, Choose Advanced method.   


8. Provide Middleware Home Location, Agent Base Directory and Hostname.
9.Provide weblogic details then click next.
10. Provide Database Connection Details.
11.Provide Sysman credentials and click next.
     12.  Check on Select configure Oracle Software Library, Uncheck configure shared location and tick on Enable Oracle BI Publisher.
    13. Provide port details and click next.
    14. Review the information, which we have provided then click on Install.
    15. Execute configuration script as Root user.


[MN-Dboem]root@*****:/opt/oem/MW_13c# sh allroot.sh


Starting to execute allroot.sh ………

Starting to execute /opt/oem/MW_13c/root.sh ……

/etc exist

/opt/oem/MW_13c

Finished product-specific root actions.

/etc exist

Finished execution of  /opt/oem/MW_13c/root.sh ……

Starting to execute /opt/oem/Agent_13c/agent_13.1.0.0.0/root.sh ……

Finished product-specific root actions.

/etc exist

Finished execution of  /opt/oem/Agent_13c/agent_13.1.0.0.0/root.sh ……

[MN-Dboem]root@*****:/opt/oem/MW_13c#
  

16. Review the Details then click on Close

 
Conclusion:


In the preceding Blog we have learned Oracle Enterprise Manager Cloud Control 13c Installation. We have select advanced method Installation which is meant for small, medium and large deployments and also allows you customize the ports according to your environment.


By
Name : Mirza Hidayathullah Baig
Designation : Senior Database Engineer
Organization: NetSoftMate IT Solutions


1

PREVIOUS POSTSPage 1 of 2NO NEW POSTS